
From the time I started working professionally in the automotive repair world, I have often told stories about the mechanics I used to hang around with when I was 14 or 15 years old. They would often complain about new technology and how they were not going to be able to work on cars anymore. My favorite story is when electronic ignition first started to show up in the gas station where I worked.
The guys would say things like, “How are we supposed to stay in business,” and, “How are we going to fix these cars?”Back then, we used books to look up information. We needed only one or two new ones a year, three at the most if you had an occasional import vehicle roll in. Things sure have changed, but I’ve always embraced new technology on new cars and trucks. The vehicles we drive today are far safer, more reliable and last longer than ever before. I will never stop saying we need to stay in touch with the changes.
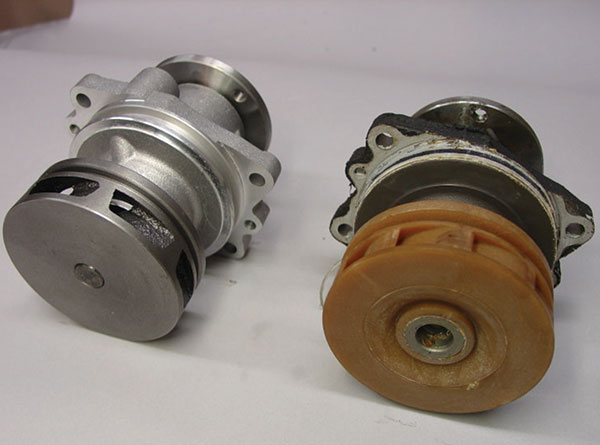
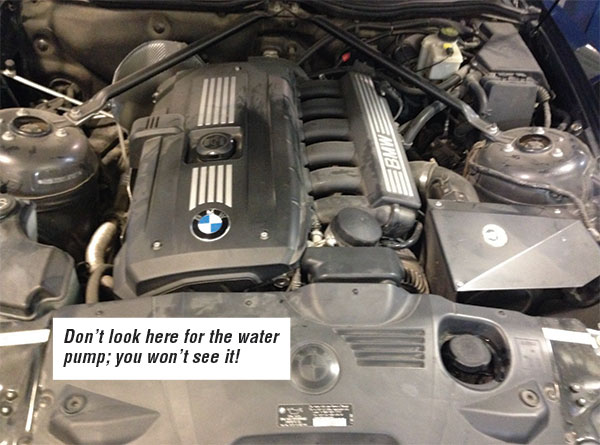
Today, we’ll talk about water pumps of the electric variety. BMWs, in particular, have plastic water pump impellers that would often break (see Figures 1 and 2). Cars overheated and most shops were caught off guard; we just didn’t expect this kind of failure. It was a fairly straightforward job. Pull the pump, check for a broken or loose impeller and replace the water pump as needed.
As I mentioned previously, technological advances require us to do things differently now. The first thing we need to do is verify if there are any water pump-related diagnostic codes. There’s a very good chance there will be some. Recently, we had a 2007 BMW Z4 with the N52 engine in the shop. The inexpensive OBD-II code readers may not give you the full picture. Here are some of the common codes I have seen:
• FC 2E81– Electric coolant pump, speed deviation, speed outside tolerance
• FC 2E82 – Electric coolant pump, cutoff overcurrent
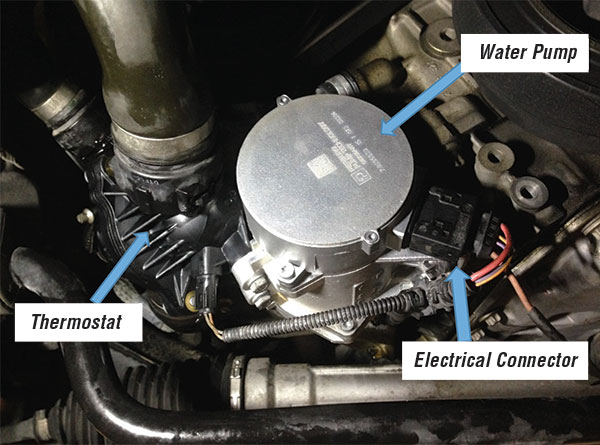
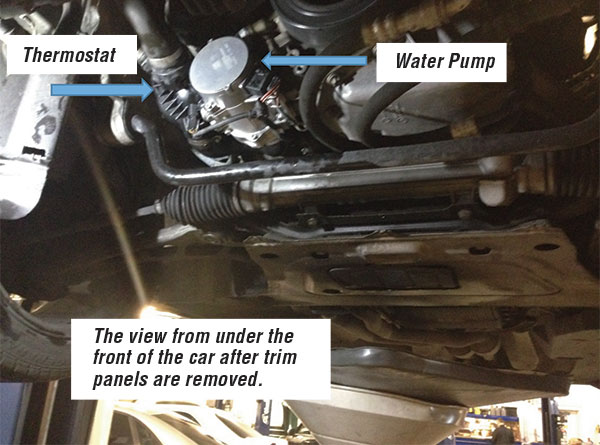
I like to perform a visual inspection, but don’t look for the water pump from the top of the engine (see Figure 3). You’ll want to drop the lower panels, and you will see the pump on the lower right side of the engine (see Figures 4a and 4b). Now you can check power supply, ground signals and do other basic testing (see Figure 5). After you have determined the electric water pump is the cause, it’s a straightforward replacement.
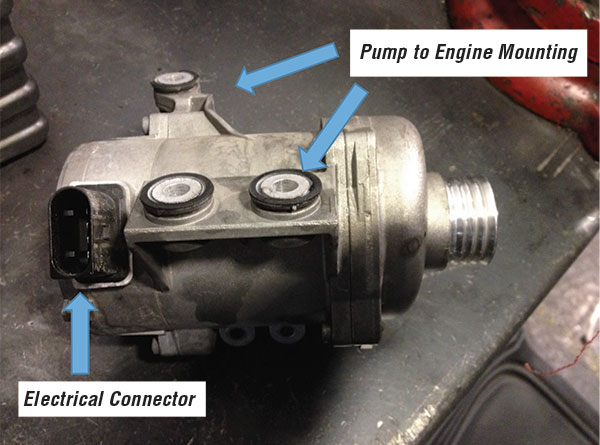
Disconnect the hoses and mounting to replace the pump. I like to use a coolant extractor to remove and replace the coolant. On this particular 2007 Z4, I also replaced the thermostat, as I like to make sure the system is properly repaired after a running-hot complaint. It sits right next to the water pump.
BMW Service Information tech bulletin # SI B17 01 07, dated June 2010, advises to always completely drain and refill the cooling system with new long-life coolant to provide proper protection. You should never reuse drained coolant (see accompanying TSB sidebars). You will regret it if you use the wrong products. And, always replace the mounting bolts for the water pump every time, as they’re one-time-use bolts.
It’s also important to follow the correct bleeding instructions, so don’t start the engine just yet. Always connect a battery charger during bleeding and follow these steps:
1. Fill the coolant expansion tank with coolant up to the lower edge of the filler neck.
2. Close the cap on the expansion tank. Note: Do not open the coolant expansion tank cap during the venting procedure.
3. Connect the battery charger, and switch the ignition to the “on” position.
4. Set the heater to maximum temperature, activate the “Automatic” button, then reduce the fan to the lowest setting.
5. Press the accelerator pedal to the floor for 10 seconds. Note: The engine must not be started. The venting procedure has started and it will take approximately 12 minutes.
6. Then, top up the fill level in the coolant expansion tank with 100 ml above max.
7. If the venting procedure has to be carried out several times, allow DME to drop completely (leave ignite on removed for approximately 3 minutes), then repeat from Step 3. Refer to BMW TSB #SI B17 01 06, which states that you must premix the coolant before filling the system to prevent damage to the water pump.
As more and more electrically operated components are placed on vehicles, proper equipment and test procedures are more important than ever.
Article adapted from Import Car.