Thanks to advanced technology, modern vehicles operate with fewer noise, vibration and harshness (NVH) complaints than ever before. Consequently, when a NVH issue arises, it’s most likely caused by worn drivetrain components like universal joints, constant velocity (CV) joints or wheel bearing hub assemblies. In any case, NVH complaints can often be the most challenging to diagnose when you can’t duplicate the driving conditions under which they occur.
If the noise can’t be duplicated on a test drive, it’s doubly important for the service writer to determine during the customer interview when and how the NVH complaint occurs. Remember also that some wheel bearing noises are transmitted through different parts of the chassis. To reduce diagnostic errors, verify noises by using chassis-mounted sound detectors or by thoroughly inspecting all components while the vehicle is on the lift.
Universal Joints
In modern automotive architecture, universal joints are most commonly found on the rear axles of light trucks, SUVs and RWD passenger cars. While some low-angle joints are made with a rubber-compounded material, most modern universal joints are made of a steel cross connecting four trunnions containing lubricated needle bearings. See Photo 1.
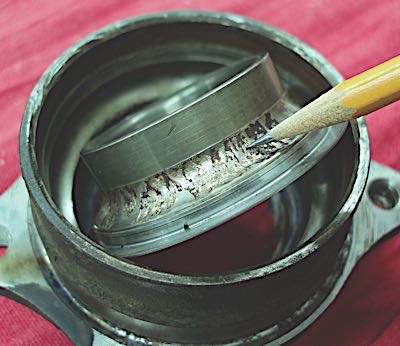
Eventually, the needle bearings wear grooves into the case-hardened surfaces of the cross, which allows the propeller shaft to rotate slightly off-center. The rule-of-thumb spec for off-center rotation is generally 0.010” measured at the end of the propeller shaft tube. In the most catastrophic cases, the lubricant in the trunnion bearings can be lost, which will cause the joint to eventually separate.
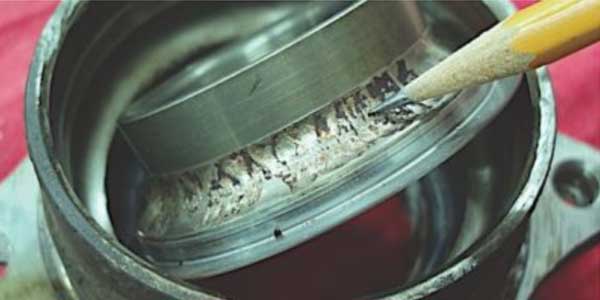
Larger universal joints can be inspected for extreme wear by twisting the propeller shaft back and forth. Smaller joints can be tested by prying the trunnions back and forth with a large screwdriver. Preventive inspections can be performed by watching for rust formations around the trunnion seal, indicating that the trunnion has lost its lubrication. In another case, the driver might complain of a snapping or popping sound at low speed, which might indicate that the trunnions are seizing due to lack of lubrication. Seizing can be diagnosed only by removing the propeller shaft and checking each universal joint for smooth operation by hand. See Photo 2.
Because the trunnion bearings are located at 90-degree intervals, a conventional universal joint actually accelerates and decelerates as it turns.
To eliminate this uneven rotating speed, universal joints are installed in pairs and phased along the same plane on the propeller shaft. When the U-joints are correctly phased, the propeller shaft speed smooths out because one U-joint accelerates as its companion joint decelerates. Unfortunately, some splined two-piece truck propeller shafts can be incorrectly phased during reassembly. This condition can be difficult to detect since incorrect phasing often results in a harmonic vibration that resonates under different conditions of speed and load. For this reason, it’s always important to index the propeller shaft to its mating flanges and to its individual parts before replacing universal joints.
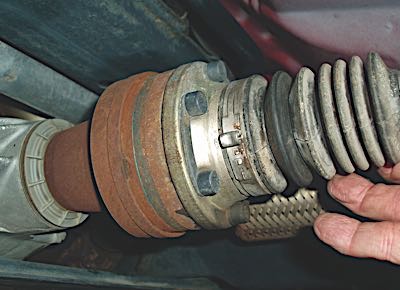
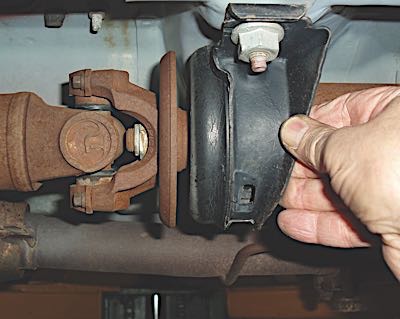
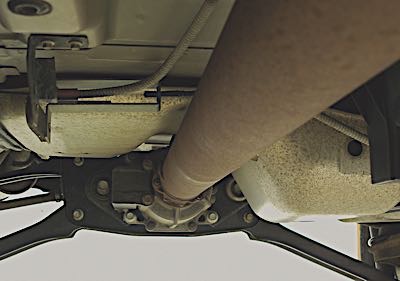
Harmonic vibrations can also be caused by universal joints operating at unequal angles of deflection at the propeller shaft. These angles should be measured with the vehicle at normal suspension height and load. In some applications, the angle at the rear axle can be adjusted, either with shims or by a control arm eccentric, to allow the rear axle pinion gear shaft to operate in the same plane as the transmission or transfer case output shaft. See Photo 3.
Although some U- joints are serviced as a unit with the propeller shaft, most can be replaced. Using a hand-held universal joint press will prevent damage to the propeller shaft, as will soaking the joint in penetrating oil before removal. If required, pack the needle bearings with chassis grease and always lubricate the propeller shaft loops before assembly. If used, grease zerks should point toward the propeller shaft and be aligned along the same plane. If the U-joint feels too stiff after it has been installed, align the trunnions by tapping the propeller shaft loops with a medium-sized hammer.
Constant Velocity Joints
CV joints have made life much easier for techs because, as the name implies, CV joints operate at a more constant speed than do conventional universal joints. They do, however, tend to operate more smoothly when the right and left axle shafts are operating at equal angles of deflection.
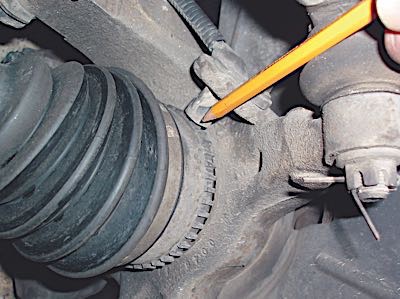
The most common CV joint failures are caused by a loss of lubricant through a torn or perforated CV boot. The symptom of a leaking CV boot is a lubricant “spray” collecting on the chassis surfaces surrounding the joint. When the lubricant is completely gone, the joint will wear out and eventually separate. The most common symptom of worn CV joints is the clicking noise that characteristically occurs when the vehicle is driven through a short turning radius under power.
Several basic rules should cover CV half-shaft installations. First, make it a habit to remove only one shaft at a time because there still are a few vehicles in which the differential carrier can drop to the bottom of the gear case when both axles are removed at the same time. Next, avoid mixing the right -and left-hand shafts because some minor differences might exist between their compression or extension lengths. Because using an impact wrench can damage the joint or adversely affect wheel bearing preload, always use a torque wrench to tighten the CV axle retaining nut to specification.
Hubs and Bearings
Because tapered-roller front-wheel bearings require frequent lubrication and adjustments, permanently preloaded and lubricated bearing hub assemblies have generally replaced them. Correct preloading is required for wheel bearing assemblies because the clearance between wheel speed sensors and tone rings is critical. Preloaded bearings also reduce the rotating friction of the disc brake assemblies by helping maintain a small, but significant, air gap between the brake rotor and pads.
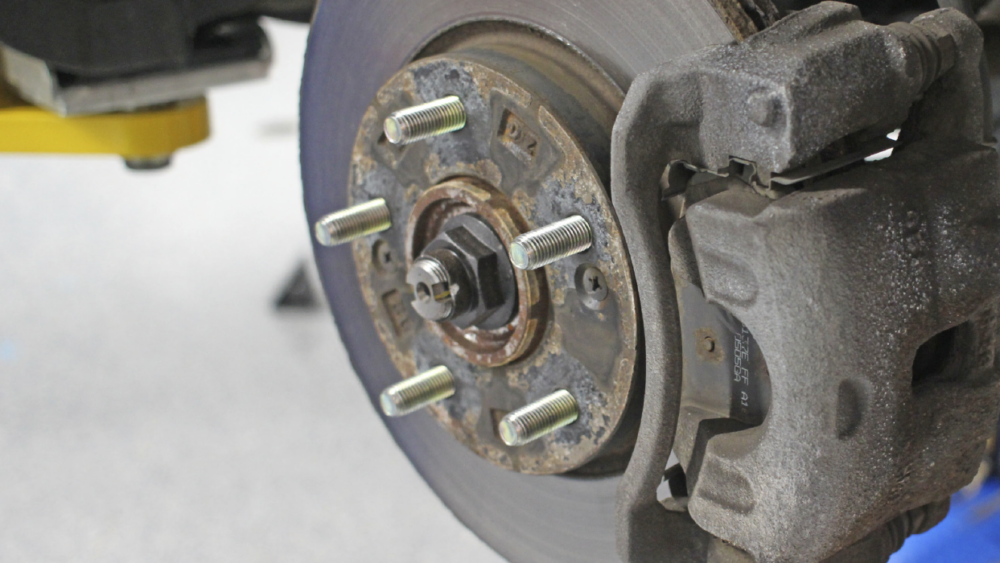
When diagnosing any wheel bearing noise, it’s important to remember that wheel bearings must: 1) support the vertical load created by the vehicle’s weight, 2) withstand the forward thrust of the driving wheels, and 3) resist loading during cornering. Any noise coming from the bearings will, therefore, be most often duplicated under one or more of these driving conditions. See Photo 4.
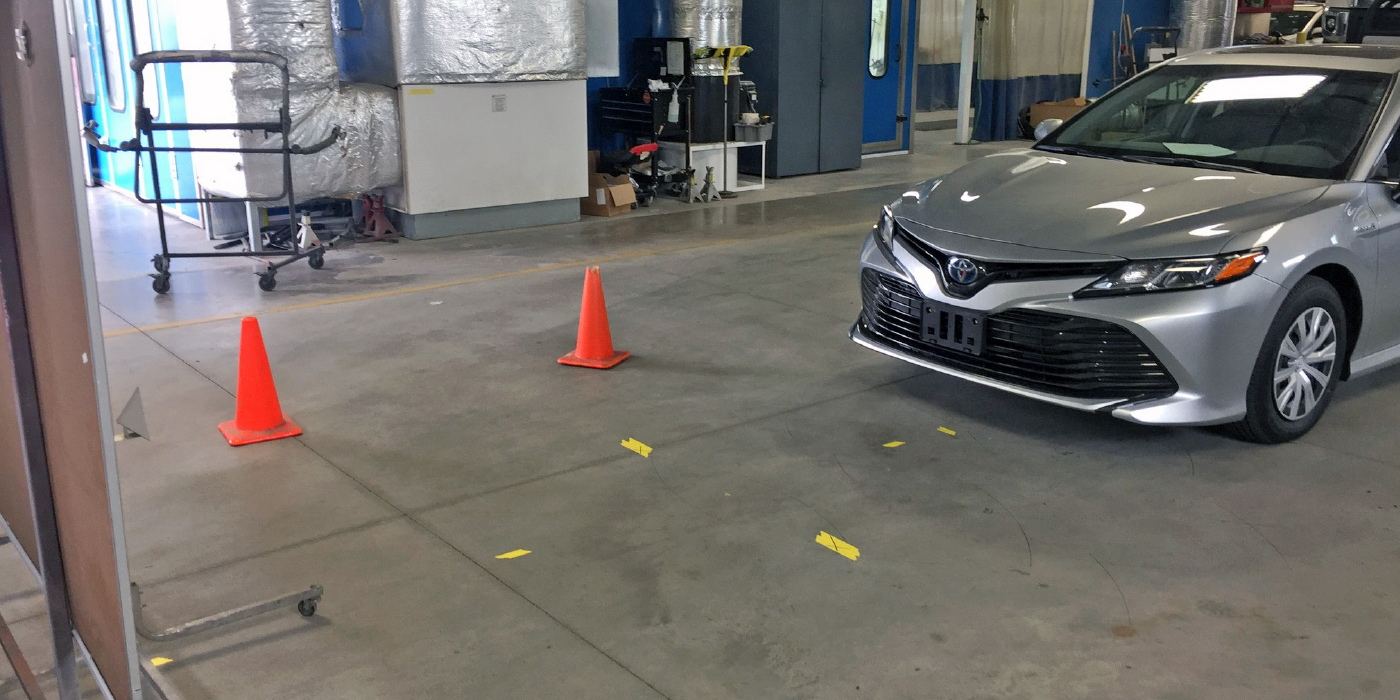
When road-testing the vehicle to duplicate an NVH complaint, notice that wheel bearing and drivetrain noises are constant, whereas tire noises vary according to the road surface. If a vacant parking lot is available, weave the vehicle back and forth at low speed to alternately load and unload the wheel bearings. Also, notice if the noise level changes as the vehicle stops and accelerates. After the wheel bearings have warmed up after an extended drive, check each bearing hub’s temperature with an infrared heat gun. In most cases, the defective wheel bearing will indicate a higher operating temperature.
Last, raise the vehicle with the wheels suspended. Grasp each tire at the 12 and 6 o’clock positions to check for looseness caused by a loss of preload in the bearings. Looseness in the wheel bearings might also cause a wheel speed sensor trouble code to be stored in the vehicle’s ABS module. If the vehicle comes in with the ABS light illuminated and a wheel speed code stored, check that wheel for worn bearings. See Photo 5.
Expedite installation by thoroughly cleaning and lubricating the hub’s mounting surfaces. Replace all retaining bolts as required, apply lubricant or threadlocking compound as directed and torque each to the manufacturer’s specification.
Article courtesy Brake & Front End.