Although four-wheel disc brakes currently dominate the import brake service market, millions of drum brakes are serviced each day in independent import shops. Thanks to their age, many drum brakes present problems related not only to normal wear, but also to extended age and mileage. Because an incorrectly serviced drum brake can cause noise, pulling, grabbing and pulsation complaints, we’ll look at how drum brakes operate and how they can best be repaired. We’ll limit our discussion to the single-anchor, floating shoe designs we currently see on modern production vehicles and leave designs like dual-anchor, dual-cylinder drum brakes to the pages of history.
SERVO ACTION
The upside of single-anchor drum brakes is that they create a “servo action” that multiplies the hydraulic force applied against the brake lining. When applied, the wheel cylinder piston forces the primary shoe against the rotating brake drum surface. The primary shoe tends to rotate with the brake drum, which forces the secondary shoe against the brake drum surface. The secondary shoe is held in place by the anchor pin located at the top or bottom of the backing plate. This creates an “internal expanding” or self-activated “servo” braking action.
The simplicity of the drum brake allows it to act as a park brake by using a cable, lever and strut assembly to expand the primary and secondary shoes against the drum. Thanks to servo action, the parking brake feature in a drum brake works better going forward than backward. The downside of drum brakes is that, because the brake linings aren’t exposed to moving air, they don’t easily dissipate heat during extended braking or shed water after being driven through a flooded intersection.
DRUM BRAKE HYDRAULICS
Before anti-locking braking systems became popular during the 1990s, brake engineers designed a “combination valve” that usually contains a metering, proportioning and pressure differential valve. To prevent front-wheel skid on slick roads, a metering valve was integrated into the combination valve that delays front disc application until a specific hydraulic pressure is reached in the front hydraulic circuit. And, since servo action would cause the rear brakes to prematurely lock up well before the disc brakes, engineers integrated a proportioning valve that limits the hydraulic pressure delivered to the rear wheel cylinders.
Engineers integrated a pressure differential warning light feature into some combination valves to indicate when a fluid leak was causing a pressure differential between the front and rear brake hydraulic systems. A suspension height-sensing valve was also added to some light trucks that reduces hydraulic pressure to the rear drum brakes when the truck is driven empty. Most of this hydraulic hardware was eliminated when anti-locking brake systems came into popular use during the 1990s.
While most disc/drum hydraulic systems are split between front and rear, the brake hydraulics are split diagonally on some vehicles, meaning that the left front is hydraulically connected to the right rear and the right front to the left rear. In the absence of manufacturers’ recommendations, the front/rear split system-bleeding sequence is generally right rear, left rear, right front and left front. Dual/diagonal is generally bled right rear, left front, left rear and right front.
DRUM BRAKE FRICTION
Because the primary and secondary brake shoes serve two distinctly different purposes, their frictional compositions and frictional areas are, in most cases, different. Since the primary purpose of the primary shoe is to apply pressure against the secondary shoe, its lining is generally shorter in length and develops less friction coefficient. The secondary lining, on the other hand, is generally longer and develops a higher friction coefficient. Unintentionally switching the two linings from front to rear will consequently modify drum brake performance and reduce lining life.
As a point of awareness, the “arc” (or curvature of replacement linings) is normally ground to a slightly smaller diameter than the brake drum. As a rule of thumb, about 0.020” of clearance will exist at the ends of the secondary lining when the shoe’s center is pressed against the drum. This shorter arc allows the brake lining to gradually seat into the drum and reduces brake squeal and chatter.
In most cases, a lining is considered safe if 1/16” of the lining remains above the rivets, or if the remaining bonded lining thickness meets manufacturers’ specifications. As with disc brakes, different grades and brands of drum brake linings should never be mixed from carton to carton or from side to side in any application because each brand of lining usually develops different friction coefficients at different operating temperatures.
As a cautionary note, small amounts of axle oil and brake fluid on the brake linings will magnify the servo effect, thus causing a premature wheel lockup or grabbing complaint. Since drum brake linings absorb fluids, the oil or brake fluid leak must be repaired, all parts cleaned and the contaminated linings replaced to restore normal drum brake operation. Before installing the brake drum, always remove greasy fingerprints from the new brake linings with shop towels soaked in aerosol brake parts cleaner.
BRAKE DRUMS
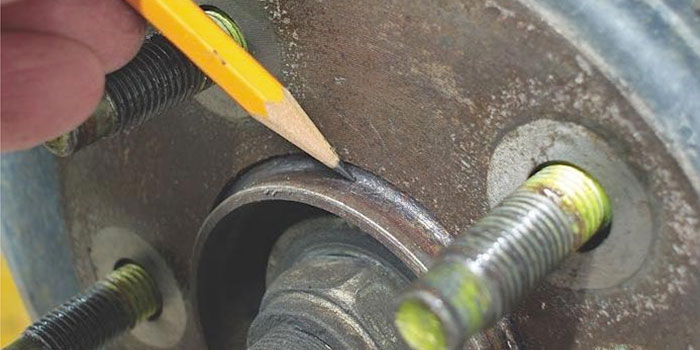
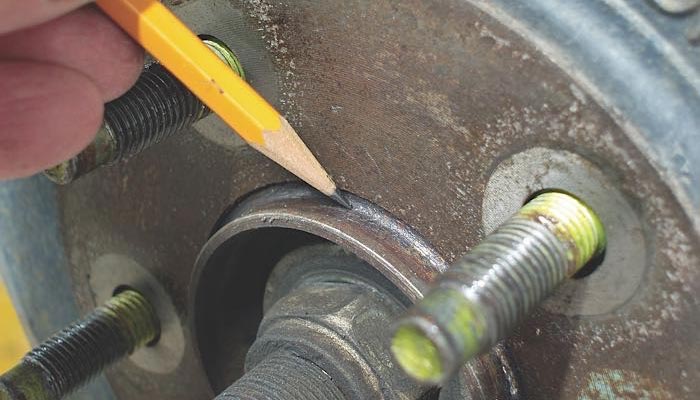
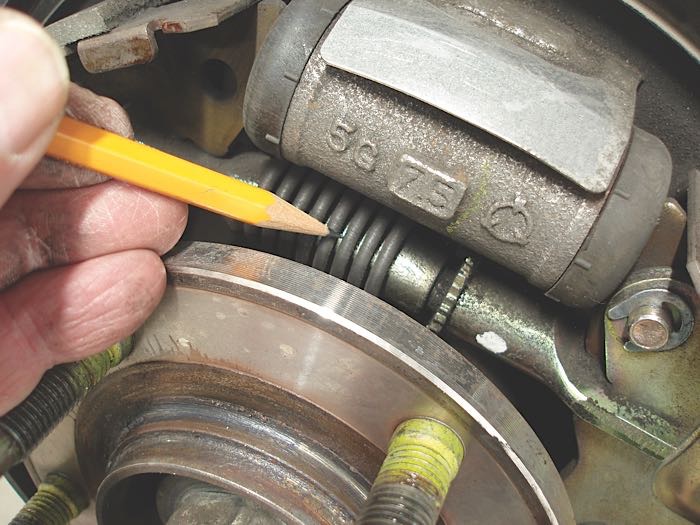
While some vehicles utilize one-piece, cast-iron brake drums, many other vehicles utilize a two-piece drum consisting of a stamped metal hub mated to a cast-iron drum. In some cases, a two-piece drum can fit loosely on the axle hub, which allows the drum to rotate off center. If the drum surface isn’t concentric with the axle hub, the shoes can’t be accurately adjusted. A drum concentricity problem can be detected when the shoes are adjusted to drag against the drum. If the drum isn’t concentric, the drum will bind and release when rotated.
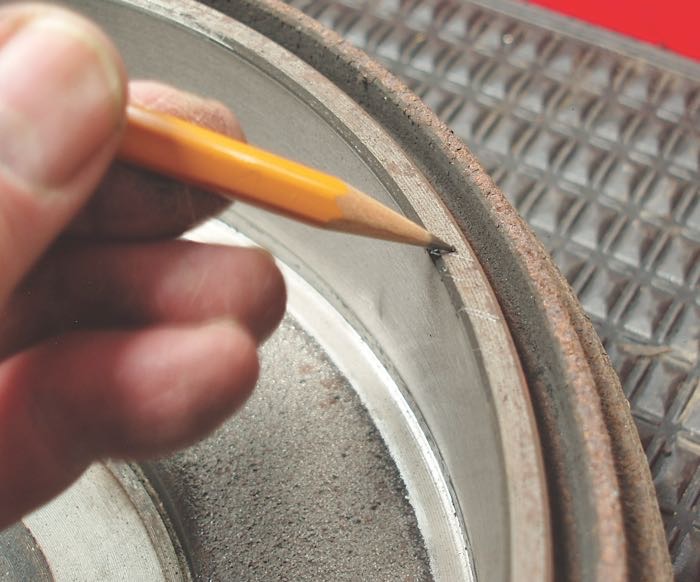
Most brake drums are manufactured with a chamfer cut into the edge of the drum surface, indicating a general discard specification of 0.060” oversize for most cars and light trucks. But, in any case, it’s nearly impossible to estimate drum taper wear or out-of-round without using a brake drum micrometer. In most cases, a brake drum will not be as good as it looks. So, investing in a good brake drum micrometer will pay for itself in terms of reduced comebacks and greater brake safety.
DRUM BRAKE HYDRAULICS
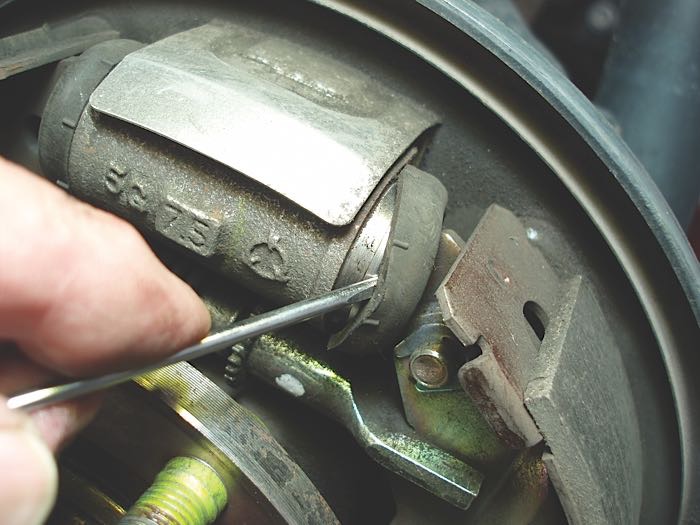
Moisture absorbed by the brake fluid will quickly corrode the wheel cylinders and eventually cause an intermittent brake pulling complaint when the wheel cylinder pistons begin to stick in their bores. While a wheel cylinder can be repaired by honing the cylinder and installing a wheel cylinder repair kit, replacing with new reduces potential liability and is more cost effective.
As standard procedure, the brake hoses, steel lines and master cylinder should also be inspected. If the vehicle comes through the door with brake application complaints like rear-wheel lockup or premature disc brake application on slick road surfaces, it’s possible that the combination valve is inoperative. If you’re servicing an ’80s or earlier vehicle, be aware that most drum brake master cylinders contain a residual check valve that increases pedal response by maintaining a small amount of hydraulic pressure in the system. To test for residual pressure, firmly apply the brake pedal and then check for a small spurt of fluid when the wheel cylinder bleeder screw is opened.
Although it’s old technology, be aware that installing a drum brake master cylinder equipped with residual check valves on a disc brake system will cause the disc brakes to drag and wear prematurely. Remember also that residual check valves were designed out of later drum brake designs because they were no longer required.
Article courtesy Brake & Front End.