Ford embraced tire pressure monitoring systems (TPMS) as early as the 2002 model year on the Explorer and Windstar. These systems can be either direct or indirect.
From 2006-’09, Ford used banded sensors mounted in the center of the rim. In 2010, Ford reverted to valve stem-mounted sensors.
All the systems are straightforward and common service procedures apply to most models.
2002-’05 Direct Systems (2006 Expedition)
Ford systems use the unique ID numbers of the sensors that have to be registered (along with their position on the car) with the tire pressure monitor ECU. This is also the case if any of the system components are subsequently changed, like in the event of rotating the tires, changing sensors, replacing the ECU, etc.
This process requires the activation of the TPMS sensor using a low-frequency radio signal tool or magnet to excite the sensor so UHF data is transmitted. The transmitted data includes the TPMS ID, pressure and temperature.
If a TPMS sensor or its position on the car is changed without re-registering the IDs, the TPMS warning light will turn on and stay on until the IDs are re-registered.
Sensor Training
Note: The tire pressure sensor training procedure must be done in an area without radio frequency (RF) noise.
RF noise is generated by electrical motor and appliance operation, cellular telephones and remote transmitters.
- Turn the ignition to the OFF position.
- Turn the ignition to the RUN position three times, ending in the RUN position. Do not wait more than two minutes between each key cycle.
- Press and hold the brake pedal.
- Turn the ignition switch to the OFF position.
- Turn the ignition switch to the RUN position three times, ending in the RUN position. Do not wait more than two minutes between each key cycle.
- When the message center displays “TRAIN LEFT FRONT TIRE,” place the magnet on the valve stem of the LF tire pressure sensor. The horn will sound briefly to indicate that the tire pressure sensor has been recognized by the TPMS module.
- Within two minutes after the horn sounds, place the magnet on the valve stem of the RF tire pressure sensor.
Note: If the TPMS module does not recognize any one of the five tire pressure sensors during the tire training procedure, the horn will sound twice and the message center will display “TIRE TRAINING MODE INCOMPLETE” and the procedure must be repeated. - Repeat Step 7 for the RR, LR and spare tire.
When the tire training procedure is complete, the horn will sound twice and the message center will display “TIRE TRAINING MODE COMPLETE.”
2006-Current Models
TPMS was standard for the 2007 model year. 2007-’09 models have banded sensors, while most 2010-’11 models have sensors mounted behind the valve stem.
If the vehicle has been stationary for more than 30 minutes, the sensors will go into a “sleep mode” to conserve battery power. It will be necessary to wake them up so they will transmit the latest tire pressure information to the Smart Junction Box (SJB).
Activation
- Turn the ignition switch to the ON position.
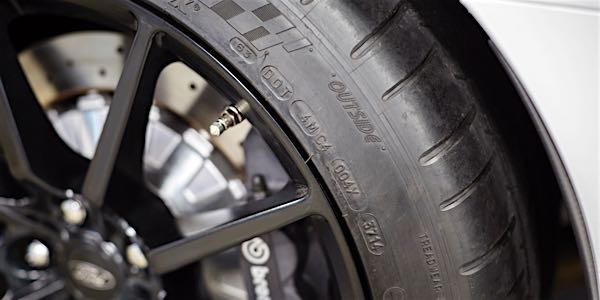
- Position the TPMS tool against the LF tire sidewall, 180 degrees from the tire valve stem. The TPMS tool must remain in place 180 degrees from the valve stem for 2007-’09 models with banded sensors, and directly below the valve stem on the sidewall for 2010-’11 models with the valve stem- mounted TPMS sensors.
- Note: The TPMS tool will provide feedback in the form of a flashing green light and a beep sound for each successful response from a tire pressure sensor. Press the test button on the TPMS tool to activate the sensor. Activate the sensor at least two times.
- Repeat Steps 2 and 3 for the remaining tires.
Relearn Procedure
- Turn the ignition switch to the OFF position. Then, press and release the brake pedal.
- Cycle the ignition switch from the OFF position to the RUN position three times, ending in the RUN position.
- Press and release the brake pedal.
- Turn the ignition switch to the OFF position.
- Turn the ignition switch from the OFF position to the RUN position three times, ending in the RUN position. The horn will sound once and the indicator will flash if the training mode has been entered successfully. If equipped, the message center will display “TRAIN LF TIRE.”
- It may take up to six seconds to activate a tire pressure sensor.
Press and release the test button on the TPMS tool. The horn will sound briefly to indicate that the tire pressure sensor has been recognized by the vehicle. - Within two minutes of the horn sounding, place the TPMS tool on the correct position for the sensor and release the test button to train the right front tire pressure sensor.
- Do not wait more than two minutes between training each sensor or the SJB will time out and the entire procedure must be repeated. Repeat Step 7 for the right rear and then left rear tires.
The procedure is completed after the last tire has been trained. When the training procedure is complete, the message center (if equipped) will display “TIRE TRAINING COMPLETE.”
For vehicles that are not equipped with a message center, successful completion of the training procedure will be verified by turning the ignition switch to the OFF position without the horn sounding. If the horn sounds twice when the switch is turned to the OFF position, it indicates that the training procedure was not successful.
Article courtesy Brake & Front End.

