Engine Cousins
Volkswagen and Audi have shared many components over the past 30 years. In the last 10 years the two companies have even shared body shells. So, when the Audi V8 and V6 engines came out in the early 1990s, it was inevitable that they would make their way into Volkswagen models as well. The V6 is now shared in this country in the VW Passat and Audi A4 and A6 models.
Before starting any repairs on these cars, remove the upper engine cover and locate the engine code on a boss just to the passenger side of the power steering pump bracket. On later cars, you may be able to see the code without removing the cover, if it isn’t too dirty.
Early V-type engines are a single overhead cam design with two valves per cylinder. Later model engines have five valves per cylinder. The V8 and V6 share some of the same component parts; the V8 having just two more cylinders. All of these engines are compact, powerful, smooth running and have proven to be very reliable with normal maintenance. They are, unfortunately, interference-type engines and, therefore, when a timing belt breaks, there almost always will be internal damage.
A significant savings in repair costs for drivers can be realized by timely replacement of the belt. As vehicle manufacturers have increased the mileage for recommended belt replacement, selling a customer on an earlier schedule may be difficult. The only change in the belt setup has been the addition of a hydraulic tensioner to better compensate for belt stretch and engine expansion and contraction. As a future technician, you need to understand the importance of informing your customers not to go beyond the 60,000-mile recommendation for timing belt replacement due to the extremely high cost of valve replacements. So, in this installment of "Living Under the Hood," we’ll address timing belt replacement in Audi/Volkswagen engines.
Tight Design
 One look under the hood on these cars will make it obvious why the interior has so much room – there isn’t any "extra" space in the engine bay. By releasing the holddown fasteners for the top engine cover and removing that piece of plastic, the engine becomes a little more visible. On early models, you will have to remove the front, outer cover to even get a look at the accessory belt. The outer timing belt covers are held in place with spring clips and small tabs on the inner covers. Be very careful when removing any of these covers, as even the smallest broken off piece can find its way to the space between the cam belt and the crankshaft sprocket, with disastrous results. If you are careful, you can get the upper covers off and get a look at the cam belt without removing the serpentine belt. If you are continuing with the removal and replacement, the serpentine belt will be the next item to come off.
On the early cars (big Audi and A6) with electric fans, there is room to remove the serpentine belt and timing belt in the space between the radiator and the engine. It’s tight, but unless the crank sprocket has to come off, there is room to work. The later and smaller cars are not so mechanic-friendly. The manufacturer has made it possible to gain working space by making the whole radiator support moveable to provide access for belt replacement. Even the replacement of the serpentine belt will make this step necessary.
Take It Off
Most of the cars come apart the same way, but there were some design changes that will make each of them unique. The first step is to remove the lower engine splash shield, if it still exists. Many are missing after the first DIY oil change since the fasteners have all been destroyed. The fasteners usually are located as follows: Two at each fender liner, three at the rear of the pan and three along the front edge at the bumper cover. The later cars usually have one solid bolt or nut mounting center front. With patience and care, the panel will easily come off.
 To remove the front bumper cover, you will need to remove two vertical bolts accessed through holes in the bumper cover, or by removing the small air intake grilles at the lower end of the cover. Then remove any fasteners at the fender liners, work the cover loose from the large plastic brackets at the rear corners of the cover, and then slide the cover off to the front. If the car has headlight washers, make sure you clamp off and disconnect the hose going to the cover.
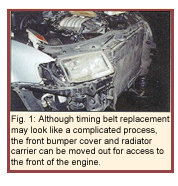
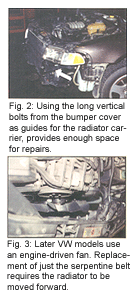
After removing the cover, you can locate and remove the screws near the ends of the upper header, on the sides near the headlight buckets and any that are attached to the fender liner support (see Figure 1). You do not need to remove any coolant or A/C hoses or electrical connections. You will find three bolts or holes on the cover support brackets that hold the brackets to the inner body support structure. I use the long bolts that hold the cover to the brackets as the guide pins that will allow you to slide the radiator carrier assembly forward, after removing the necessary bolts from the brackets (see Figure 2). There are special guide pins available for this process, but I don’t really see much need for them. Now there is room, though still tight, to remove the serpentine belt.
 Prep Work
On the early models, this process is pretty straightforward by releasing the spring tension on the tensioner and locking it with a pin (a small Allen wrench works). On later cars (Figure 3), the engine-driven fan is attached to the fan drive with a BMW-type nut (reverse thread) that can be removed by holding the pulley with a pin-type spanner and open end wrench. With the fan removed, the belt tensioner can be released and the serpentine belt removed for inspection or replacement.
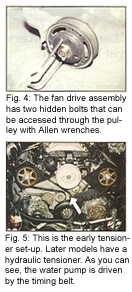
Reinstallation is the reverse of the above steps. I recommend replacing the serpentine belt any time the timing belt is replaced due to the number of steps necessary to remove it on the later cars. With the serpentine belt off, you can continue with the front engine cover removal. First, you will need to remove the belt tensioner and, on later models, the fan drive assembly. The fan drive support has two hidden bolts (Figure 4) that are accessed with Allen wrenches through the pulley. Use quality, hardened Allen wrenches for this step so you don’t strip them! I usually tighten slightly, then snap them loose. I make it a practice to use anti-seize on these bolts on reassembly to make future removal possible.
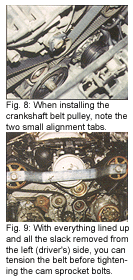
 Remove the small bolts right"rom the crankshaft pulley and then remove the pulley and the lower front cover. Take a close look at the crankshaft pulley as it has two small locating tabs for alignment. If you need to remove the crankshaft bolt later on for seal replacement, double-check that the lock pin is fully seated in the crankshaft before applying too much torque.
Removing the Belt
Looking at Figure 5, there doesn’t appear to be anything special about the timing belt setup on this engine. But to prevent internal damage with the belt removed, the engine shafts need to be locked in position. The camshafts are not splined or keyed to the sprockets. Tension is applied through a tapered press fit. The drive hubs are keyed to the camshafts and are driven by the sprockets only when tightened. The camshafts are spring loaded and can move easily and disastrously if they are not secured with the belt removed.
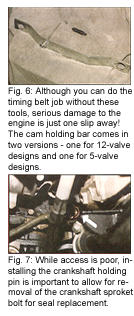
 After aligning all of the timing marks, you will need two tools to hold the crankshaft and camshafts in alignment (Figure 6). First remove the TDC sensor or cover plug from the lower front left of the engine block (Figure 7) and, after making sure the slot in the crankshaft is lined up, screw in the locking pin. Then, back up on top, remove the power steering pulley (Figure 8) and install the cam drive hub-locking bar and secure it to the pump mounting bracket with the J-hook (Figure 9). Note that there are small and large pins in the bar that need to line up with the same size holes in the cam drives. If it doesn’t line up, recheck your timing marks.
The camshaft locking bar looks the same for early and late engines, but the bar for 5-valve engines is longer. So if you will be doing these engines on a regular basis, you will need both types. Now release the belt tension by loosening and turning the tensioner on early models. Use an Allen wrench to rotate the tensioner against the hydraulic tensioner and lock it down with a small pin on the newer models.
You can now remove the timing belt from the sprockets and tensioners. You will need to carefully remove the camshaft bar to remove the belt. If either of the cams start to move, get help holding the cams in place while you perform this step; only a small amount of movement can be tolerated. Remove the old belt and then take a close look at the idler and tensioner pulleys, and the water pump. If there is any excessive drag to any of the bearings, or there is any seepage at the water pump, replace them. If you need to pull the cam or crank sprockets for seal replacement, now is the time. Also peek under the intake manifold at the valley pan at this point. They are prone to leakage on some of the earlier engines, and repairing them now will save time for you and money for your customer.
Belt Installation Steps
With the new timing belt slipped over the cam-locking bar, reinstall the bar to the cam drive hubs. Loosen both cam bolts about one turn to provide movement for the sprockets. Using a bar-type puller, pull the sprockets loose from the taper on the cams. This will allow the cam sprockets to move independently from the cams, while the cams are still locked in position. Slide the new belt into position making sure any excess slack is on the right (passenger) side. Rotate the tensioner clockwise on early cars, or remove the lock pin on later cars, to tension the belt.
At this point, recheck the position of the crank sprocket and then retorque the cam bolts to spec. To double-check cam timing, remove the locking bar and crankshaft lock pin. Turn the engine over by hand with the crank bolt two full turns, then remount the cam locking bar. If everything stayed where it’s supposed to be, it should slip right into the holes in both cam hubs.
Final Notes
Use care when reinstalling the various covers, as they need to go back on in a particular order, and some need to be tucked under one installed before. As I mentioned earlier, there is no room for any kind of debris inside the covers, so if you drop something in, you’ll need to dig it out before starting the engine. Separating fasteners into divided trays helps make sure nothing is left out or lost during the repair.
Make sure to reinstall the TDC sensor or plug in the block. If you replaced the water pump, or drained the coolant for any reason, you will need to fill and bleed the system, or use a vacuum fill kit. These cars have a tendency to get air bubbles in the system so you may need to check the coolant level after running or driving to full operating temperature.
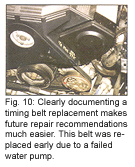 I recommend installing a sticker indicating the date and mileage for the belt replacement, or use a paint pen to make it obvious and reduce the need to pull the covers to check belt condition (Figure 10). Reinstall all of the covers, making sure all of the various small locking lugs are secure, then reinstall the serpentine belt and tensioners. Slide the radiator carrier assembly back into position, install the bumper cover brackets and the cover, check alignment at the headlights and hood latch. Reinstall the lower splash pan and fire up the engine. Watch for any signs of overheating until the thermostat opens, then road-test the vehicle. On OBD II cars, a check of DTCs is a good idea. If the old belt was loose long enough, there may be a cam position or engine speed sensor code. Erase as needed.
As you will see, when it comes to servicing a timing belt on either a V6 or V8 Audi or Volkswagen engine, it’s all relative.


