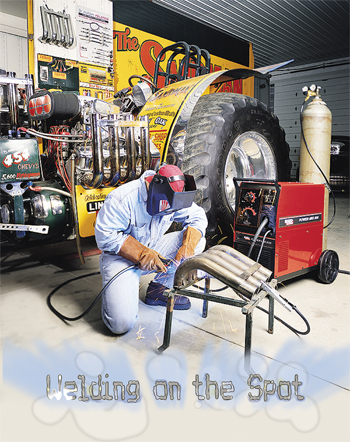
 MIG, TIG, stick, gas, gasless, oxy-acetylene, deep penetration, spot welding, plastic welders, pulse technology, high strength steel — if it seems like welding is becoming more complicated – it is!
Today’s auto industry faces many challenges that are shaping and changing the way we stick two pieces of metal together. Once upon a time, a welder would grab a new electrode, stick it in his welder and set about repairing most any metal item. As car manufacturers demanded lower weight, better fuel economy and higher finish quality, and customers demand faster repair times, the need for more sophisticated welding technology has continued to increase.
Focusing on STRSW
However, due to the misconceptions and lack of knowledge regarding squeeze-type resistance spot welding and its equipment, we conducted a welding machine challenge — a test that would simulate working on a vehicle and help school instructors, shop owners and collision techs make better decisions when purchasing a machine.
I was in a collision repair shop recently conducting an I-CAR welding test where I was observing a tech installing a quarter panel using a squeeze-type resistance spot welding (STRSW) machine. I asked the technician how he knew if his welds were good. He looked at me as if I’d asked him a stupid question and said: “I know these are good welds because of the spark the weld makes.”
“The more sparks the better?” I asked.
His reply: “Yeah, man, let the sparks fly,” adding, “You should know that because you’re an I-CAR welding instructor. Let the sparks fly.”
I took a survey that night of the shop’s seven technicians, and they all agreed with the first tech — that sparks indicated that the plug welds were good.
During a break, I inspected the tips on the shop’s welder. First, the copper electrodes had been sharpened with a grinder, but not with the grinder furnished with the machine. The ends of the tips were uneven and were about 11 mm in diameter. I pulled the trigger on the gun to check if the tips made full contact with each other and, sure enough, they didn’t. (I’ll explain these two points later in the article).
I proceeded to pull the tips from the machine, and with a file, I dressed them. I then aligned the tips, and using some scrap steel (from a damaged door), I demonstrated to the techs how to make proper plugs. And guess what? NO SPARKS!
Yes, you read it correctly. There should be little or no spark when performing STRSW welds.
A lack of knowledge seems to surround STRSW. Another case in point: During a recent Collision Industry Conference (CIC) meeting, a shop owner complained that he had purchased a STRSW welder. After it arrived at his shop, he was informed that his facility needed to be rewired to accommodate the new welder.
Exactly $7,000 later, he got his new welder functioning — and soon realized it wouldn’t reach a number of the areas on the front structure. After spending another couple grand, he finally had an operational welder.
What upset him the most about all this was his own lack of knowledge of STRSW and its equipment. Which gave me and Auto Body Hawaii shop owner March Taylor an idea: to conduct a welding machine challenge. March and I decided that we wanted to conduct a welding test that would simulate working on a vehicle in a real-world environment instead of just welding some coupons together.
Important: If you’re not well-versed on spot welding, you might want to read the sidebar, “Resistance is ….Fruitful” in this issue before reading about our welding challenge.
 The Testing Begins …
We contacted manufacturers of inverter resistance spot welders and invited them to attend two days of testing during the last week of July 2006. Seven companies responded that they’d attend.
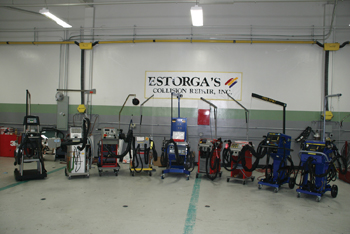
The machines we tested, left to right: Compu-Spot, Elektron, Celette, Weidland & Shill, Car-O-Liner, two from Saitek and two from Pro Spot.
(See Photo 1)
 Al Estorga, owner of Estorga’s Collision Center in Los Angeles, opened up his facility for the four days of preparation and testing. Welders were shipped in from Europe and both the East and West Coasts.
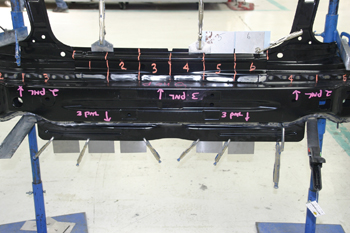
Ole Vandborg, owner of Scandinavian Coachcraft in West Los Angeles, furnished us with two new complete rear body panels and bumper reinforcements from Volvo. See Photo 2.
These panels were high-strength steel and advanced steel with boron. We positioned the panels between two of my welding stands in order to simulate their position on a vehicle.
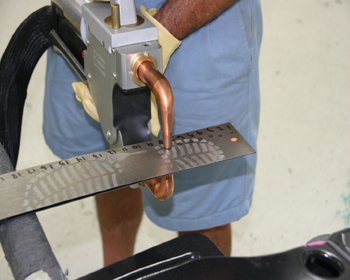 First test: We spot welded two 3-inch by 4-foot strips together for a duty cycle test. See Photo 3.
Second test: weld bonding simulation.
Third test: a multiple panel weld — spot welding four pieces of 18-gauge steel together. While we were getting set up the day before, we began our testing, March took eight pieces of 22-gauge steel coupons and welded them together.
I was in awe of the machine’s power. March began to laugh and said that any good inverter resistance spot welder can perform this task. “It looks impressive, but it’s no big deal,” he said. “It’s just a way to impress a buyer.”
Fourth test: a “reach” test. We used a stripped down front clip of a Honda and had each manufacturer position their welders on five locations to simulate a spot weld.
Fifth test: a destruction test, in which March spent the better part of a day separating (destroying) each and every weld on the Volvo rear panel section using a spot weld chisel.
This destructive test was the most revealing test, showing how well these welders performed in a real-world working situation welding the most challenging of metals.
Note: Please understand that neither March nor I am recommending a particular machine here. Furthermore, this was not a test to see whose machine was the best. What this challenge was about was giving repair professionals and shop instructors information so they could make better decisions when purchasing a machine.
Did You Know…
Although many techs associate sparks with a good weld, there should actually be little or no spark when performing STRSW welds.
The Results
The first order of business was to test the voltage. I put a volt meter into the 220 three-phase socket and observed a voltage of 205 volts. Everyone agreed that this voltage was sufficient to effectively operate their machines. We were now ready to begin.
• DUTY CYCLE TEST: March performed 50 spot welds as fast as the machine would allow. He performed the 51st weld on 22-gauge mild steel coupons and then performed a peel test. All machines produced welds that passed the peel test.
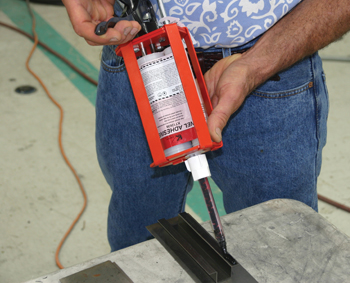 • WELD BOND TEST: We applied adhesive to a 22-gauge panel and allowed it to dry 12 hours (See Photo 4). We added spot welds and then completed a peel test. Again, all the welders met the required diameter on the peel test.
It should be noted that we used a pair of vise grips to provide for a shunt. The adhesive acts as an insulator between the two pieces of metal being welded. To create an electrical path between the panels (shunt), a self-tapping screw or pliers is needed for the first weld only. Once a spot weld is created, an electrical path is also created.
• MULTIPLE PANEL WELD TEST: We took four pieces of 18-gauge zinc-coated mild steel and spot welded them together. When finished, I performed a peel test on the coupons. Again, all the welders functioned well.
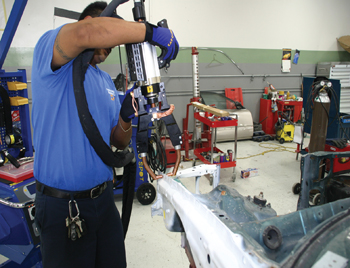 • REACH TEST: We took a stripped-out front end of a Honda and painted the various zones different colors. Then each company’s representative performed a simulated spot weld in each zone using their electrodes that come with the basic purchase price. (See Photo 5). Once again, all the welders were able to reach the various zones.
Our Observations
I’d like to share with you some of March’s and my thoughts and observations.
• Types of guns — There are three types of guns: a single-sided gun, a “C” gun and an “X” gun. One company also has an additional gun that goes by the name of “pliers.”
Of the machines we tested, three manufacturers offered C-type guns and three offered X-type guns.
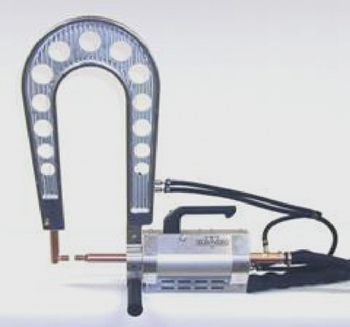
 The C-type gun works using pressure that pushes the electrode out of a cylinder to make contact with the fixed electrode on the C arm (See Photo 6).
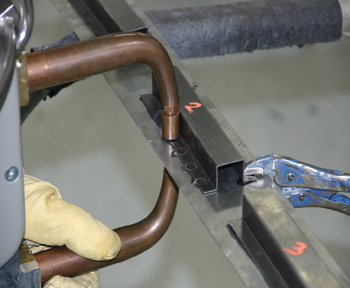
The “X” gun uses a center pivot (like an X) and forces the arm to pivot into the other electrode. The photo below is of an “X” gun (See Photo 7).
• The changing of electrodes to gain access to multiple locations on the vehicle — The “C” gun arms attach to the gun with a single locking device. To gain greater access, a larger “C” is employed. Due to the design, the electrodes are self-aligning. One company uses a solid electrode, and the other companies that employ the C design use a press-on tip.
March and I preferred the press-on tip for the following reasons:
1. No sharpening tool is needed.
2. Easy to replace.
The negative to this design is that it won’t reach every spot on a vehicle. A price consideration is the “X” adapter. One company charges for the accessory, and the other includes it in its overall package.
The “X” gun electrodes come in matching pairs. They’re designed to reach virtually every spot weld on a vehicle.
Exchanging electrodes takes more time on the “C” gun. I preferred the machine with the electrodes that had an alignment pin on the part. The other two companies used set screws to attach the electrodes to the gun. Of these two, one has a cam action that locks in electrodes to a standard position (which requires virtually no alignment of the tips). The gun that uses set screws took the most time to change and required the technician to align the tips before welding.
A couple of other observations on electrodes: First, as the electrodes increase in length, the squeeze pressure at the tips decreases, increasing the possibility for a weld to fail. Second is the cost factor. The additional electrode sets aren’t cheap, especially the water-cooled units — and you’ll need to think about the storage of these tips.
Final Notes
• The adjustment of air pressure that regulated the squeeze pressure — Most of the units have a dial in the front of the machine that made the operation easier. One unit has the control in the rear of the machine, which took a little more time to adjust.
• The machine’s computer — All of the welders are using a computer to monitor their welds. Two of the machines actually have a small video monitor built into the unit. Each of the company’s reps went through the setup with March. March liked the programs that asked questions (sort of like the check-in computer at the airport kiosks). All the welders had a boron metal option, a minimum panel thickness option and a number-of-panels-to-be-welded option. One company took a different approach to panel thickness. This company wants the overall thickness to be entered. I think this approach is somewhat better, but to ask a tech to have a caliper and measure all of the metals to be welded may be asking a bit too much.
• Ergonomics — March liked all of the guns, but the “pliers” was his favorite. As I mentioned, guns were harder to manipulate with the larger “C” attachments and longer electrodes. One machine incorporated a work area on top of its machine with a tool board in easy reach (nice feature). The “C” gun machines had an excellent gun rest that allowed for easy arm changing.
• Service — Five of the six machines we tested are made in Europe. One company, at the time this article was written, had no repair stations in the United States, so their machines needed to be sent back to Europe for major repairs.
• Training — All the companies have a training CD, but I still think it’s important to have a live body to demonstrate the machine because I learn by the hands-on approach, like so many of the techs in our industry. You need to ask if the purchase price includes in-house training.
• Cost of accessories — Always check on the cost of accessories. Remember the shop owner I mentioned earlier who had to purchase $2,000 worth of electrodes to make his machine fully operational. Some other important items when selecting an inverter welder: warranty, OEM program requirements and basic price.
Hopefully, we accomplished what we set out to do: Giving you — the shop instructor or future collision technician — the information you need to help make better decisions if and when you decide to purchase an inverter resistance spot welder.


