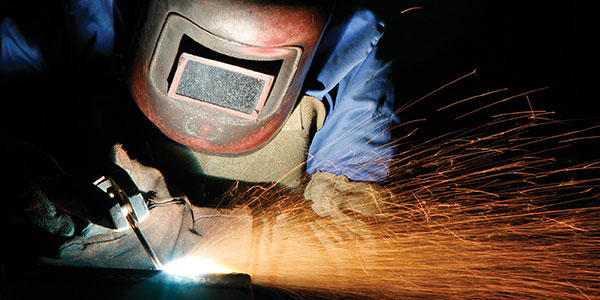
Poor welds can destroy a shop’s reputation and create a deadly situation, which is why doing test welds is a must.
The auto body repair world is facing huge issues: a lack of technicians and a rapidly changing world that requires new procedures, equipment and training. We have so much going on that sometimes we forget some of the things we take for granted – basic skills that we assume we all know get lost. Welding is one of those skills that has changed over the years, more so recently.
New steels and metals are making us all step back and look at what we need to do. New equipment for welding is a must to survive in our industry. “I’ve been doing it this way for 20 years” does not fly in today’s world.
Take a look around you. The media is focusing more and more on our industry and our training. People are looking at our basic skills much more closely than before. I see so many shops doing it right and technicians who are doing an outstanding job, but I just will not rest until I see all of us doing it right. It takes one shop in a city or area to affect all of our reputations. In reality, it takes just one technician.
Basic Skills
Picking up a torch or a gas metal arc welder (GMAW) and welding on a vehicle requires planning, and creating quality welds requires knowing what you’re welding on and what you’re welding with, as well as what’s around you. Poor welds can destroy a shop’s reputation and create a deadly situation. This isn’t like paint that can be redone if it doesn’t match.

Call of Duty
Let me tell you about a learning experience I had many years ago. I was using a GMAW welder in MAG mode and wire feed with 75% argon and 25% CO2. I was using a common 110-volt welder. I set up my machine how I normally did and did my first plug weld. It just didn’t sound right, so I made an adjustment. Weld No. 2 was better, but not quite right, so I made another adjustment and continued to weld No. 3, which turned out much better.
I continued doing my welds and, at about weld No. 8, I started having some issues. I checked my ground and then checked my torch. I even banged the torch on the floor a few times to clear anything out of the nozzle. I then tried another weld, and it was a little better, but not great. I took a break and came back to try another weld. What do you know, it was working again. I mentioned this to one of my coworkers back then, and he looked at me and laughed. He also called me a name that started with dumb and ended with a three-letter word. He looked at me and said, “It’s called duty cycle.”
The not-so-funny part of this is, I still see this happening. How many times do you see technicians banging the torches on something? I can live with the fact that duty cycle does show, but to see technicians setting up welders and doing practice welds on the vehicle being repaired is dead wrong.
All welds must be of quality and required strength. Vehicle manufacturers do not give you practice weld locations on a vehicle. Every weld counts! Steels today are much stronger and thinner than ones in the past. Corrosion shows and spreads much more quickly now. One weld with porosity can cause corrosion to start and spread. Vehicle structures today rely on every part and every weld to do its job. A bad weld could be a critical error for a shop.
Test Welds
Test welds are the most important part of any welding procedure.
Using metal preferably from the vehicle being repaired, practice some welds and do visual and destructive testing. Does the weld pass? If so, carry on. If not, why? You better find out, because continuing on if there’s a problem is wrong.
The question I have for techs and managers is, “Do you know what a good weld looks like?” Just because it looks good does not make it right. A great-looking weld may not have any penetration into the base metal. This is why it must be done on every vehicle being welded. Even different welding applications on the same vehicle require setup and testing. The same steel is not used in every location we weld. Remember, it takes one weld to create a problem and a warranty – one weld to set your reputation back.
So what am I looking for?
- Bead height
- Bead width
- Porosity
- Skips or voids
- Penetration on the backside
- Cracks
There are other visual defects to look for in a weld, but the point is, you need to know what to look for.
If all the visual indicators are good, then do a destructive test. I-CAR WCS classes can tell you what’s best to test your welds. Simple peel tests can tell a lot as far as what’s happening in a weld. The I-CAR welding tests are a great way to learn and make sure you have what you need to weld on today’s vehicles.
Corrosion Protection
The last part to a proper weld is the dressing and corrosion protection. We need to grind the weld, but where do you stop? So many people grind flat, which is good, but many go past and start grinding into the base metal on both sides. This can be dangerous on a weld that’s considered structural as this grinding can weaken the weld. Over-grinding plug welds or any weld can severely weaken the weld. Knowing when to stop is a critical factor.
Corrosion protection is just as critical. You can put a great weld down, but it won’t last if moisture gets to it. Using corrosion protection is as important as any other step. Weld-through primers are a necessity to a weld that will last the test of time. Seam sealers and wax-based products must be applied correctly. Time is the great judge of a weld.
The backside of a weld may not be visible, but is as critical as the front. Finishing your weld front and back is a requirement for success. Just cleaning and applying a dauber of non-reduced epoxy primer will add to the quality of the weld. Doing reinspections, I cannot tell you how many times I look and see a big ash mark on the backside of the weld. Simple cleaning and priming would save the time and headache of a warranty.
STRSW
I’ve been mainly discussing welding steel with a GMAW welder. A separate article is needed for squeeze type resistance spot welding, or STRSW. Yet another article is needed for aluminum and MIG brazing, but I want to note that to weld aluminum and also MIG braze requires new welders and/or technology. These new welders are proving to be a great investment. The quality of welds and abilities of these machines save a great deal of time and effort in repairs. You may think they’re expensive, but they’ll pay for themselves quickly.
Before You Weld, Ask Yourself:
- Do you have the correct welder for the application? Is the voltage correct? If you’re using a GMAW welder, do you need a MIG or MAG application?
- What size wire is recommended? Not all car manufacturers use the same wire size. Different wire may be needed for a quarter panel versus a frame rail. Just because that’s the wire in the welder does not make it correct. Be sure the machine can handle the size of wire needed for the application.
- Proper gas and settings. Is the pressure correct? After all, gas flow affects the quality of the weld.
- Did you check the chart on the machine to the gauge of metal being welded? Use the machine settings on voltage and wire speed to the wire you have in the machine as they’re usually right on. New machines with automated settings are usually simple to set up and use.
- Has your welder been maintained? I’ve seen many welders being used in shops that can’t make a passing weld. New welders with automated settings have come a long way and help technicians to set up and weld correctly. Much of the human error in setting up is reduced.