There are three main categories of disc brake service: pad replacement, caliper overhaul, and rotor machining or replacement.
Although it is impossible to determine what repairs might be needed until the brake assemblies are inspected, a preliminary road test can help pinpoint problems. During the road test, listen for noises and note any pedal pulsation or vehicle pulling when applying the brakes. Noises can indicate brake pad problems, pedal pulsation from rotor damage, and pulling due to uneven brake application, which can be caused by a number of things.
Keep in mind that there are some brake noises that are widely considered normal and not a cause for brake service. Such noises include an intermittent squeal or groan when brakes are applied. Sometimes these noises occur only during the first few brake applications in the morning; however, they may be heard at any time while braking. These noises are usually aggravated by different conditions such as cold, heat, moisture, road dust, salt or mud.
Some common disc brake noises that require immediate service are outlined as follows:
• Clunking noise: This can be caused from pads that were not properly fitted to the caliper, loose caliper brackets or loose calipers.
• Squealing noise during stopping: This may be the result of an improper disc finish, poor pad isolation, troublesome lining formulations, missing pad shims, or the wear indicators contacting the rotor surface.
• Grinding noise: A grinding noise could indicate that the pad lining material is worn out. When the rivets or the steel backing of the pad make contact with the rotor, damage to the rotor will occur.
Mechanical Diagnosis
Disc brake mechanical problems will usually involve a seized caliper piston, worn parts or calipers that do not move properly on their slides. Each of these problems can be found by doing a thorough visual inspection.
A seized caliper piston will typically show up as hard pulling to the opposite side during brake application. Also, the opposite side brake linings will wear out prematurely. If more than one caliper is seized, poor stopping will result.
With typical single-piston calipers, a common mechanical problem is uneven pad wear. Lack of the sliding or floating action that transfers clamping force from the cylinder side of the caliper to the other side results in uneven pad wear, and in some cases, can result in a low or spongy pedal. If the piston is not moving properly on its slides, inspect the slides for damage, then disassemble, lubricate and assemble properly.
Rear disc brakes with integral parking brake mechanisms commonly cause a low-pedal condition when the self-adjustment components become sluggish or seize up altogether, or if the driver does not regularly use the parking brake. This will also result in poor stopping power and accelerated front brake wear as the rear brakes will not be doing their fair share of the work. If the parking brake mechanism is not functioning properly, repair or replace the caliper as necessary. Often the parking brake mechanism is integral to the caliper and cannot be serviced separately.
Brake Roughness
Pedal pulsation, vibration and brake roughness are common disc brake complaints. Most often, these complaints are due to defects in the disc itself, such as runout, rotor thickness variation, excessive lateral runout, excessive disc thickness variation, lining material transfer, rotor corrosion or cracks. To isolate where the pulsation is coming from, coast at low speed on an uncrowded roadway, hold the steering wheel lightly with your fingers, and apply the brakes gently. If the steering wheel shudders back and forth, the front brakes are at fault.
Rotor lateral runout occurs when the spindle and hub are not parallel to each other. It is usually not felt in a sliding caliper system, and keep in mind that this condition will lead to disc thickness variation. Runout or rotor warpage may be caused by excessive heat, overtorquing lug nuts or improper mounting of components.
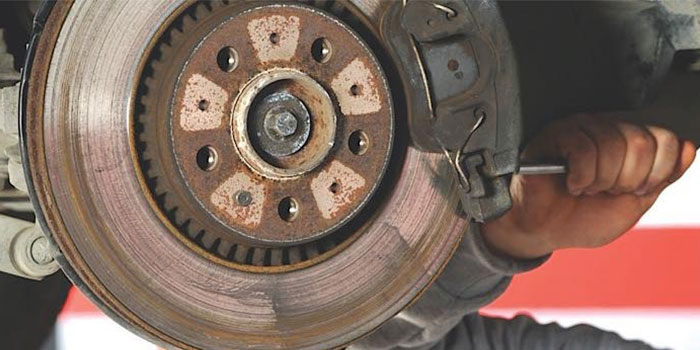
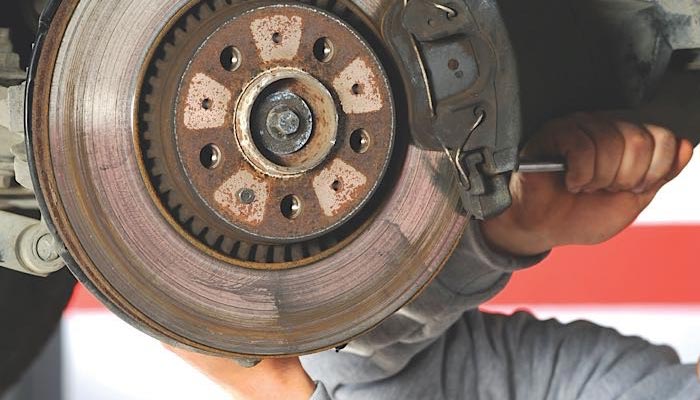
Brake Rotor Inspection
Brake rotor inspection consists of two parts: a visual inspection followed by one or more careful measurements.
A thorough inspection determines if the rotor is in serviceable condition, must be machined to restore its surface, or is beyond saving and needs replacement. To begin, wipe the rotor surface clean to make it easier to spot problems. Inspect the rotor for problems on the surface, such as:
• Scoring and grooves
• Cracks
• Heat checking
• Hard spots
Generally, rotors must be resurfaced if scoring and grooves are deeper than 0.010 inch. If cracks are visible, replace the rotor.
Brake Pad Service
Brake pads are sold and serviced as axle sets, which consist of four pads and the inner and outer pad for the caliper at each wheel. Never mix pads from different manufacturers, as the friction coefficients of the linings may be different even though they appear the same. If only one pad of an axle set is badly worn, replace the entire set after repairing the problem that caused the uneven wear.
Most manufacturers recommend that the bushings, O-rings, retaining bolts, retaining clips and any other caliper mounting hardware be replaced whenever a new set of brake pads is installed.
The thickness of the lining material is the main factor that determines whether the pads should be replaced or not. The brake pads must be at least 0.030 inch above the pad backing plate or rivet heads. Measure friction thickness with a machinist scale.
Pads should be worn evenly and not tapered. If the pads are tapered, it is a sign the slides or pistons are seizing. In this case, the caliper slides should be serviced and the hardware should be replaced. Also, inspect the pads for taper wear in which the pads are thinner at one end than at the other. Some pad taper wear is normal in floating calipers because the caliper body tends to flex slightly on its mountings. The leading edges of brake pads may also wear faster than the trailing edges because they operate at higher temperatures. However, if there is more than 0.13 inch of taper wear, you should replace the pads and inspect the caliper for possible problems. Compare the amount of wear on the two pads in each caliper, then compare the amount of pad wear between the two calipers on the same axle.
All of the pads may not be worn the same amount in sliding or floating calipers because the pad on the piston side usually wears more quickly. However, grossly uneven pad wear occurs in floating and sliding calipers when the mounting hardware rusts or corrodes, causing the caliper to bind as it moves on the guide pins or anchor plate.
Check the friction lining surface for signs of contamination from brake fluid that has leaked past the piston seal and dust boot. Fluid contamination will cause the lining to darken, and brake pads that have been soaked with brake fluid must be replaced. Inspect the pads for physical damage. Look for large cracks in the lining, loose or missing rivets, a bent backing plate or a bonded lining that is separating from the backing plate. If these problems are present, replace the pads.
Machining Rotors
Some carmakers are now recommending that brake rotor machining not be done unless there is a pulsation or shudder complaint. During normal pad replacement, the discs should be used as-is providing the rotor meets all specifications. If the rotor does not meet factory specifications, machine or replace as required.
It would be impossible to list all instructions for every type of brake lathe in use today, but there are however some general guidelines that do apply to all rotor machining:
• Disc brake rotors should only be refinished if they have enough thickness to still be within specifications after refinishing.
• After a rotor has been separated from the hub,clean any rust or contaminants from the hub flange and brake rotor mating surface. Failure to perform this step will result in increased assembled lateral runout.
• Never machine a rotor unless you also machine the rotor at the other side of the same axle an equal amount. This keeps braking force and fade resistance equal from side to side and prevents brake pull.
• Even a well-kept lathe may produce a relatively rough directional finish. In the days of asbestos linings, this was acceptable — 80-100 RMS was considered fine enough. Today, however, with semi-metallic and ceramic friction material, a very smooth surface on the order of 40 60 RMS is required or squealing and rapid wear will result. A non-directional finish should be obtained if machining rotors.
• Rotors must be washed after machining or hard particles will become embedded in the new linings and cause noise and scoring. Clean the braking surface with denatured alcohol or other approved brake cleaner.
Bench Lathe
When using a bench lathe, first consult the instruction manual that pertains to that particular lathe to ensure proper setup and operation. The following instructions pertain to most lathes and are meant as a general outline as to how to use a bench style lathe.
1. Ensure that rotor mounting surfaces are clean.
2. Mount rotor to lathe according to instructions.
3. Attach any necessary vibration dampening attachments to the rotor or lathe.
4. Ensure the bits are not damaged in any way.
5. Replace or rotate bits as necessary.
6. Position cutting bits to center of rotor braking surface ensuring that bits do not contact rotor surface.
7. If lathe is equipped to machine drums as well as rotors, ensure that drum feed is not engaged and also ensure that rotor feed is not engaged.
8. Turn brake lathe on, then adjust cutting bits until they just contact the rotor.
On-The-Car Lathe
In recent years, on-car brake lathes have become a popular alternative to traditional bench-style brake lathes. There are several benefits to using the on-car brake lathe. For one, it allows rotor machining on the vehicle spindle center line which is the axis of rotation for the rotor. It also stops the stack-up tolerance of related parts from affecting rotor lateral runout. You will find that some bench-style brake lathes may actually induce lateral runout and instead of machining a rotor to the vehicle spindle center line, it is machined to the centerline of the lathe. Keep in mind that the cutting bits for both the on-car lathe and the bench lathe may not be interchangeable.
Whenever using an on-car lathe, first consult the instruction manual that pertains to that particular lathe to ensure proper setup and operation.
Article courtesy Brake & Front End.