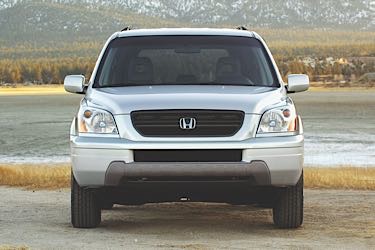
 Aligning the 2003-2008 Honda Pilot is not difficult. The first-generation Pilot shares the same suspension design as the Odyssey and rear suspension design with the Accord.
The Pilot is the largest vehicle Honda manufacturers, and has no TSBs issued for alignment or tire-wear problems. Most TSBs for these vehicles focus on steering column noise, but the majority of these are for a limited number of vehicles only.
The Pilot is based on Honda’s global light-truck platform, featuring a highly robust and rigid unit body design with isolated front and rear subframes.
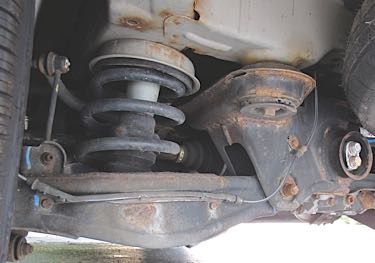
The Pilot employs a strut-type front suspension that provides a generous 7.3 inches of wheel travel. Separate load paths to the unit body are provided for the coil spring and the shock absorber to reduce road noise. A solid 0.9-inch stabilizer bar is linked directly to the strut via ball-joint connections to reduce body roll during cornering maneuvers.
The lower control arm bushings are designed to provide a stabilizing toe-out steering effect when loaded during braking or cornering. The L-shaped arm allows a very tight steering lock for good low-speed maneuverability.
 The Pilot’s rear suspension is a compact, multi-link trailing arm layout. Wheel travel is a generous 4.9 inches in compression and 3.3 inches in rebound. The three links that position each rear wheel laterally run between the knuckle assembly and the subframe. A trailing arm also runs from the unit body to each rear knuckle.
Steering knuckles are an “in-wheel” design to optimize suspension geometry and packaging efficiency. Bushing compliance provides a modest toe-in effect in response to substantial cornering and braking loads to enhance overall stability. A solid 0.8-inch stabilizer bar helps reduce body motion during cornering. A new urethane bump stop is applied to the rear suspension for improved ride quality.
The Pilot employs an advanced new four-wheel-drive system called Variable Torque Management 4WD (VTM-4). VTM-4 combines the best features of modern on-demand and conventional four-wheel-drive systems without compromising vehicle weight, efficiency and interior space. VTM-4 proactively delivers power to all four wheels under acceleration and when wheel slippage is detected. This has the benefit of not only improving traction in slippery conditions, but also benefits driving dynamics and vehicle stability in virtually all circumstances.
But even with a lot of similarities to other Honda vehicles, it is what happens before and after the angles are measured that can make the difference between a satisfied customer and an angry comeback.
Even with the most sophisticated alignment system, it is still possible to make a mistake or false diagnosis on the Pilot. It is important to look at more than camber, caster and toe. Look at the diagnostic angles as well as the driver, tires and how the vehicle is used.
 Inspection
Always inspect the customer before you inspect the vehicle. Ask how they use their Pilot and how they load it. The independent rear suspension on the Pilot will gain significant camber and toe if it is overloaded. These altered angles can lead to tire wear on the inside edge. Even minor loads like batting equipment for a little league baseball team can cause some sagging.
Aftermarket rear spring airbag kits are available for the rear springs that can increase load-carrying capabilities between 500-750 lbs. while improving rear tire wear. Prices for the airbags start around $100 and can go up from there depending on how the bags are inflated.
Always mark the original location of the tires before an alignment. Many pull and tracking complaints can be solved by swapping tires to cancel out the forces. Most Pilots are shod with 235/70R/16 all-season tires. Due to the size of the tires and the aspect ratio, Pilots are sensitive if the pressures are not equal. For most Pilots, the inflation pressure is 32 psi, but check the driver’s side door placard for the correct inflation.
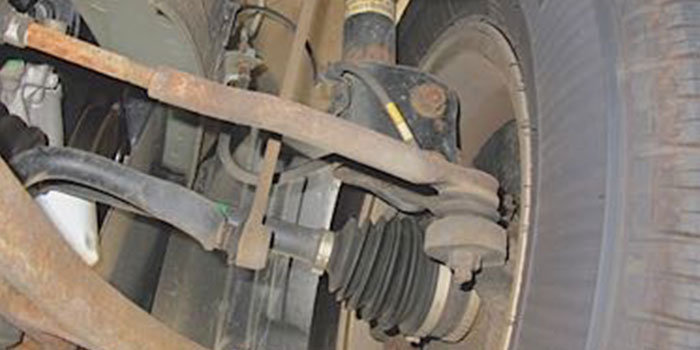
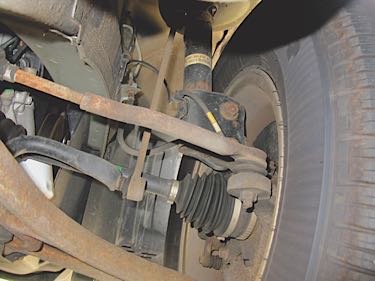
Inspect the vehicle for any signs of damage like curb strikes and other such impairments. The knuckles and lower control arms on the Pilot are cast iron. Most damage will be confined to these components.
A side-to-side visual comparison can reveal a bent component. Bent strut rods may cause the driver to complain of inconsistent steering feel and the SAI or side-to-side tolerances to be out of spec. Also, looking at the diagnostic angles like SAI and the turning angle are important.
If your alignment equipment is able to measure the setback of the wheels, it can be a very useful tool to diagnosis a bent control arm.
Adjustments
The front caster is not adjustable on the Pilot. Honda advises looking for damaged components like the control arms and struts. The front suspension cradle cannot be adjusted to change camber or caster.
To change front camber, install a cam bolt kit in the lower strut mounting hole. This will give you ±1.75º.
The rear suspension is the multi-link setup. Only toe is adjustable with cam plate bolts on the inboard side of the lower control links. This adjustment yields very little adjustment — it is designed to only compensate for wear in the bushings. It the rear toe cannot be brought into specification, look for other damage in the links and bushings.
The most common culprits are the upper link with the ball joint or the bushing between the knuckle and lower control arm. Always use a new self-locking nut on the cam. Assemble the adjusting bolt and cam plate with the eccentric facing up. Make sure the toe angles are close from side to side.
Rear camber is not factory adjustable. It’s necessary to replace the upper rear link with an adjustable link that can change the camber by -2.00º to +4.00º.
VSA Sensor Neutral Position Memorization
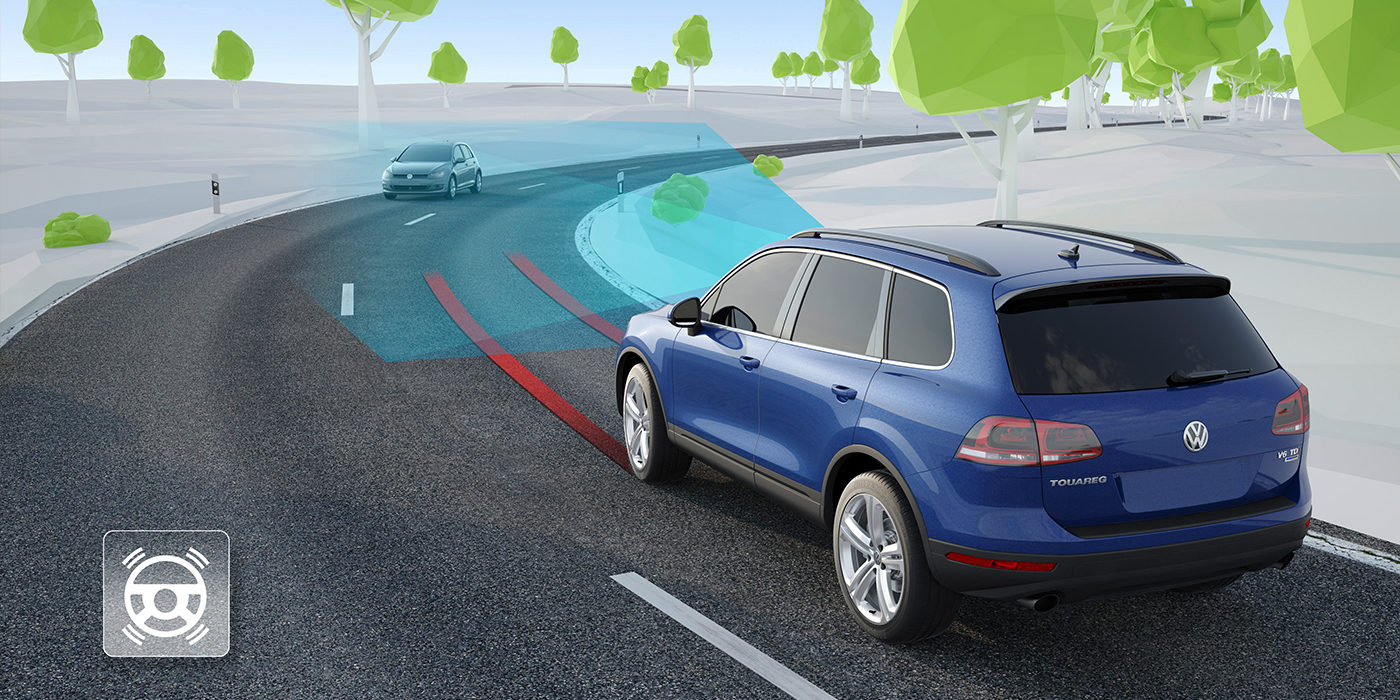
Most Pilots are equipped with stability control called VSA. After any toe adjustment or steering component replacement, it is necessary to reset the steering position sensor. This process does not require a scan tool. Disconnecting the negative battery cable can create more problems than it solves.
If the error in the steering angle is large enough, it will disable the system and turn the system’s malfunction indicator light on to alert the driver. If the error is small, it will operate as normal until certain conditions like those seen when driving on freeway ramps and tight streets occur. Under these conditions, the computer might unnecessarily activate the stability control system, slowing the vehicle, or it may fail to respond with the right corrective action, causing it to leave the road.
Do not take any chances with the reprogramming of the steering angle sensor. If your shop cannot do it, send it to a shop that can. Also, you can charge the customer for this procedure. The Honda warranty time is around .3 hours.
Noisy Rear Brakes
If a customer with a 2003 and later Pilot complains of a noise and judder from the rear of the vehicle when turning, the VTM-4 differential fluid could likely be contaminated by clutch wear, condensation or both. This causes the VTM-4 differential clutches to make noise and to judder when turning.
Worn VTM-4 fluid that has not been replaced at the recommended service intervals can cause the same condition. Check to see if the VTM-4 fluid has been replaced at the recommended intervals. If not, replace the fluid.
Do 10 figure-eight patterns with the steering wheel at full lock each direction. Listen for a noise and feel for a judder. Accelerate at the start of each circle to make sure the clutches engage and disengage. Do not use the VTM-4 LOCK button.
Note: As an alternative to doing figure-eight patterns, you may do 10 circles to the left and 10 circles to the right. If you can hear the noise or feel the judder, replace the fluid. If you cannot hear the noise and feel the judder, continue with normal troubleshooting.
Courtesy Brake & Front End.