They say that the proverbial phrase “I couldn’t see the forest for the trees” means that a person or organization cannot see the big picture because it focuses too much on the details.
I have seen this phrase used after days of diagnosing a transmission problem without resolve, yet the cause is staring you in the face. You are so deep in; you no longer can see the obvious.
With GM’s 6L80 being out on the road for the past 15 years, they are coming into the shops more frequently. They are beginning to take the place of the 4L60-E transmission. Although that is a tough act to follow considering how many 4L60-Es were manufactured from 1993 to 2013. I wonder if anyone knows that number? Not to mention how many were remanufactured.
Getting back to the 6L80 transmission, with the years they have been on the road; we now see the types of failures for which they are susceptible. Things like converter clutch failures, output carrier lube failures, 4-5-6 clutch burnout, 4-5-6 clutch hub with the output carrier shaft snapping or twisting (caused by shift overlap programming issues or output carrier failure). Cracked 3-5-R drums and 1-2-3-4 clutch piston. Or pressure regulator valve bore wear, AFL, TCC Reg, and compensator feed bore wear are also on the rise.
With 6L80 transmissions having TCC issues, the TCC Reg valve in the valve body is usually looked at first. If this is OK, the decision must be made to inspect the TEHCM or pull the unit and look at the turbine shaft O-ring, the PR valve, the TCC control valve, and converter limit valve in the pump. Removing the unit is the usual choice over replacing the TEHCM. And when the turbine shaft O-ring and valves in the pump are good, a visual inspection is made with the upper ring on the turbine shaft and the bushing in the stator, particularly the one on the converter end of the stator support shaft. When all these items are good, and nothing is discovered, the torque converter is replaced. When that does not work, the TEHCM is replaced. And when that does not work, the inspection cycle repeats itself.
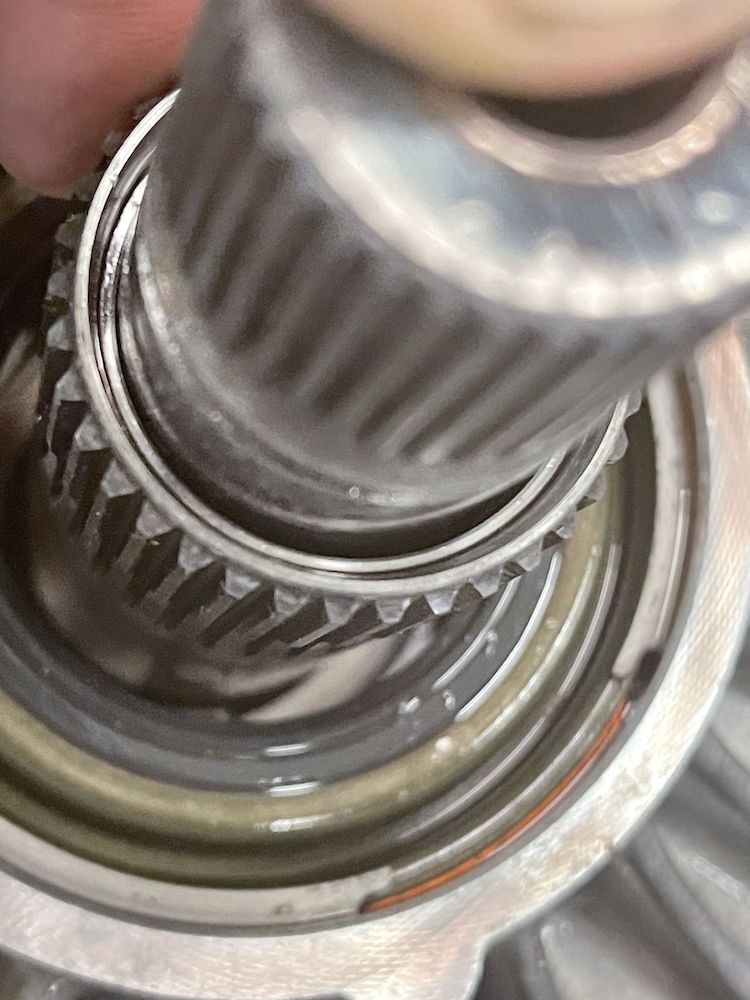
But here is the catch in seeing the tree that is in the forest. The stator bushing can look good when it is not. This is where one can be easily fooled. The turbine shaft must be in the stator to get a better visual of the bushing condition.
Bushing clearance is 0.001˝ for the first inch and .0015˝ for each additional inch after that. The bushing journal on the turbine shaft for the stator bushing measures approximately 1.117˝ in diameter. The clearance should then be 0.001˝ for the first inch plus a tenth more: 0.0001˝, which works out to be 0.0011”. This would be the absolute tightest observable clearance between the journal and the bushing. The reality will be a clearance closer to 0.0015˝ to 0.002˝.
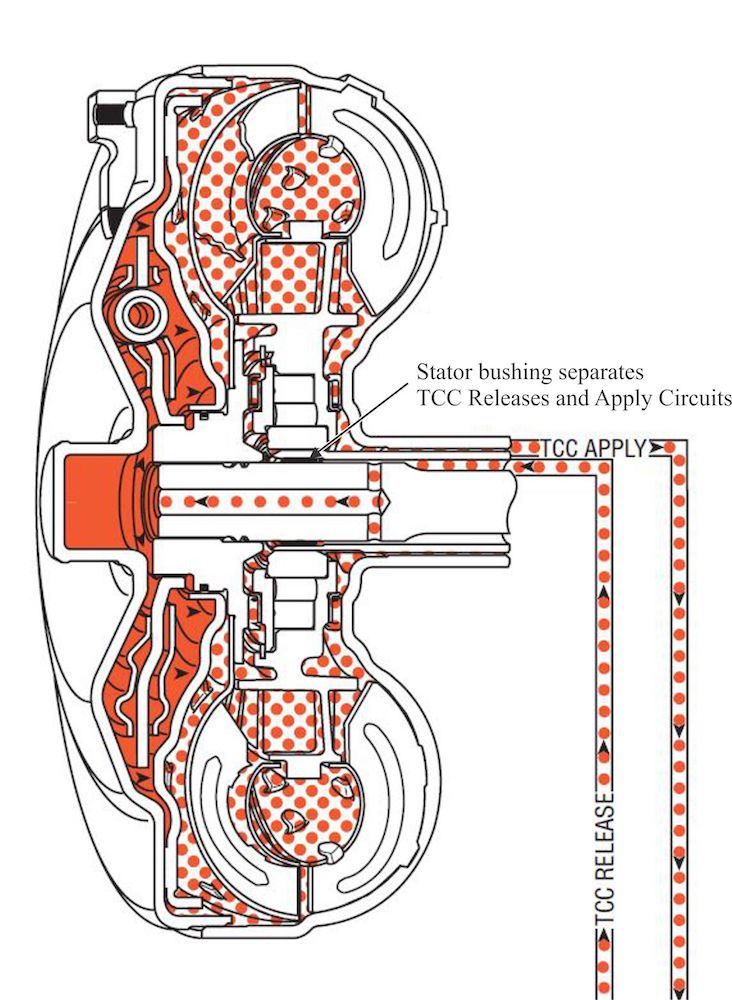
If you look at figure 1, there is far more clearance between the journal and the bushing than 0.002˝. This excessive wear will compromise the hydraulic converter circuit as the converter “off” and converter “on” pressure will mingle (figure 2). So, as you can see (all pun intended), just looking at the appearance of the bushing will cause you not to see the forest for the trees.
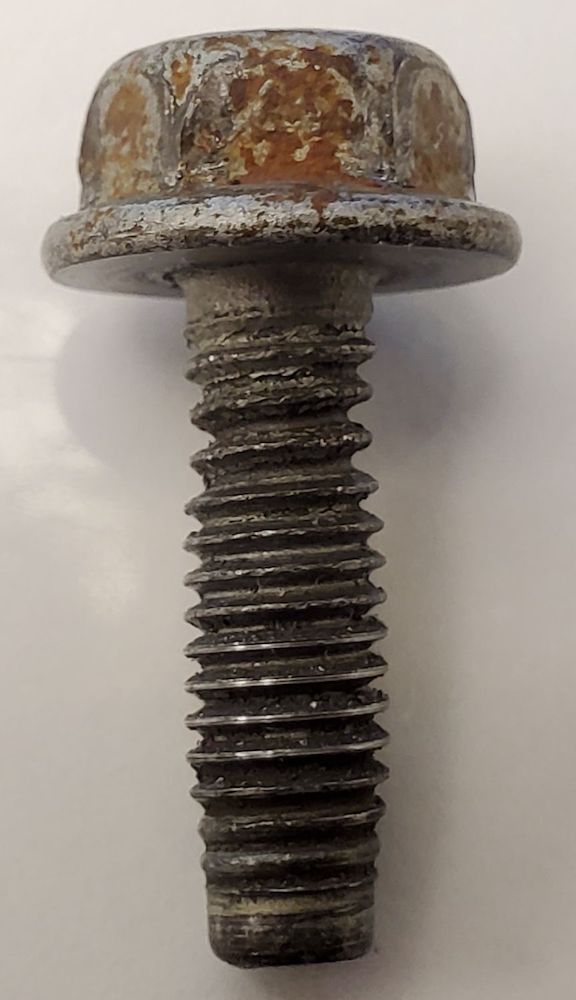
By the way, there is nothing worse than finishing a rebuild where you are tightening up the pan bolts according to torque spec and the bolt head snaps. Not just once, but two or three times. Well, this is yet another personality of the 6L80 transmission. The pan bolts used here are quite small (M6 x 16mm) and do not tolerate much corrosion because of it. Look at figure 3, and you can see how the corrosion takes place at the base by where the pan would be. Water collects in this area and deteriorates the bolts. Some are worse than others, so you can build a few units and never have an issue. But then, the one that needs to go Friday at 5 pm, you have three breaks.
This article is courtesy of Transmission Digest.