 Adapted from Robert McDonald’s article in Engine Builder.
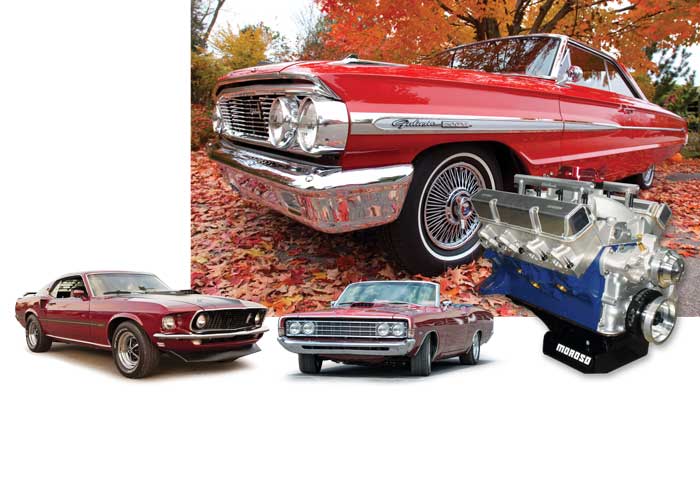
It seems as though the car restoration market is in full swing. Anybody who has an appreciation for an automobile can tell you that it’s all about American Iron. The phrase American Iron came about because we as Americans loved big automobiles with big engines.
There is one power plant that has taken a back seat over the years that seems to be gaining a lot of attention – the Ford “FE.” If your classic or project car has one of these engines, you may elect to rectify it instead of replacing it with a modern day engine.

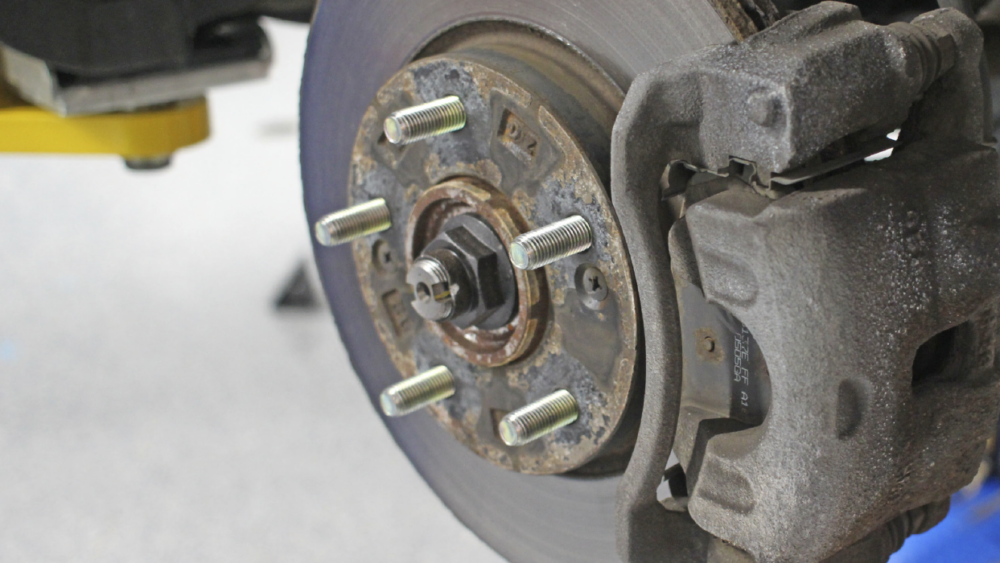
The Ford FE has a rich history that is often overlooked. The “FE” stands for Ford Edsel and was produced from 1958 to 1976. The FE engine was the powerplant intended for the release in Ford’s new car the Edsel. Ford needed a medium-sized engine to get more power than a small block and less weight than a big block for medium-sized cars. The FE was considered a Y-block design because the block casting extended 3.625” below the centerline of the crankshaft, which was about a 1” below the journals of the crankshaft. The Y-block design offered great support for the crankshaft.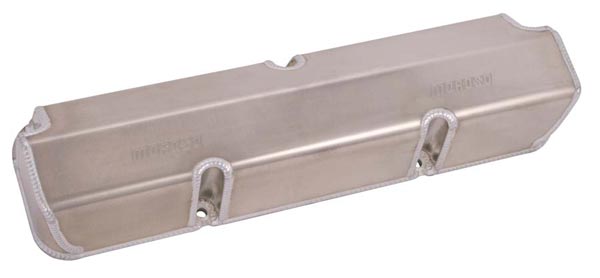
I find it amazing that these well-known, American Iron series engines do not get the recognition they deserve. Ford produced the FE series engines for almost 20 years and in this time period, this series of engine gained quite a following.
After researching the FE, I was intrigued about its internal workings. I had always heard about and seen some of the more popular FE engines, such as the 390, 427 and 428, but never had a chance to dive into one.
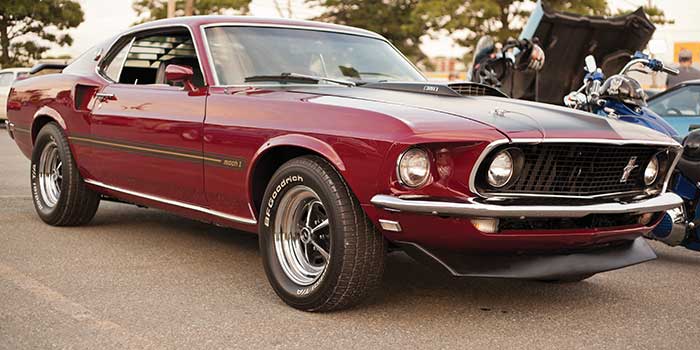
A few years ago, a friend of mine purchased a 1962 Galaxie, and the previous owner had installed a 390 with a four speed. The car was fun to drive and gained some nostalgic recognition on the road, but the engine smoked quite heavily at times, consumed quite a few quarts of oil and fouled several spark plugs on even very short trips around town.
The engine was supposedly rebuilt prior to my friend purchasing the car, but something was definitely wrong with this power plant. So, we took this opportunity to explore an FE engine.
Note: While company names are mentioned in this piece, it is up to the builder to research engine components and parts for a successful performance build. For more information on manufacturers and suppliers of performance engine parts, see Engine Builder’s Buyers Guide available at www.enginebuildermag.com.
Breakdown on the Teardown
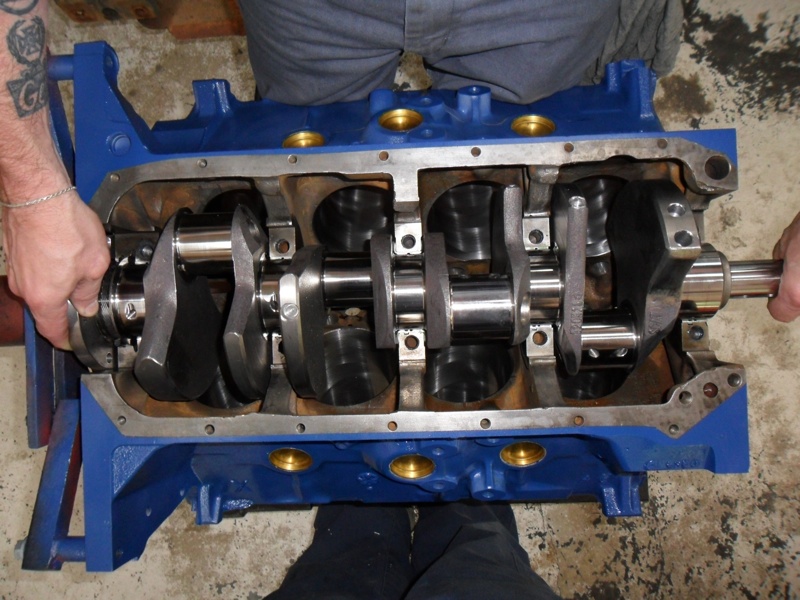
Here is a rundown of the engine in the car. Upon teardown, the engine was a 390 cubic inch with points distributor, aluminum dual plane Shelby intake, Holley 750 double pumper carburetor with manual choke, and fitted with a set of 1-7/8” headers, which are unique and wrap around the frame of the car.
The engine had been bored .030” and fitted with a set of TRW dished pistons and a Comp Cams hydraulic flat tappet camshaft.
The engine had apparently been rebuilt, but the machine work on this particular rebuild was hideous to say the least.
The bores were out of round and had anywhere from .006” to .009” of bore taper. The valve guides in the cylinder heads were completely worn and the crankshaft looked as though it was starting to gradually eat the main bearings. Also, the camshaft was very hard to turn in the block.
Plan of Attack
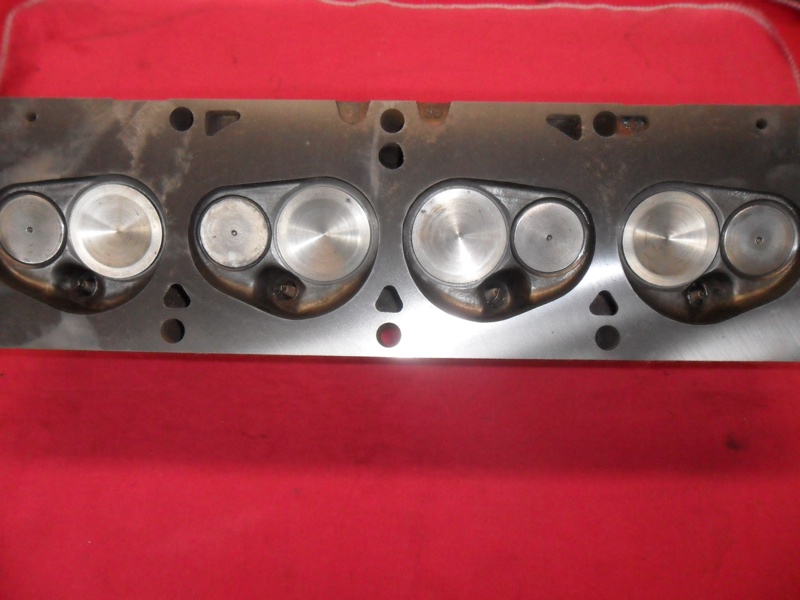
Depending on what we found upon further teardown, there was a chance that we could possibly salvage the cylinder heads, which were a set of 390 GT 14 bolt exhaust heads that had valve sizes of 2.08” and 1.65”.
These cylinder heads had some minor work done as far as some mild descent port work with new valves and a set of larger diameter springs.
We found another stock 390 block that we could bore and transfer all the parts. The crankshaft was in rough shape, but should be able to undergo some machining to be reused. Basically, we would do some machining, get some new bearings and gaskets and transfer all the parts. There ended up being one glitch in our plan – the crankshaft.
Turning a crankshaft is something that I generally will turn over to a good friend of mine who has machined crankshafts for years. The only problem that I had was one of some sad news. In the past several months, my friend had become terminally ill and could no longer machine.
So, I called around and someone had suggested another shop that would turn the crankshaft, which was in another town about 40 miles away. We shipped the crankshaft and waited a couple of weeks for its return. When it came back, we measured the crankshaft with a micrometer and couldn’t believe our eyes. It was in worse shape than when we had started.
Whoever ground the journals on the crankshaft didn’t take the time to first index the crankshaft. The only thing we could do at this point was to purchase a new one. But, where do you find a new crankshaft for an FE?
Well, that question was easily answered. It seems the FE is quite popular, and there are several companies that are catering to the hotrodders who love them.
After doing some research, I found that SCAT Crankshafts and Eagle Specialty offer several different options for a complete rotating “stroker” bottom end assembly.
Rotating Assembly
The rotating assembly package consists of three different crankshaft strokes to choose from, which is 3.98”, 4.125” and 4.25” compared to the stock stroke, which was 3.78”.
These crankshafts were also offered in forged 4340 or cast nodular iron and were fitted with FE main journals 2.438” and smaller big block Chevrolet rod journals, which are 2.200”. The “stroker” assembly also came with your choice of H-beam or I-beam rods with your choice of two different lengths 6.49” (stock) or 6.700” and premium forged pistons with flat-top or dish design.
When we first started the project, we were looking to just do a stock rebuild and to learn more about the FE. At this point, we were still keeping a budget build in mind, but which stroke should we use?
Our stock iron cylinder heads were OK, so if we used them we felt that a small stroke increase would be beneficial and also gain some cubic inch displacement. While shopping online, we found a SCAT rotating assembly for a little under $2,000. It consisted of a cast 4.125” stroke crank, H-beam connecting rods and .030” over Mahle flat top pistons and rings.
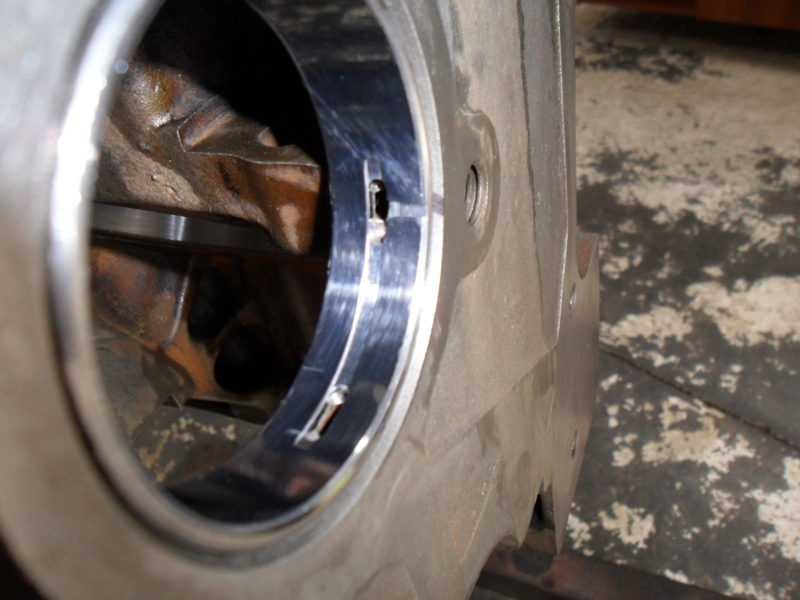
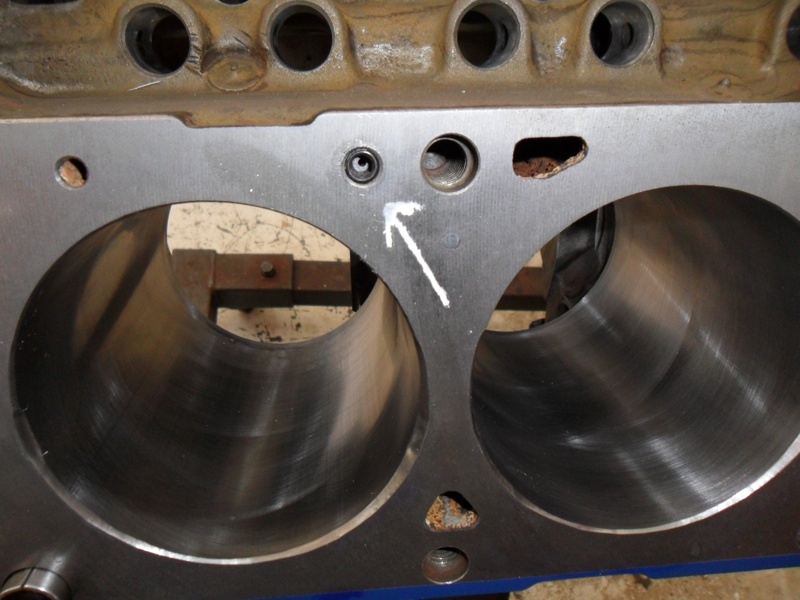
So, we started the block prep anticipating the arrival of our bottom end. We bored and honed the cylinders to 4.082”, align honed the mains and decked the block .017”, which would bring the pistons out of the bore above the deck about .003”.
We sonic cleaned the block and installed new cam bearings and continued disassembling the cylinder heads. Once again, we were faced with a roadblock. The guides in the cylinder heads were worn, the valve seats were literally destroyed and the valve faces were pitted and wouldn’t clean up in the valve grinder.
The rotating assembly arrived so we checked the balance of the crankshaft assembly with our flywheel and clutch components and ended up adding some Mallory (heavy metal) to the crankshaft to complete the balancing procedure.
The clearance checks were performed on the connecting rod bearings and main bearing of the rotating assembly and averaged from .0027” to .003 on the mains with .005” of thrust clearance and .0024” to .0026” on the rods.
The pistons had .0055” cylinder bore clearance and the rings were filed to fit with .018” on the top ring and .022” on the second ring. With such a nice and beefed up bottom end in this FE, the only way to complement these internal components was to use a set of aluminum heads.
Of course, the word budget came up again, but at this point we had thrown it out the shop door.
Heading into Headwork
Aluminum cylinder heads for the FE are pretty common. There are a couple of companies making aluminum replacement cylinder heads, but Edelbrock seemed to be the best choice for our application.
We choose a bare cylinder head with unfinished seats and guides because we wanted to do our own port work and fit the heads with our choice of valves for this bore size. Stock size valve stems on the FE is 3/8” and we were going to install 11/32” stem valves.
Since the 390 has a small bore compared to the 427, we had Ferrea custom make some valves, which were 2.15” for the intake and 1.65” on the exhaust.
Once we received the valves, we sent the heads to Brian Maloney of Maloney Competition Systems in Martinsville, VA, to change the valve guides, do a multi-angle valve seat job and port the cylinder heads.
To further complement the cylinder heads, we wanted to upgrade the existing stock rocker stands. Not knowing our camshaft profile at this time, we were entertaining the idea of a solid-roller camshaft. Since the camshaft would be more aggressive, some stronger rocker shafts and supports along with roller tip rockers would be cheap insurance for our application.
Performance Quotient Brands, also known as PRW, manufactures a stainless steel rocker arm system for Ford FE engines.
This kit comes complete with 16 alloy 17-4ph stainless steel 1.75 ratio rockers (with silicon bronze bushings), hardened shafts, individually numbered billet aluminum rocker shaft supports and spacers, aircraft-quality studs, 12-point nuts, shims, ball-style lash adjusters and pushrod-length checkers.
Fuel System Upgrade
Since our project had progressed into a piece of art with some really nice parts, why not bring the old into the new?
Our previous engine was carbureted, so why not complement this build with modern day fuel injection? FAST (Fuel Air Spark Technologies) builds several different combinations of an EZ-EFI system for an FE application.
For our combination, we chose a multi-point system, which came with an Edelbrock Victor single plane intake, 1,375 cfm throttle body, 36-lb. injectors (we opted for 60-lb. because we wanted to make more than 500 hp), wiring harness and ECU, fuel pump and all related sensors, fittings and fuel line.
By choosing the fuel injection, we could modernize the vehicle, but we also wanted to improve driveability and hopefully gain some fuel efficiency. It’s not that we couldn’t tune the carburetor for various driving conditions, because that is what we could have done years ago.
We really wanted to give this FE a modern day appeal. In fact, when dyno testing the engine, we are going to run the engine on the carburetor with electronic ignition and then bolt on the fuel injection to compare. The biggest difference in the comparison will be the size of the throttle body compared to our Holley 750 carburetor.
When the fuel injection kit arrived, we sent the intake manifold to Maloney Competition to be ported. The runners in the intake manifold as cast were in need of some attention and would not support the power gains we were in hopes of.
After the port work and changes were completed on the cylinder heads and intake, we had to get some flow numbers, not only to see where we stood on airflow, but also to help aid in designing the camshaft profile. Airflow is very important to know where to fully open and close the intake and exhaust valves for maximum power for your application.
Our combination yielded 11.0:1 compression with 431 cubic inches, so with our ported cylinder heads and intake along with our 1-7/8” headers and four-speed transmission, a custom grind camshaft was in order.
We wanted the engine to have great throttle response, good vacuum and low down stump pulling torque, but make some horsepower on the top end. Camshafts are a unique science and since there are only a handful of people who can see these events and understand them, camshafts are often mis-ground.
For camshaft knowledge and custom grinds, I often use Dema Elgin of Super Lobes. Located in southern California, Dema has been in the camshaft grinding business since 1957. For this application, he recommended a lobe separation of 112 degrees on a single pattern grind with 261 degrees of duration at .050” and .383” of lobe lift, which with 1.75 rockers would yield .640” lift with .026” of lash.
After having the camshaft ground, Comp Cams help sort the rest of the valvetrain. This included the appropriate valve springs, retainers, locks, lash caps, valve stem seals, shims and lifters.
Additional Add-ons
We had breathed new life into our piece of American Iron, and it was becoming exciting. With the engine near completion, we wanted to find some dress-up items to enhance our historic piece.
Low and behold if we did not find that Moroso manufactures a set of billet aluminum valve covers for an FE.
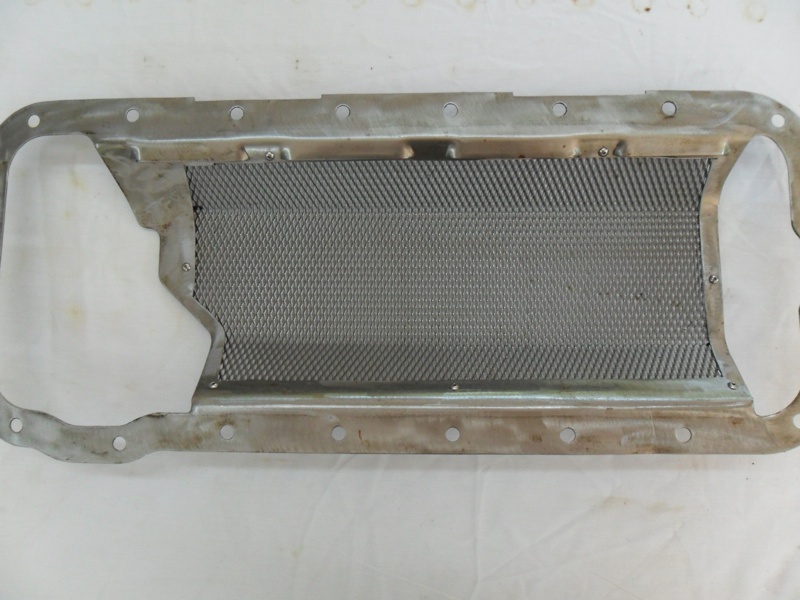
Not only would these be a great addition, but they also manufacture an 8-quart kick out road race oil pan that is powder coated with internal baffling. These items prove to be a real work of craftsmanship and were a nice addition to our project.
Two things to mention for this build would be fasteners and the harmonic damper.
First of all, the entire engine was outfitted with ARP fasteners. The SCAT connecting rods came standard with 7/16” ARP bolts, but ARP also carries a complete line of fasteners for the FE engines.
These included the main bolts, head bolts and stainless accessory fasteners for water pump, intake, front cover, fuel pump, valve covers, oil pan and distributor hold down.
A great way to ensure consistent performance from an engine is by the bolts that hold it together.
Second, would be the harmonic damper. Torsional vibrations in an engine become out of control and will destroy the engine. Remember that every action has an equal and opposite reaction.
Also, when the crankshaft flexes from the cylinder firing, it has to rebound. Fluidampr by Horschel Motorsports offers a damper for the FE engines and we felt that with the reputation of Fluidampr, this would also be great insurance for the power levels we were in hopes of achieving.