MODELS
2000-2020
4Runner, 86, Avalon, C-HR, Camry, Celica, Corolla, Echo, FJ Cruiser, Highlander, iA, iM, Land Cruiser, Matrix, Mirai, MR2 Spyder, Prius, RAV4, Sequoia, Sienna, Solara, Supra, Tacoma, Tundra, Venza, Yaris
Reference Number(s):
T-SB-0008-20
Description:
Vehicles may display evidence of a fluid leak or fluid seep from powertrain components. This bulletin explains how to determine the differences between a fluid leak versus a fluid seep.
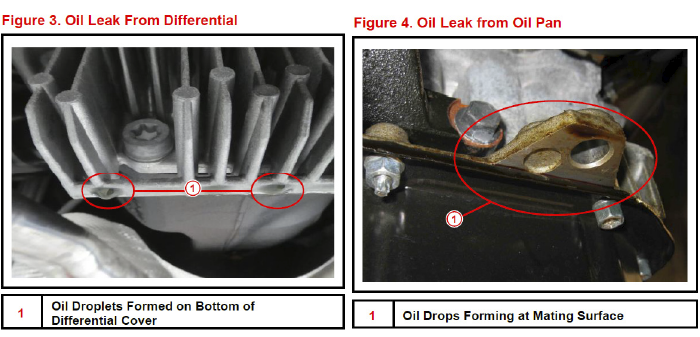
Leak Definition:
A leak is verified by the identification of pooling fluid with the formation of droplets and dripping.
Figures 1-4 are examples determined to be a leak.
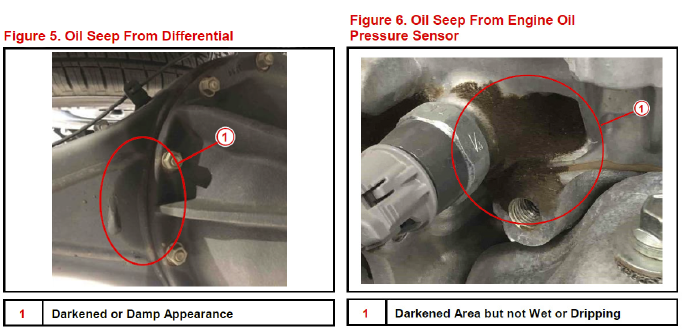
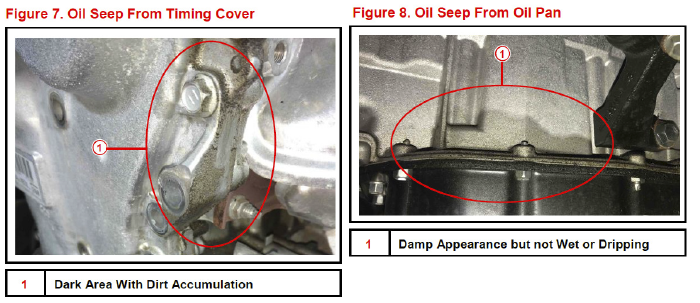
Seep Definition:
A seep is defined as a thin accumulation, film or coating of oil on the exterior of a component. The area often has a darker or damp appearance compared to the rest of the part and may attract dust or dirt over time.
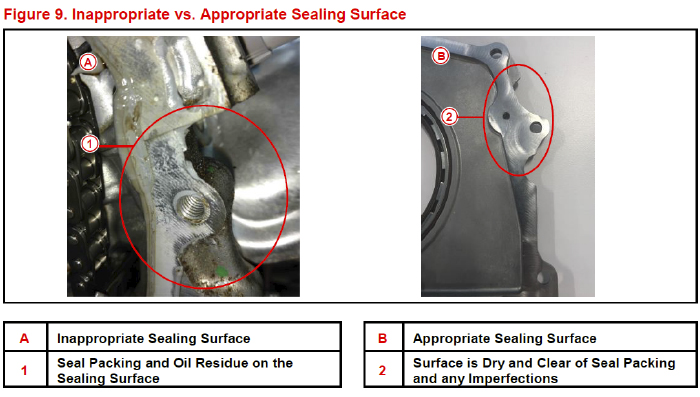
Figures 5-9 are examples determined to be see page.
Repair Procedure:
If a repair is needed, reference the information below to ensure an adequate repair:
1. After disassembly, clean, inspect and prepare each sealing surface before reassembly:
a. For Joints Sealed with Gaskets/ O-Rings/ Seals:
- Clean: Remove any gasket material stuck to each sealing surface.
- Inspect: Check the sealing area for any surface imperfections (pitting, grooves, gaps, etc.) and replace part if necessary.
- Prepare: Remove all oil residue and wipe each surface with the appropriate cleaner and allow to dry.
- Install a new gasket and reassemble components per the applicable repair manual.
b. For Seal Packing/ Form in place Gasket (FIPG) Sealed Joints:
- Clean: Remove all sealant from each surface.
- Inspect: Check the sealing area for any surface imperfections (pitting, grooves, gaps, etc.) and replace part if necessary.
- Prepare: Remove all oil residue and wipe each surface with the appropriate cleaner and an oil-free cloth. Allow to dry before applying new seal packing.
- Apply new seal packing to appropriate areas and reassemble components per the repair manual within 3 minutes of applying seal packing.
- Allow at least two hours after installation and before adding oil.
2. Confirm the repair is complete, test drive vehicle and make sure that there are no leaks from the repaired area.