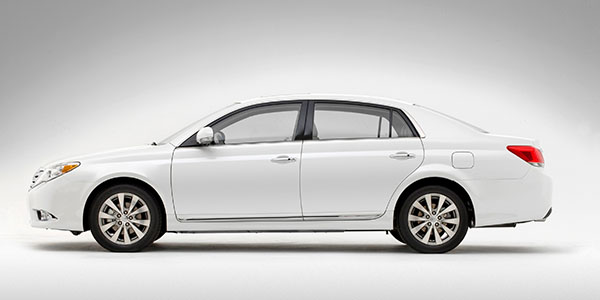
In 2005, Toyota’s Avalon underwent a redesign of its third-generation model, which was larger than previous versions and much sleeker. The Avalon came in four trim levels: the standard XL, Touring, XLS and Limited. The XL included 16” alloy wheels, while other trims came with larger 17” wheels.
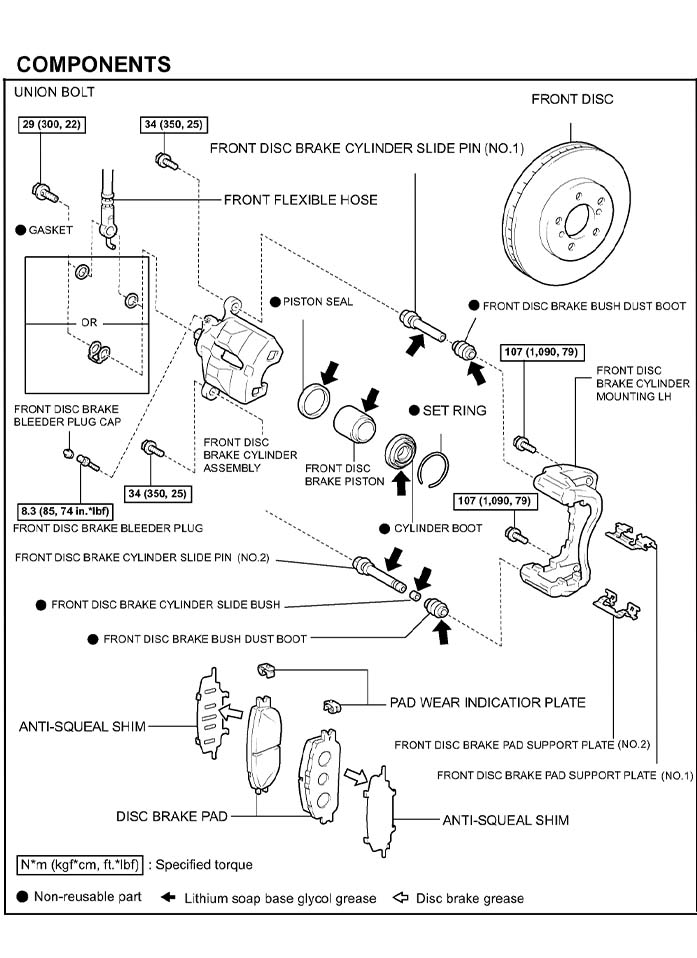
Front Brakes
Make sure that both brake pad support plates have sufficient rebound and have no deformation, cracks or wear, and that all rust and dirt is cleaned off. If necessary, replace the support plates (No. 1 and No. 2).
Next, measure the thickness of the front brake rotor. Standard thickness is 28.0 mm (1.102 in.), with a minimum thickness of 26.0 mm (1.024 in.).
Note: before you remove the front rotor, add alignment marks to index the rotor and axle hub. When replacing the rotor, position the hub so the rotor has the least amount of runout.
Check for bearing play in the axle hub. Torque hub nuts to 76 ft. lbs. Use a dial indicator to measure runout (10 mm, 0.39 in.). Runout should be 0.05 mm (0.0020 in.) or less. If the runout exceeds the maximum limit, index the rotor and axle so the runout is minimal. If the runout still exceeds the threshold even when the rotor positions are changed, the rotor should be machined or replaced.
Clean the slide pins and apply lithium grease before installation. The caliper mounting bracket bolts should be torqued to 107 Nm (79 ft. lbs.). Install the pad hardware, including the wear plates and support brackets.
Install the caliper assembly and torque the two caliper bolts to 34 Nm (25 ft. lbs.). Make sure to replace the anti-squeal shims whenever you change out the pads. Also, make sure to install the brake pad shims in the correct position and direction to avoid any squeaks. Finally, install the front wheels and torque to 103 Nm (76 ft. lbs.).

Rear Brakes
Using a screwdriver, remove the caliper slide pins being careful not to damage. Inspect pins and bushing and add lithium grease before installation. The two rear caliper mounting bolts should be torqued to 62 Nm (46 ft. lbs.). Apply lithium grease to the sealing surface of 2 new dust boots. Install the caliper slide pins and torque to 43 Nm (32 ft. lbs.). Check for leaks all around and then install the rear wheels and torque to 103 Nm (76 ft. lbs.).
Some Toyota vehicles may exhibit a rattle or buzz type noise coming from the driver’s instrument panel area. The noise can be duplicated when lightly accelerating and then decelerating, or when depressing the brake pedal with the shift lever in Park and then releasing brake pedal. A new vacuum check-valve is available to reduce this noise.
Toyota recalled certain 2005-2006 Avalons due to brake fluid leaks that could lead to a change in brake pedal feel, and, over time, degradation in braking performance. In these cases, the master cylinder piston seal should be replaced with a redesigned seal.
2005-’12 Toyota Avalon Brake Specs
Front Brake Pad Thickness
• Standard thickness: 12.0 mm (0.472 in.)
• Minimum thickness: 1.0 mm (0.039 in.)
• Front brake disc thickness
• Standard thickness: 28.0 mm (1.102 in.)
• Minimum thickness: 26.0 mm (1.024 in.)
• Front brake disc runout
• Maximum disc runout: 0.05 mm (0.0020 in.)
Rear Brake Pad Thickness
• Standard thickness: 10.0 mm (0.394 in.)
• Minimum thickness: 1.0 mm (0.039 in.)
• Rear brake disc thickness
• Standard thickness: 12.0 mm (0.472 in.)
• Minimum thickness: 10.5 mm (0.413 in.)
• Rear brake disc runout
• Maximum disc runout: 0.15 mm (0.0059 in.)
Article courtesy Brake & Front End.