Cabin air filters prevent leaves, dirt, bugs and other debris from entering the HVAC system. This prevents the fan and control doors from jamming with debris that could cause fan noise or affect the operation of the heater, air conditioner and defroster. Keeping the HVAC system clean also helps reduce the growth of odor-causing mold and other microbes on the A/C evaporator.
Most drivers don’t even know cabin air filters exist, despite vehicle manufacturers trying to make them more accessible to the customer since 2010. The most common placement is in or behind the glove box, and some manufacturers place the filter in the cowl area. Most of these filter replacements don’t even require tools.
But there are still many late-model vehicles that aren’t easy to service, and they require a significant amount of disassembly to gain access to the filter. Some manufacturers even inserted the cabin air filter into the HVAC system.
Here are the 10 toughest jobs according to the editors of Underhood Service.
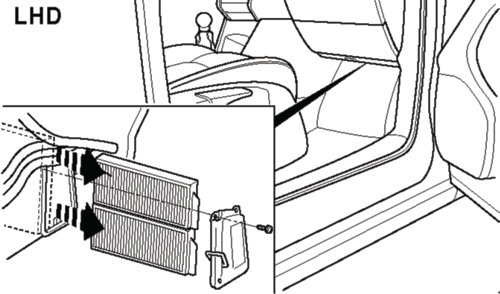
2007-’12 Nissan Altima (0.3-0.5 hours)
To replace the filter, you have to remove the glove box and kick panel. If the previous technician installed the filter backward, you won’t have the tab to pull the old filter out.
Removing the old filter from the small slot typically leaves the passenger floorboard covered in dust and debris. To install the new filter, you must scrunch it down, possibly causing damage.
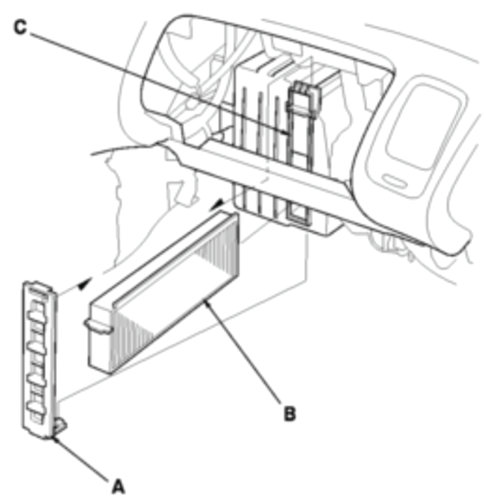
2003-’08 Honda Pilot (0.4-0.6 hours)
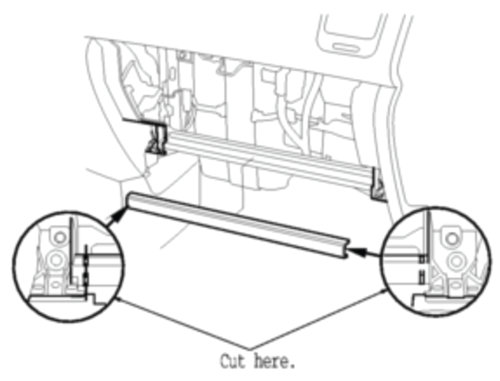
Getting at the cabin air filter on the Honda Pilot requires the removal of the glove box, kick panel and a metal brace.
If this is the first time the filter is being replaced, you will need to cut a plastic support brace first. What makes this job tougher is the glove box stops and screws, which are awkward to remove.
2000-’05 Grand Prix (0.2-0.3 hours)
The issue with replacing this filter is dealing with the weather stripping that doesn’t want to go back on the cowl panel and firewall. If it isn’t correctly reinstalled, it can result in a passenger compartment water leak.
Any pre-2008 Mercedes
No matter which model or chassis the vehicle has, replacing a cabin air filter on a pre-2008 Mercedes can be a chore ranging from 0.3 to 0.7 hours. Pre-2008, Mercedes consistently hid the filter deep inside the dash, but this started to change in later models.
1998-2003 Honda Accord/Acura TL+CL (0.5-0.6 hours)
Honda made one of the most tedious cabin air filter replacements out there. Techs need to remove seven screws, a metal bar and three access panels.
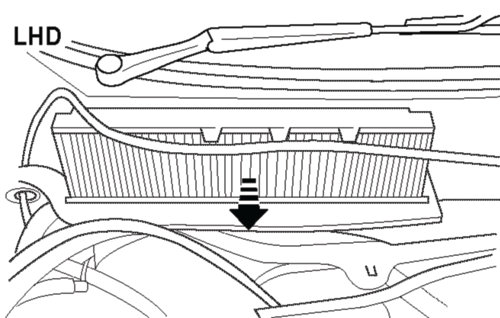
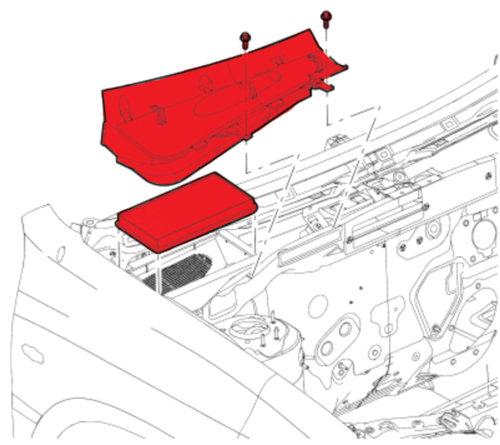
1999-2002 Nissan Quest/Mercury Villager (0.5-0.6 hours)
This minivan requires the removal of the wiper arms, the cowling, top housing and six fasteners. Not a quick job, but replacement can make a big difference in HVAC performance.
2002-’08 Jaguar X-Type (0.3-0.5 hours)
To replace this cabin air filter, you need to remove the passenger side wiper arm. Potential issues include stripping the arm or not putting the arm back in the right position. Access to the filter is restricted by the body structure below the windshield.
2001-’07 Ford Escape (0.1-0.2 hours)
The filter is not necessarily difficult to replace; the issue here is dealing with the plastic fasteners that have become brittle with time. Expect to replace at least one during the job.
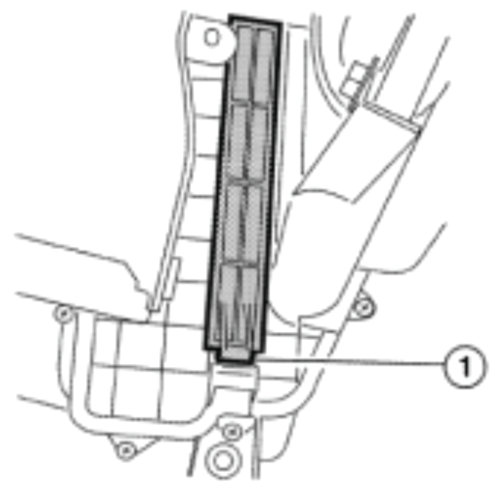
2010- Nissan Juke (0.5-0.7 hours)
This is one of the toughest cabin air filer replacements, requiring the removal of the glove box door, glove box, 10 screws and an electrical connector. Like the Altima, you have to scrunch down the filter to fit it inside the housing. Not a DIY job for the customer.
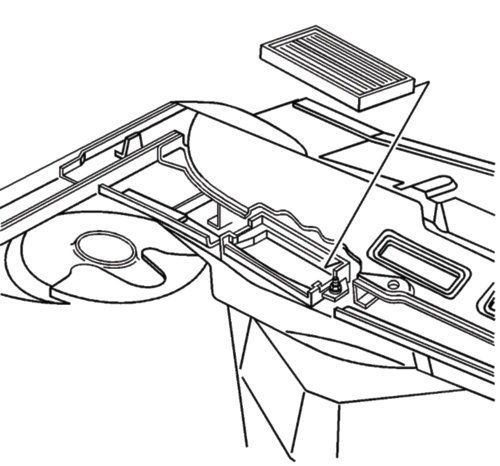
2003-’09 Mazda 3 (0.4-0.5 hours)
This system can feel like Mazda built the car around the cabin air filters. To get at the filters, you have to remove the glove compartment, kick panel and a panel that is below the glove box to access to the HVAC system. While most manufacturers use clips, Mazda uses four screws for the compartment cover. The system uses two filters that stack on top of each other. The top filter has a channel underneath it that the bottom filter slides into.