
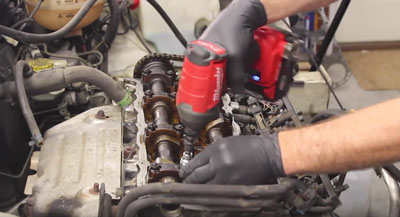
If you’re rebuilding an engine, odds are you will replace the camshaft or crankshafts. Today, we look at some must-follow tips for replacing a camshaft on just about any engine. During my VR6 engine rebuild on my ’98 GTI, I replaced the camshafts with a mild upgrade.
It is a dual overhead cam V6, so it may look a little different to some of you. I removed the old cam and lifters to replace them with a mild performance camshaft.
Tip #1: Follow Timing Marks and Tools
 If your car has tools to lock the engine in its timing position, it’s a really good idea to use them. In the case of this engine, it only has a tool to lock the camshaft and not the crankshaft.
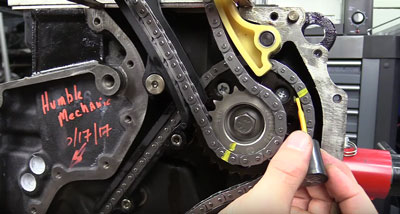
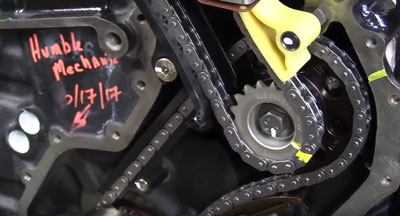
So, we’re going to follow the factory timing mark on the crankshaft to be sure that it’s in the proper position on the bottom end as well as on the top end. If you don’t have any factory marks or tools to lock the cam or crankshaft into place, go ahead and use something like a paint pen or nail polish to make your own marks. Be sure you don’t use something that washes off very easily like Wite-out. Trust me, I’ve made that mistake before.
I like to always put marks on the gears as well as on either the chain or the belt. If you’re replacing those components, you can transfer the marks to the new one. We can put marks on the head as well. I tend to over-mark my camshafts just to make 100% sure that everything goes back together properly. If you don’t want to leave those marks on when you’re done, you can simply wash them off with a little brake cleaner.
It’s always a good idea to put the engine at the top dead center of whatever cylinder the manufacturer recommends before just removing the camshafts. Unless you’re doing a full timing job, or something like in this case, removing the cylinder head, then it’s not as big of a deal. If you’re strictly replacing camshafts, you want it in the proper position. On reassembly, it’s a good idea to actually back the crankshaft back just a little bit so that none of the pistons are all the way at the top of the movement. When we bolt our camshafts down, we’re going to be opening some valves, and we want to make sure to avoid any damage to another cylinder in the engine.
Tip #2: Replace Related Parts
 The reason why we’re replacing the camshaft will really dictate what we do here. If we’re installing a new camshaft and our camshaft has replaceable bearings, it’s a good idea to replace those bearings along with the camshaft. This can include lifters as well.
Over time, a wear pattern forms on the lifters and the lobes, so it’s good practice to replace both and get fresh wear and surfaces on the camshaft lobes, as well as the lifters. This, however, can be extremely costly. So, if you have to reuse something, be sure on this assembly you’re marking the location of each component and it goes exactly where it came from. It’s generally recommended to replace things like bearings and lifters along with a camshaft.
Tip #3: Lubrication
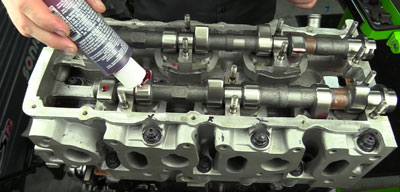 Before installation, be sure to lubricate the bearings, lobes and lifters. There are plenty of great assembly lubes out there. I’ve put a link in the YouTube description to the one that I’m using for this procedure.
Some manufacturers recommend that you soak the lifters in engine oil. Of course, this depends on the engine, and it’s for hydraulic lifters only. If you do soak the lifters, there is generally a wait time before starting the engine. Thankfully, in most cases, the wait time for first fire is actually much shorter than the time that it would take to assemble the engine anyway.
Tip #4: Work in Stages
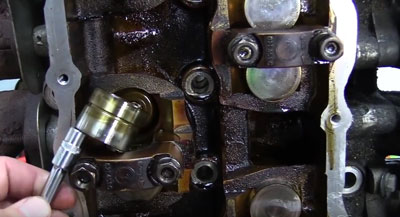
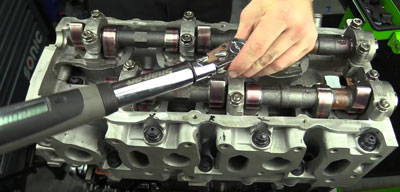
 Loosen and tighten everything slowly. When we’re disassembling, we’re typically working from the outside in. When we’re assembling, we’re working from the inside out.
I always like to loosen bolts or nuts a little bit at a time and then move to another one to slowly walk the camshaft up or down depending on installation or removal. This is also incredibly important when it comes down to torquing all of your components. Not following this can put an unneeded strain on a camshaft or other components.
Tip #5: Break-In
 Before you start your engine, be sure to rotate it around a couple of times at a minimum of two full rotations and then recheck your timing just to make sure everything went well.
Most camshaft manufacturers recommend starting the engine and immediately bringing it off idle to about 2,000 rpm for anywhere from 20 to 30 minutes. This will ensure proper oil pressure at the camshaft. Follow the manufacturer recommendation of the camshaft here to be sure that you break it in properly.
Bonus Tip #6: Torque
 A quick bonus, tip: Make sure you torque everything properly. This is not a job that you generally want to wing. Having the repair manual and following the proper steps are vital to longevity of your camshaft and for a proper repair.
To watch the video on this procedure, go to: youtube.com/watch?v=hVedsbU5RbM. If you have questions or comments, post them below the video or send Charles an email at [email protected].
Article courtesy TechShop.