Transmission Bellhousing Noise
MODELS
- 2015-2018 Fusion with 2.0L EcoBoost
- 2015-2018 Lincoln MKZ 2.0L EcoBoost
CONCERN
Some 2015-2018 Fusion/MKZ vehicles equipped with a 2.0L EcoBoost engine may exhibit a rattle noise from the transmission bellhousing area. This may be more noticeable at idle. This may be due to a flexplate crack around the mounting area. To correct the condition, follow the Service Procedure to replace the flexplate, transmission fluid pump and torque converter.
SERVICE PROCEDURE
1. Check for diagnostic trouble codes (DTCs) that may be causing the rattle noise. Are there any DTCs present that could be causing the rattle noise?
- Yes: This article does not apply. Refer to Workshop Manual (WSM), Section 100-04 for further diagnostics.
- No: Proceed to Step 2.
2. Inspect the vehicle for possible loose or broken components near the engine or transmission that could be causing the rattle noise. The use of chassis ears may aid in narrowing down the noise to the bellhousing area. Are there any loose or broken components?
- Yes: This article does not apply. Refer to WSM, Section 100-04 for further diagnostics.
- No: Proceed to Step 3.
3. Remove the starter motor. Refer to WSM, Section 303-06.
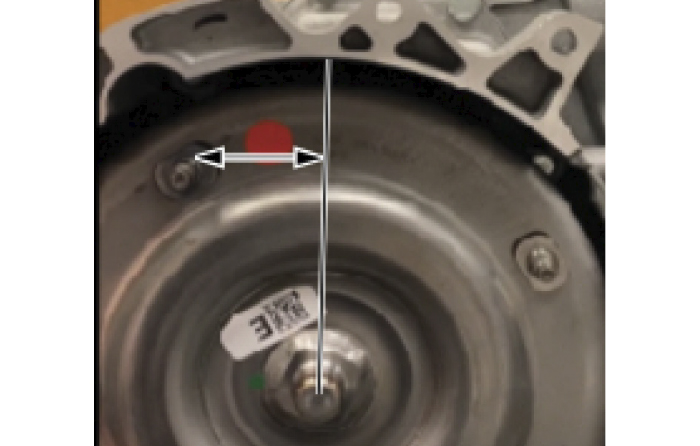
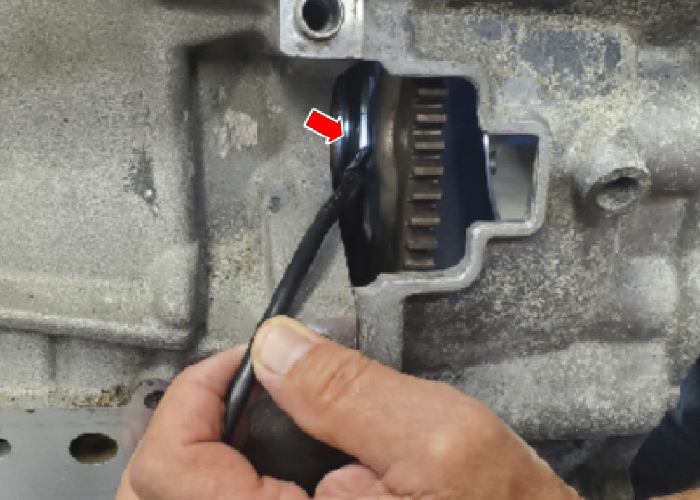
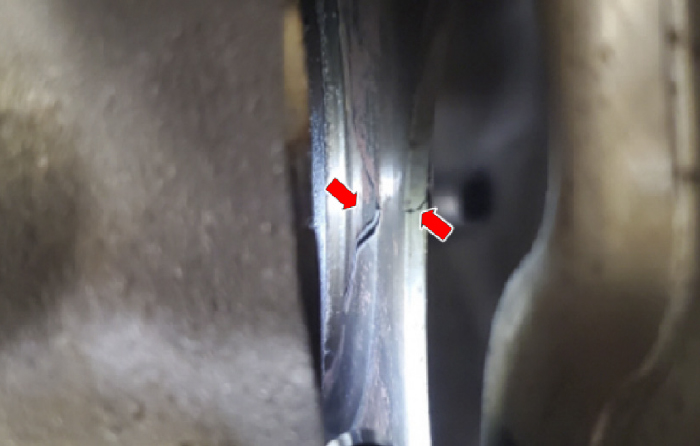
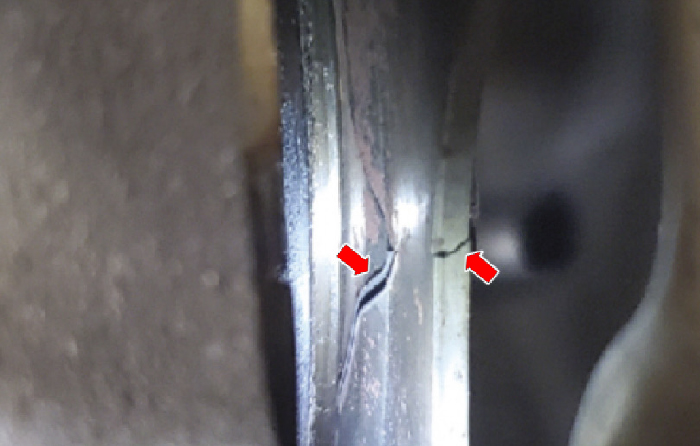
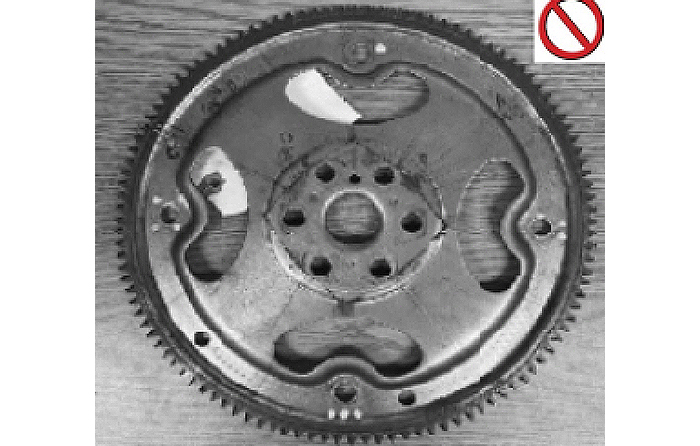
4. Placing a borescope between the engine block and flexplate, inspect the flexplate for cracks near the crankshaft. NOTE: It may be necessary to rotate the engine crank to find the cracks in the flexplate. Are there any cracks present in the flexplate? See Figures 1-4.
- Yes: proceed to Step 5.
- No: reinstall the starter motor. Refer to WSM, Section 303-06. For further diagnostics outside this article, refer to WSM, Section 100-04. Repair is complete.
5. Remove the transmission and inspect the engine block mounting face for the presence of dowel pins. If the dowel pins are not present in the engine block, inspect the transmission for the dowel pins. If the dowel pins are present in the transmission, remove the dowel pins and reinstall into the engine block prior to transmission installation.
Refer to WSM, Section 307-01A. If dowel pins are damaged or missing, replace as needed.
6. Remove and replace the flexplate. Refer to WSM, Section 303-01B.
7. Remove and discard the torque converter.
8. Remove the torque converter housing from the transmission case. Refer to WSM, Section 307-01A.
9. Remove the pump-to-torque converter housing bolts. Remove and discard the pump assembly and fluid filter.
Refer to WSM, Section 307-01A.
10. Replace the pump assembly and the fluid filter. Refer to WSM, Section 307-01A.
11. Remove and discard the clutch feed seals. Install the five new clutch feed seals. Refer to WSM, Section 307-01A.
12. Reassemble the transmission. Refer to WSM, Section 307-01A.
13. Install the new torque converter. Refer to WSM, Section 307-01A.
14. Apply Motorcraft Multi-Purpose Grease Spray or equivilent to the torque converter pilot hub prior to reassembly.
15. Inspect for damage on the crankshaft pilot bore. Is there damage? See Figure 5.
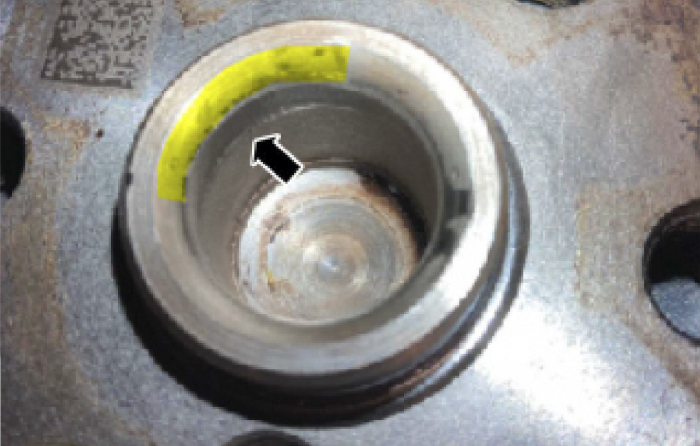
- Yes: Rotate the stud hole nearest to the 12 O’clock upright position so that the damaged part of the crankshaft pilot bore is at the 12 O’clock position. This is important to endure minimal imbalance (Figure 6).
- No: Proceed to Step 17.
NOTE: The flexplate can be installed in multiple positions.
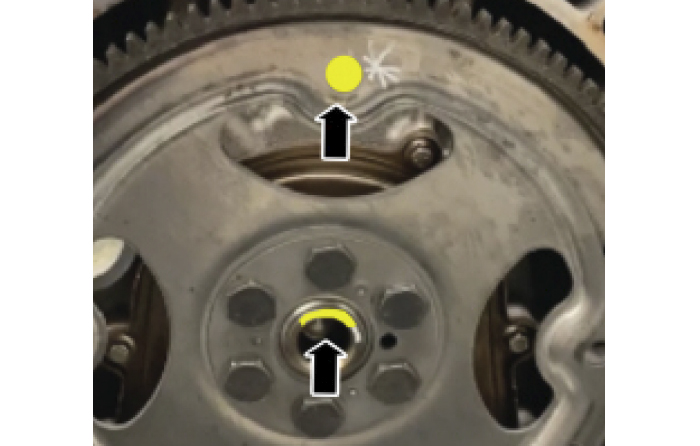
16. Locate the balance mark on the torque converter and rotate the stud nearest to the 12 O’clock position. The balance mark indicates the heavy side of the torque converter.
17. Install the transmission. Refer to WSM, Section 307-01A. When tightening the torque converter nuts, rotate the nearest stud the minimal amount to the window and install nut (Figure 7).