Question:
I’d like to buy a soldering iron. I’ve borrowed a couple different ones and I can’t seem to get them to work well. Can you help me find the one I need?
Answer:
This is a great question, especially since you are having trouble, and what is most important to touch on here is that any soldering equipment is only as good as your understanding of what makes a good solder joint, so I’ll start with that.
Whether you are soldering wires or components on a circuit board, the same rules apply:
- All surfaces must be clean and dry. If you’ve stripped a wire and there’s corrosion on it, remove all corrosion before soldering or you won’t get a good result.
- Make sure that the items you are soldering are securely held so they do not move during the soldering process. Movement during soldering causes a “cold” or “dry” solder joint.
- Make sure the soldering iron is completely heated up.
- Once heated up, tin the tip of the soldering iron by cleaning it with a damp sponge then applying a small amount of solder to it. Having the end of the tip tinned actually improves the heat transfer into the connection.
- Hold the tip of the soldering iron to the joint and be prepared to add solder immediately. Only use rosin core solder for electrical connections.
- Remove the soldering iron as soon as possible, immediately after the solder flows onto the joint. With proper preparation, most solder joints should only take two or three seconds to complete. If you leave the soldering iron on too long, the flux will all dissipate and the solder will oxidize, resulting in a “cold” or “dry” solder joint.
- Allow the solder to cool before any movement occurs in the connection or a “cold” or “dry” solder joint could occur.
It is also important to use a minimal amount of solder, which becomes automatic with proper technique. A good solder joint is easy to recognize. It will be shiny and smooth. If a solder joint is dull with a rough appearance, it is referred to as either “cold” or “dry,” which will cause higher than normal resistance in the circuit. Now on to the tools.
Soldering Guns
A traditional soldering iron or “gun” is electric and houses the transformer in the body of the tool. When you pull the trigger, current flow through the tip causes it to heat. These work well for industrial applications, larger cables and radiator repair, for example, but the drawback for small wire and circuit board repair is that they can transfer too much heat into surrounding areas, possibly causing damage. It is also difficult to regulate the temperature in the tip. Too much or not enough heat can cause “cold” or “dry” solder joints.
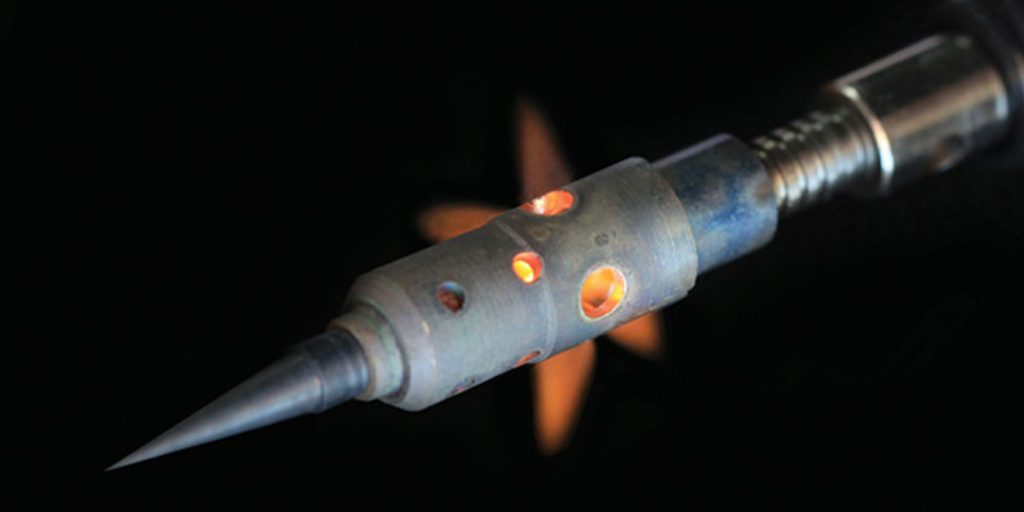
Butane Soldering Irons
The most popular and versatile for automotive use are butane soldering irons. They are small, lightweight, easily portable and don’t require electricity.
Not having to fight with a cord or hold in a button like you do on some traditional electronic soldering irons makes them easy and convenient to use and you can control the heat of the tip by adjusting the intensity of the flame. These generally come in kits with a sponge, a few different tips and a blow-mold case. I recommend making sure to get one with a hot air tip and deflector, which is useful for heat-shrink applications.
They are also available with different wattages. The difference with wattage is not how hot the tip gets, but how quickly it gets hot, how it maintains its heat during soldering and how quickly it recovers or reheats afterward. The larger the job, the more wattage it will take to maintain the temperature of the tip during soldering. If the tip cools off during soldering, you could end up with a “cold” or “dry” solder joint.
Soldering Stations
A soldering station has a separate transformer that remains on the bench with a cord that runs to the solder iron itself. The iron is generally a little smaller than a butane soldering iron and sometimes referred to as a soldering pen. The big advantage to these is that the temperature of the tip is automatically regulated and some of them have adjustable temperatures. Due to the regulation of the tip temperature, they are the best option for circuit board repairs.
A final note is that wiring holders and wire soldering clamps are a really nice accessory that can help make the job much easier. Thanks for jumping on the tool truck!
Courtesy of Tech Shop.