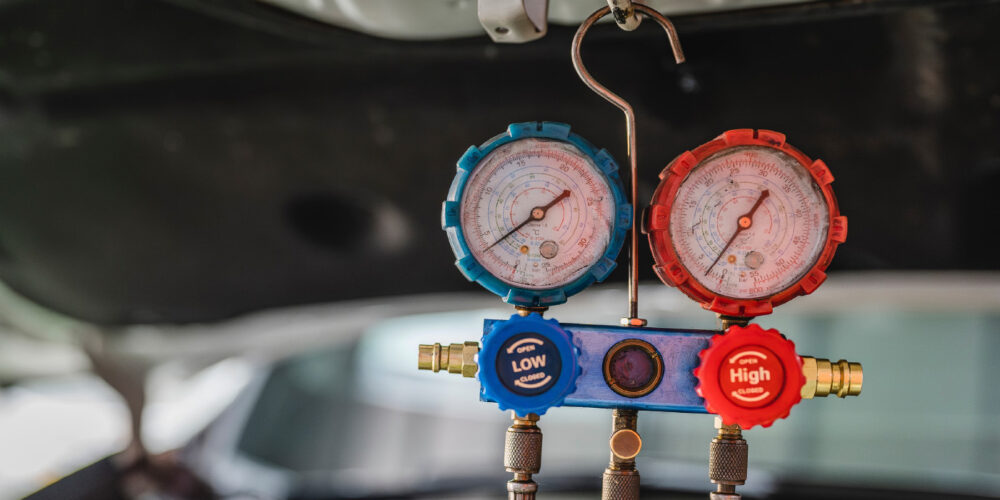
Using automotive A/C manifold gauges might seem intimidating at first. But, they are easy to master. Manifold gauges measure the pressures of the vehicle’s high and low ports. They also can be used to top off the refrigerant under specific conditions when a recycle and recovery machine is unavailable.
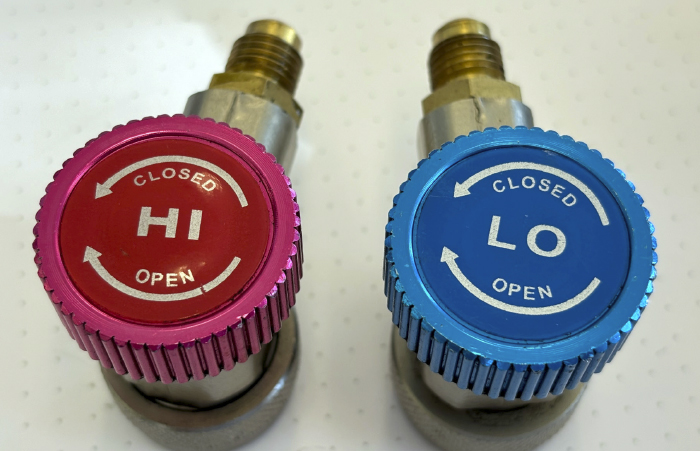
A basic gauge set will have three basic components. First, there are the quick disconnects that connect to the vehicle. Second, you have the hoses that connect the vehicle to the manifold. Next, you have the manifold. The manifold will have two valves that can be opened and closed. By opening the valves, you can add refrigerant and purge the hoses. Connected to the manifold, you have the gauges that display the high and low pressures. These gauges measure pressure in pressure per square inch and bars of atmosphere. The gauges also can show vacuum to test system integrity.
Getting Started
The first item to look for under the hood is the decal that identifies the refrigerant and quantity in the A/C system. One of the most challenging parts of the job with some vehicles is simply identifying the service ports. First, locate the low-pressure and high-pressure service ports on your vehicle’s A/C system. These are typically capped and marked. Most gauge sets will use a blue hose for the low-pressure side and a red one for the high-pressure side. The type of system will dictate the type of quick-disconnect ports. R-1234yf and R-134a have ports of different sizes to prevent cross-contamination.
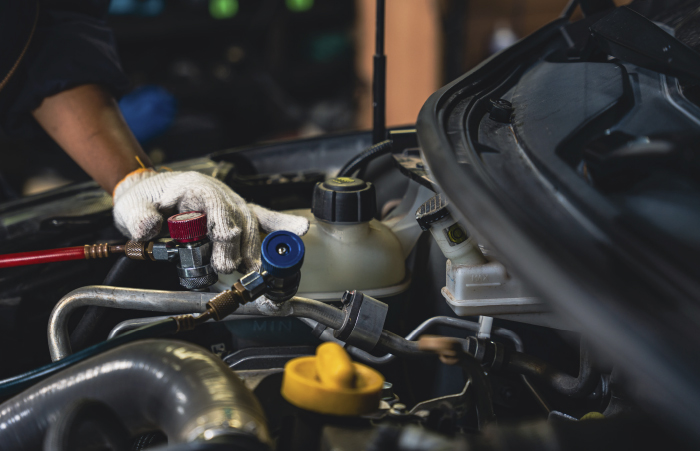
Connect the blue hose of the manifold gauge to the low-pressure service port. Connect the red hose to the high-pressure service port. The yellow hose is typically connected to a refrigerant bottle or vacuum pump, depending on the service being performed. R-1234yf cans require different tap fittings that are left-hand threaded, compared to R-134a, which are all right-hand threaded.
Two different sets of manifold gauges are recommended to service R-134a and R-1234yf. There are R-1234yf gauge sets available. The issue is not with how the gauge functions. It is about contamination. Often, the hoses can hold a small amount of refrigerant, if not purged.
Once everything is hooked up, you can observe the system’s static pressure. Before you start the vehicle, make a note of the ambient temperature inside the shop. Start the vehicle and turn on the A/C system. Set it to the maximum cooling setting. Check the service information for other information, for example if the recirculation button needs to be pressed.
Reading the Gauges
The first reading is static pressure. If the reading is zero on both the high and low sides, there is no refrigerant in the system. A reading below the specified pressure for the temperature may indicate an undercharged system. A reading above the static pressure can indicate an overcharged system.
With the vehicle running, the low-pressure gauge should show a pressure between 25 and 40 psi (pounds per square inch) when the A/C is operating correctly. The high side should show a pressure between 150 and 350 psi, depending on the ambient temperature. These numbers can change depending on the vehicle, type of refrigerant and other conditions. Check the service information. So, why do the numbers matter? When looking at the gauges, you see changes to the refrigerant, from a gas to a liquid and back again. The difference or lack of difference can reveal issues like a failing compressor, refrigerant levels and the ability of the system to transfer heat outside the vehicle.
Calibrating Your Gauges
A set of A/C manifold gauges will need to be calibrated. You do not have to send it out for repairs; you can do it yourself with a pocket screwdriver.
If you look at the clear plastic cover on the gauge, you will see a small access hole. This is where you will be making the adjustment. Start by ensuring that the gauges are at zero when there is no pressure. This can be performed by detaching the hose and opening the valve.
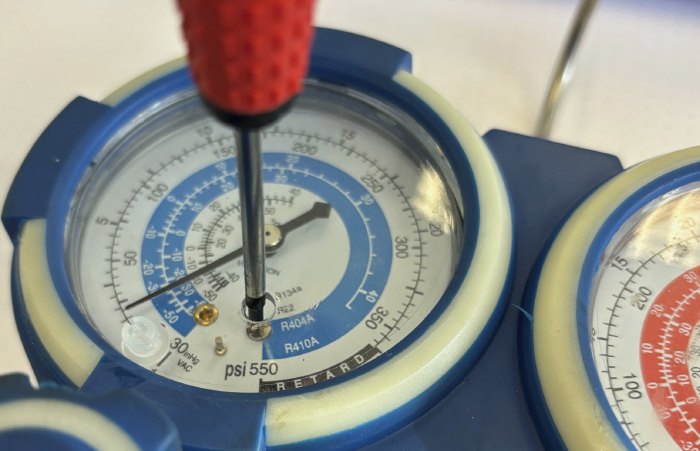
If the gauges do not read zero, they may need to be adjusted. This can typically be done by turning a screw behind the access hole on the gauge itself until the needle points to zero.
If you are concerned your gauge is inaccurate, you can connect your gauges to a source of known pressure, like an A/C refrigerant can or cylinder, and compare the reading between the low- and high-pressure gauges.
Maintenance
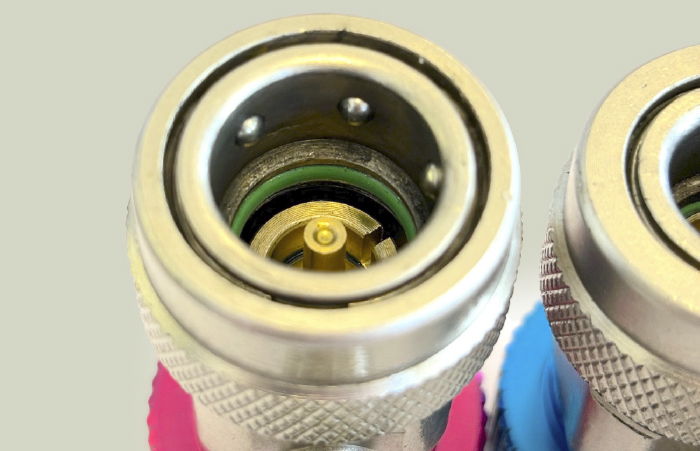
If you use your manifold gauges regularly, the small black gaskets in your hose connectors will periodically deteriorate. Also, the O-rings inside the quick disconnects might need replacement if they start to leak. Some manifold gauge sets will include spare gaskets and O-rings.
Hose hygiene is also essential. Compressor oil and moisture can build up in the lines. If the hose is long enough, there will be enough to contaminate the next vehicle if the oil and refrigerant are not compatible. You can use a solution of gas line anti-freeze that contains methanol to flush the lines.