The best tire in the world can’t fix a poor balance procedure and worn-out tooling. We have an opportunity to elevate the level of customer experience in our industry that takes nothing more than a few minutes of time and a commitment to using proper procedures and tools. And guess what? Your customer is more than willing to pay for it. Intrigued? Read on to learn what you can do in your shop to generate higher gross profit and lower comebacks.
The first step to a smooth ride has nothing to do with the balancer. It all starts with where you line up the painted dots on the sidewall, if present. No painted dots may necessitate lining the bar code sticker up with the valve stem but generally indicates that you are not trying to line up a specific point on the tire with the valve stem. Depending on the tire brand, some have a red and/or yellow dot on the sidewall.
More from Scott Blair: Charging Properly for Tire Service
Although not perfect in every case, we typically line up the red dot with the valve stem on steel wheels and the yellow dot with the valve stem on aluminum wheels. This is a guideline, not absolute. As an instructor for more than two decades, I am amazed when I demonstrate how the tire bead slides over the safety hump and then “pops,” which causes the tire to be essentially out-of-round or have a high spot in it. Look at the images below.
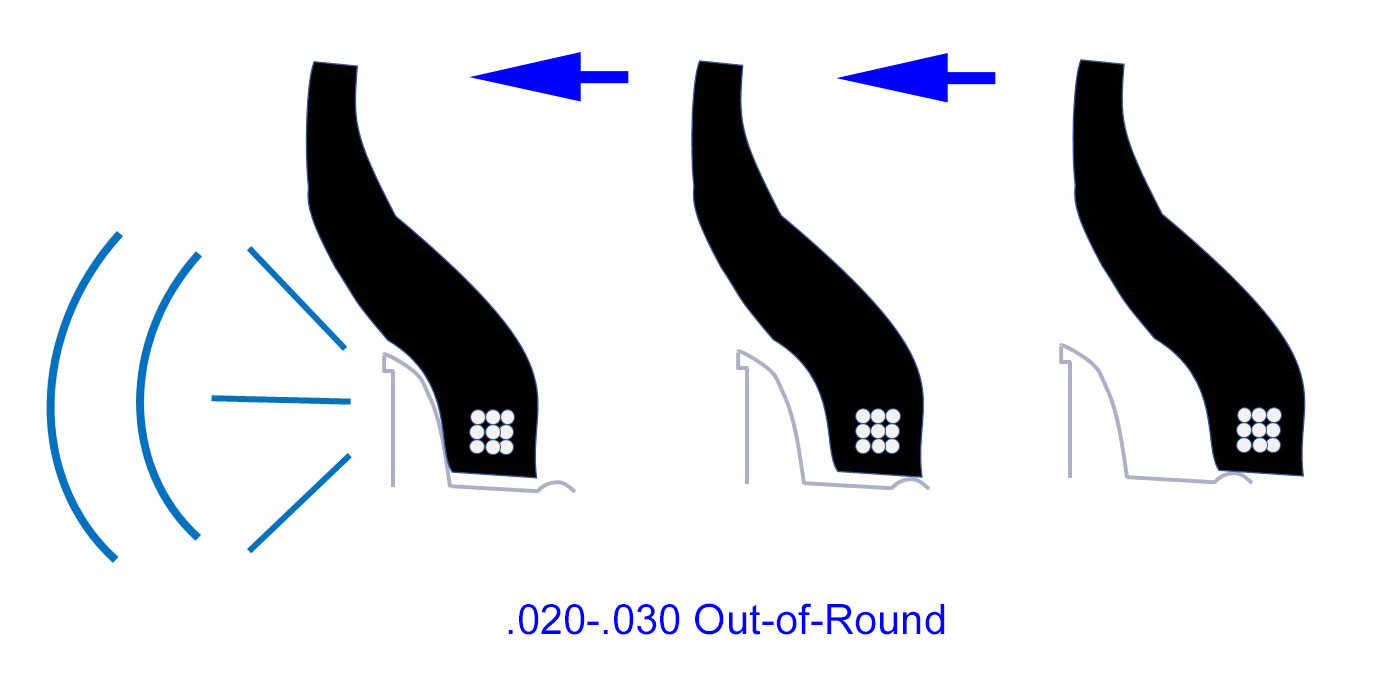
Notice that the tire bead catches on the safety hump, which causes us to increase pressure inside the tire to force the tire bead over it. This is why lube needs to be on the wheel and the tire to reduce this friction. Once the tire bead clears the top of the safety hump, it pops against the wheel flange. Right at this moment, the tire bead is sitting as much as 20 to 30 thousandths (.020-.030) of an inch above the wheel bead seat.
Instead of coring the valve and inflating to pressure, let all the air out to relax the tire bead. This is called concentricity.

This means that the tire bead is now resting on the wheel bead seat and the assembly is concentric or round with each other.
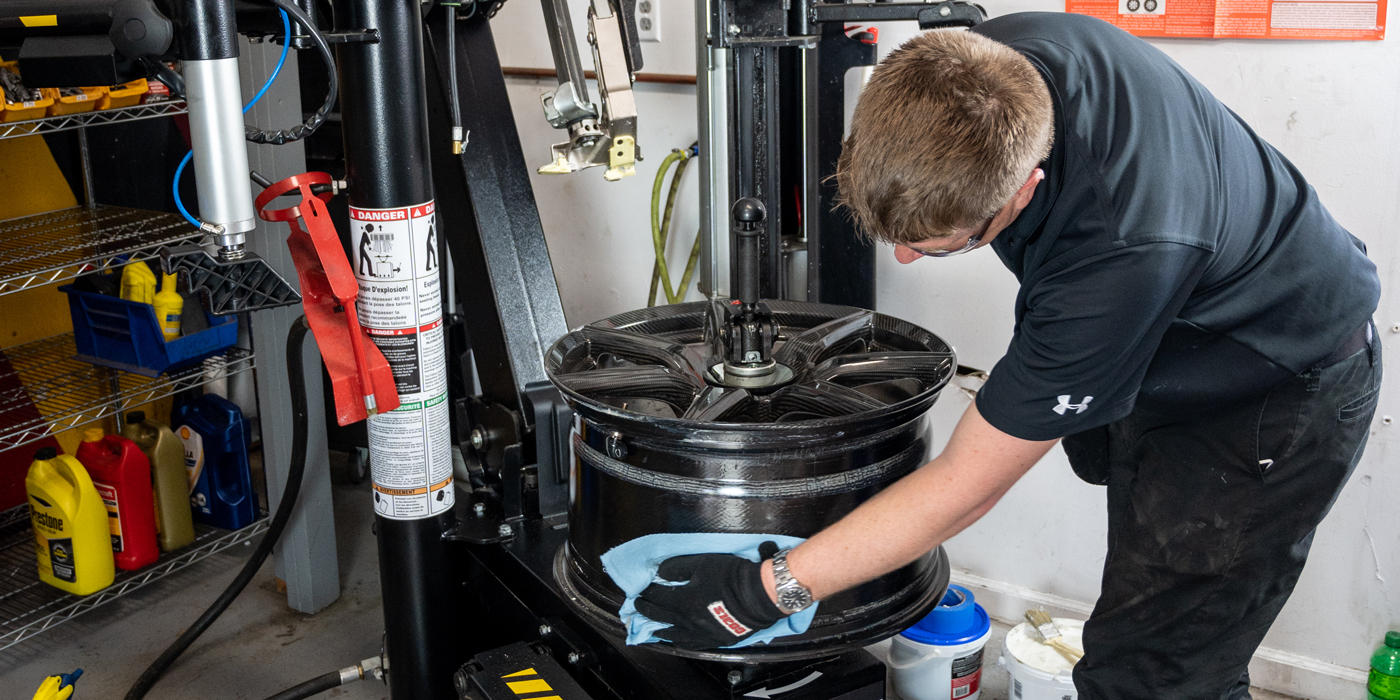
To maximize efficiency in your shop and gain 15 minutes per set of four tires installed, use an auto inflator device like this one.
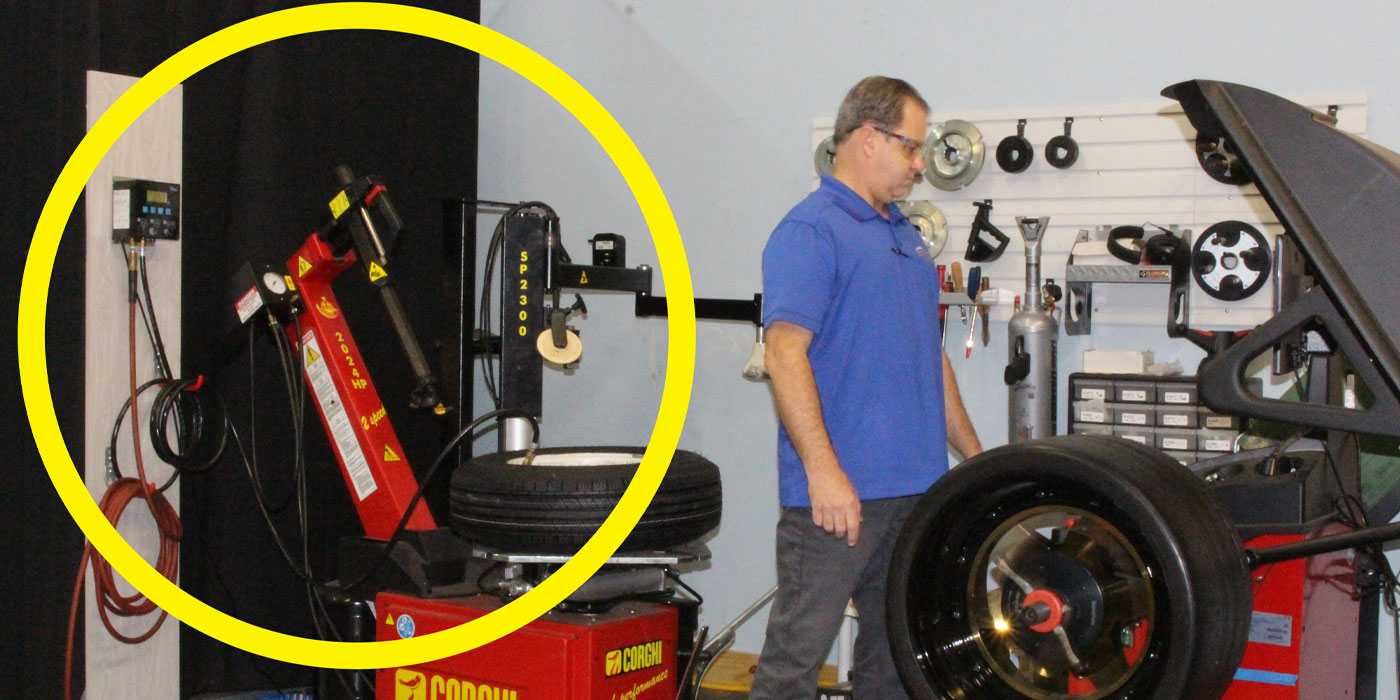
A $450 device will pay for itself in two to three weeks. Imagine getting one to two more jobs out each day and how that can directly impact your profitability using the same time and resources. Not just that, but the assembly will have less probability of causing a vibration that would wind up back in the shop being corrected for FREE if done incorrectly.
The ‘Why’ Behind Wheel Balancing
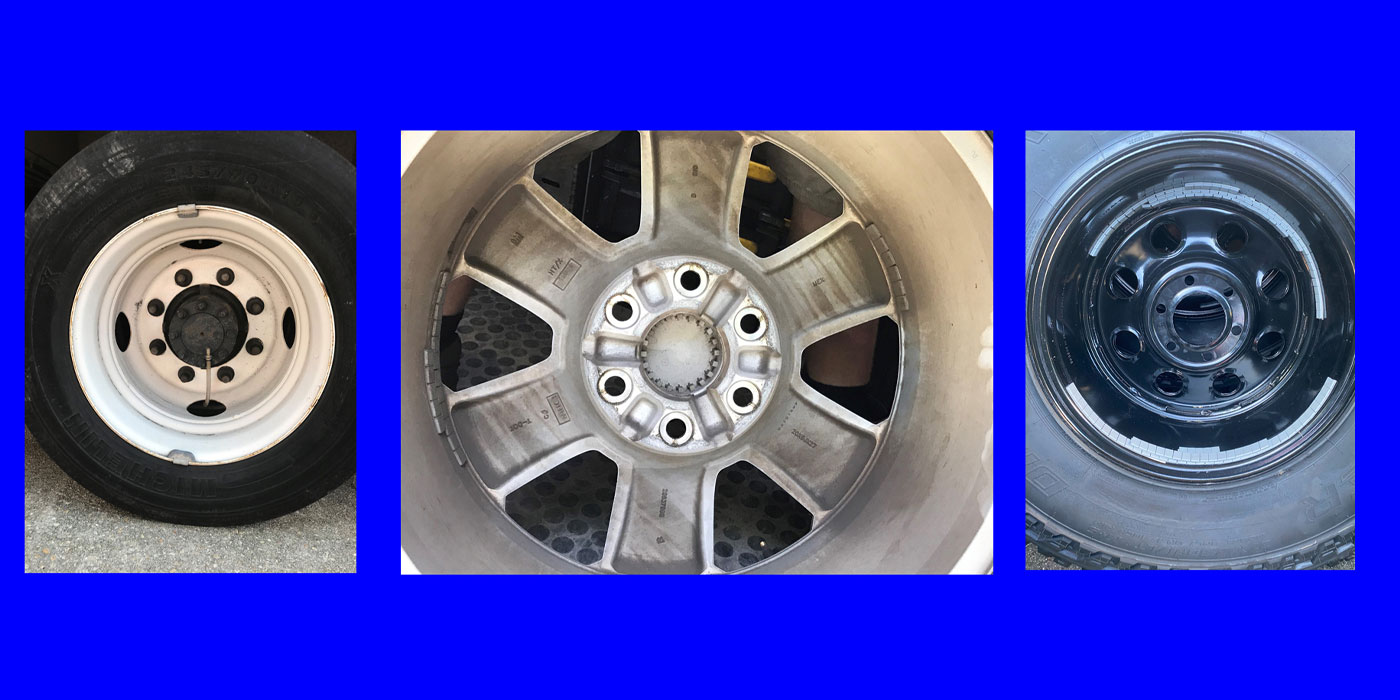
So, now we’re ready to toss the assembly on the balancer, right? Not so fast. Let’s talk about why we have to balance in the first place. The balancer doesn’t care what you have put on the shaft or if it is straight or not. It will balance an egg, but it isn’t going to ride very well. It feels an imbalance of mass and then indicates where to place counterweights to offset the imbalance. This seems rudimentary, but here are recent images of wheels that we have worked on.
A single amount of weight placed in one or two planes is all that is needed and usually no more than three to four ounces, depending on tire size.
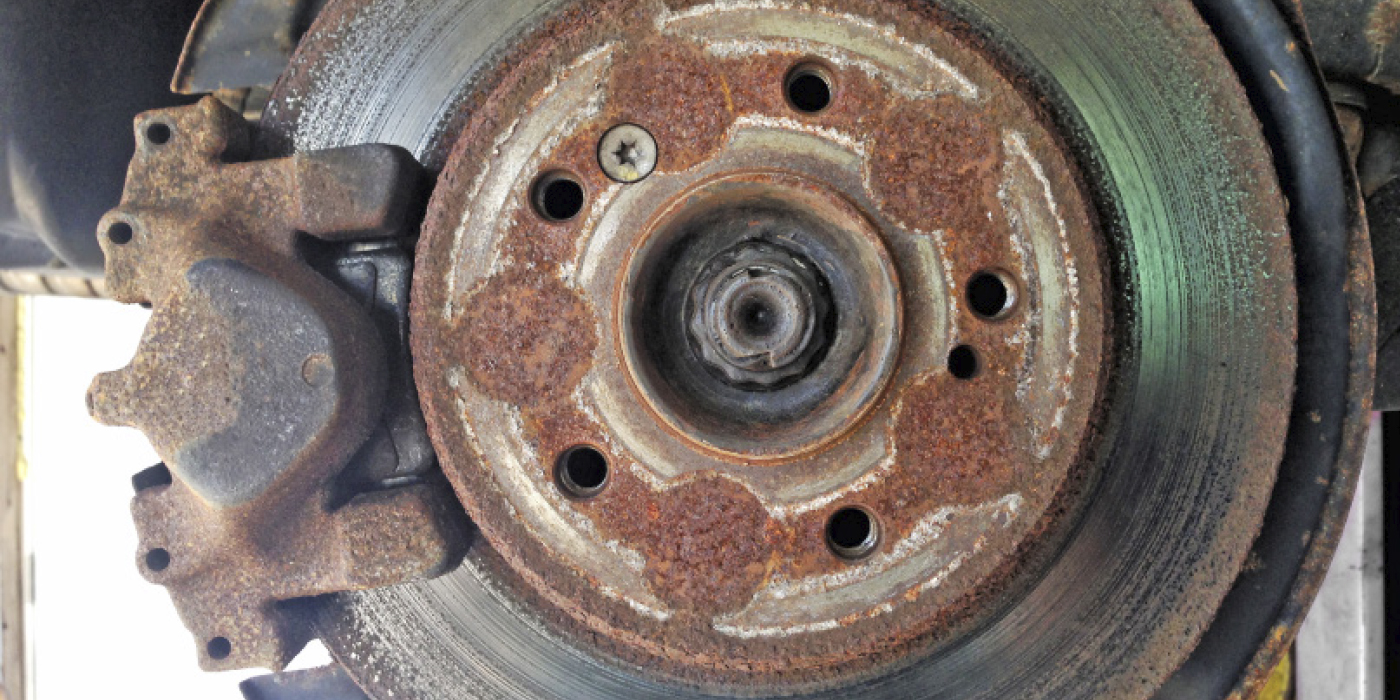
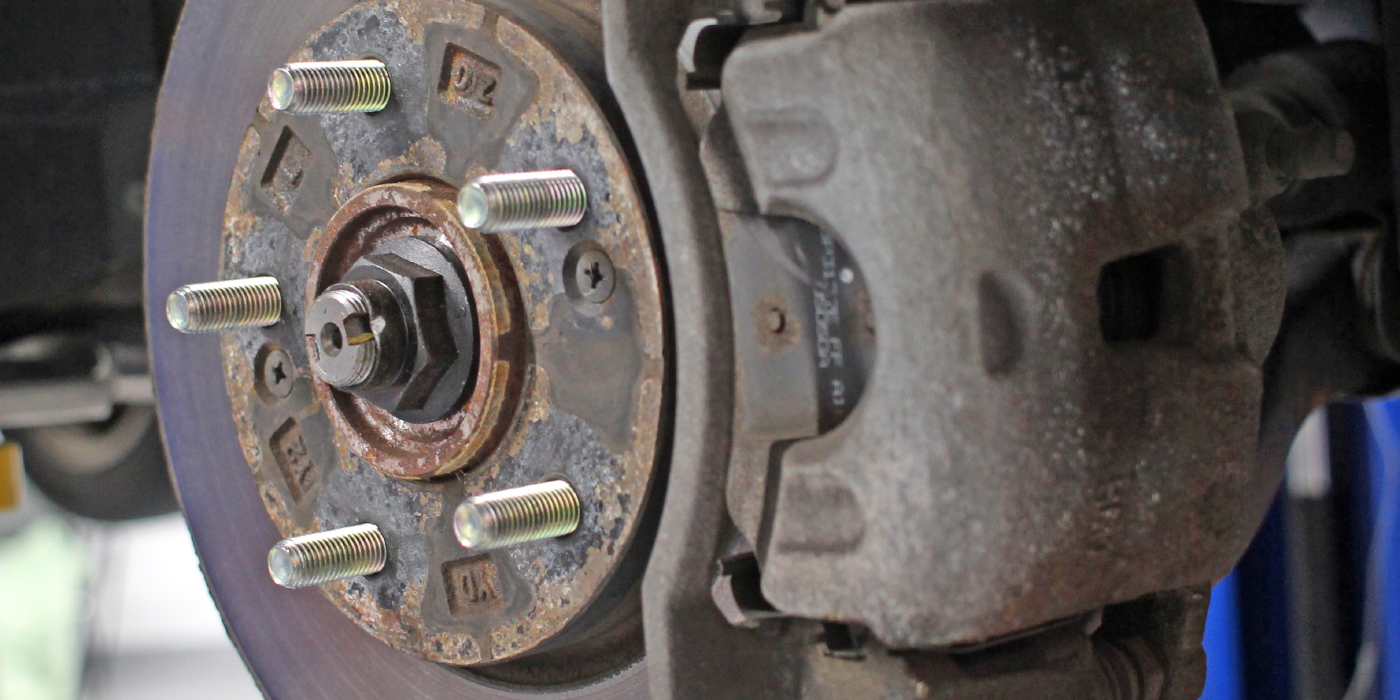
The next step doesn’t have anything to do with the balancer either. We need to clean the mounting pad and centerbore of the wheel. Painted rotors and drums like this one can cause the assembly to not be parallel to the backing plate on the balancer.
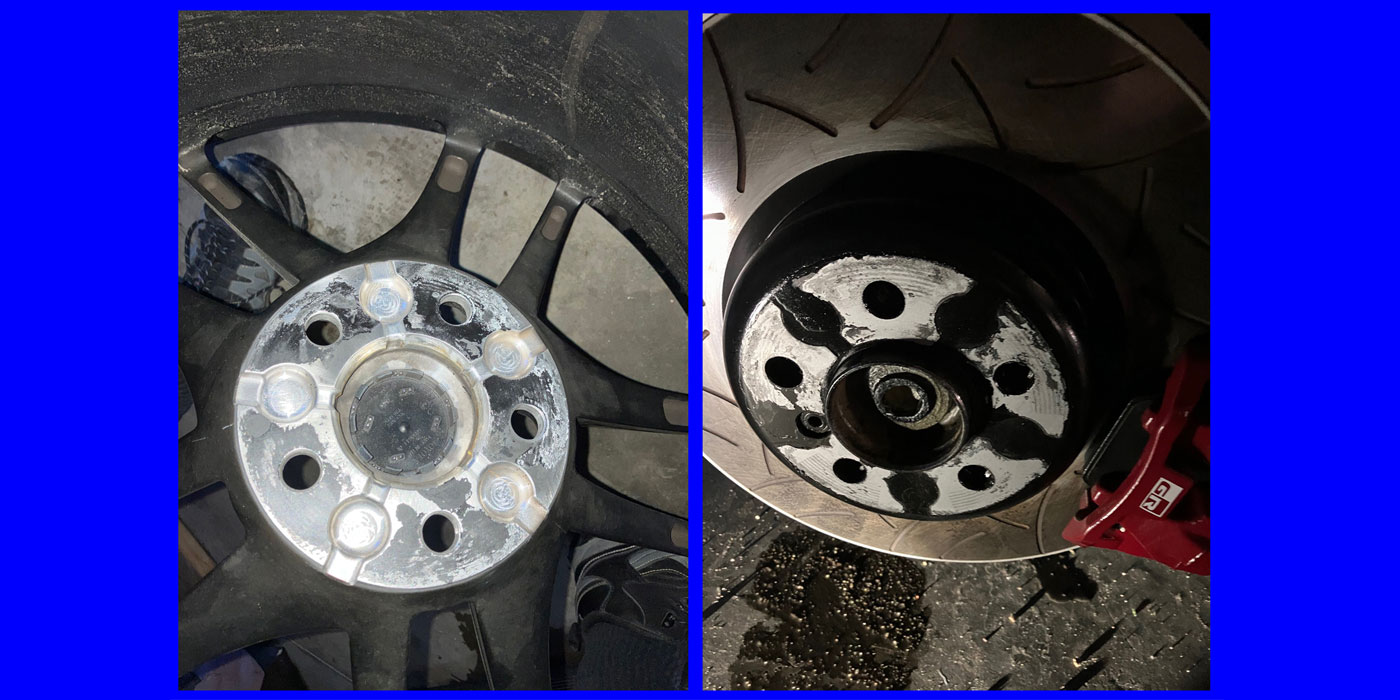
This is what we call stacked tolerances. Imagine that the paint that transferred to the wheel gets put back on the hub of the vehicle where paint is still present. You have double thickness of paint in one area and none in the other. This will generate a dynamic imbalance or wobble in the assembly.
Getting the Perfect Balance
Now to the actual balancing. We need to determine the following before assuming that all is well. Is the balancer calibrated? Has the tech experienced chasing weights or had several comebacks regarding poor ride quality after a tire service? Modern balancers are robust, so if you must calibrate every day, there may be a reason to ask “Why”? Is the balancer rocking back and forth on the floor? Are the centering tools or shaft worn enough that the assembly cannot be centered to get an accurate reading?
Test this by performing a centering check. Spin up the assembly and record the numbers. Take the assembly off and randomly put it back on the balancer. If the numbers change more than 0.25 to 0.50 oz., we need to know why. In my opinion, the basic cones that came with the balancer are the least precise balancing tool of all. A low taper collet or a machined hub plate that simulates the exact diameter of the vehicle’s hub is better.
Want to make an F250 with 35’s ride smooth? Use this plate with the matching pin plate to replicate the assembly on the balancer the way it rides on the vehicle.
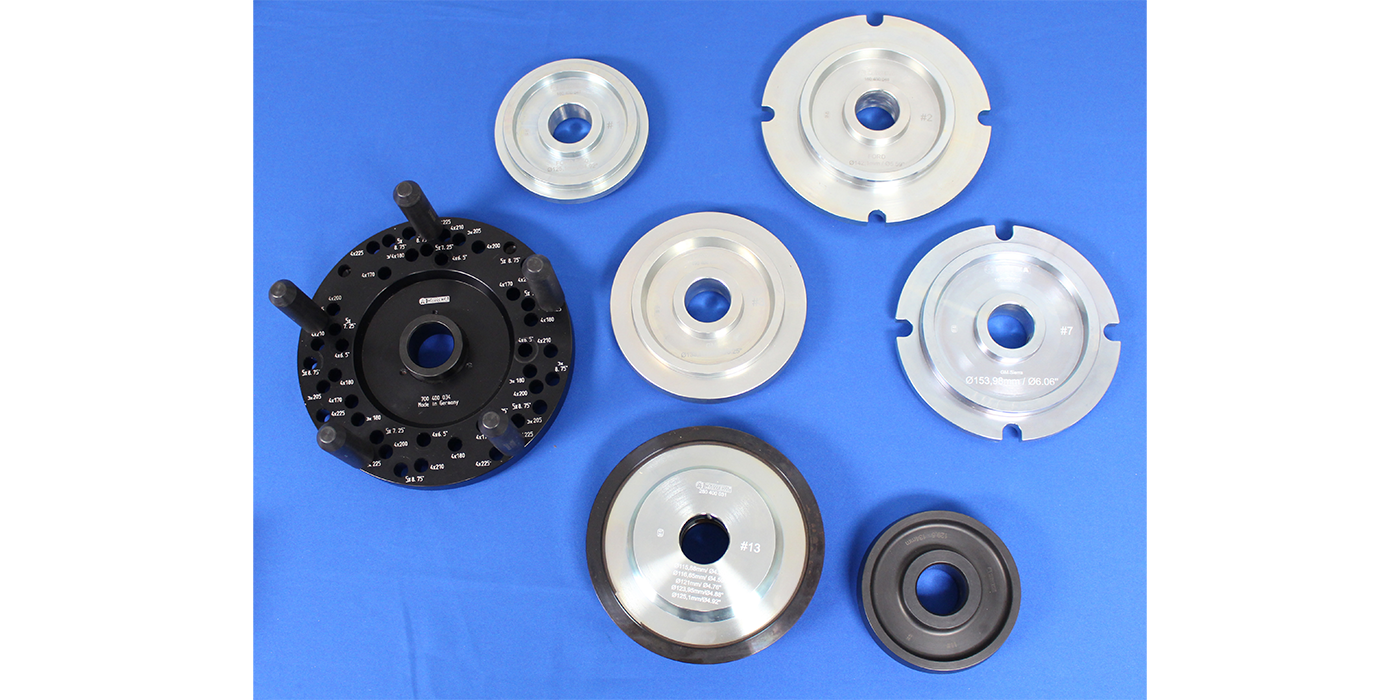
For the ultimate in precision for passenger cars and some half-ton trucks, opt for the expandable collets known as duo collets that expand like a tulip inside the centerbore for perfect centering every time when used with the adjustable pin plates.

Lastly, consider sub-harmonic vibration near your balancer. Are you located near a major highway? How about a train track like this one?

Bumping the balancer, uneven floor or vibration from a compressor can cause the balancer to indicate erroneous weight placement and amounts.
Obviously, these tools and the time to do the job right cost money. I would encourage you to examine your price matrix for providing this level of service. You might be surprised at how much you can increase profits by offering precision balancing.
Scott Blair is the Founder of T.R.A.C.K. Auto Training and 2U Mobile Solutions. He offers video, live interactive training & education (LITE) and onsite TIA certification classes. He can be reached at [email protected].