Engine Series
Better Get Your Head Examined
Addressing OHC Service and Repairs
Adapted from Larry Carley’s article in Underhood Service
Hot Head
The heads are the hottest part of an engine, so if the engine overheats the heads will swell and distort far more than the block. Aluminum is not as rigid as cast iron, nor can it withstand heat as well as cast iron. Because of this, head warpage, cracking, cam bore misalignment and cam failures are common problems with many OHC engines with aluminum cylinder heads.
When aluminum OHC heads get hot, they swell most in the middle and bulge upward and outward. This has the greatest effect on the alignment of the #2, #3 and #4 cam journals. Normal driving usually causes no problems, but if the engine overheats because of a coolant leak, stuck thermostat, dead cooling fan, hose failure, you-name-it, it may lead to head damage and/or a head gasket failure. Excessive heat can cause cam bore distortion, uneven wear, misalignment, possible wiping or even cam seizure and breakage. It can also cause valve stems to gall and bind, and may even cause the head to crack.
Keep ‘Em Well Lubed
Lubrication is another issue with OHC engines. Most late-model engines are factory-filled with lightweight 5W-30 oil, and with good reason. Thinner oil reduces friction and improves fuel economy. It also improves cold start lubrication. The OEMs typically recommend 5W-30 for most OHC engines because the oil remains thin enough during cold weather to reach the camshaft in a reasonable amount of time following a cold start. Thicker oils such as 10W-30 and 10W-40 take longer to reach the upper valvetrain after a cold start – and may increase the risk of cam damage when temperatures plunge below freezing.
Oil neglect is another factor that can shorten the life of any engine, OHC or pushrod. If the oil and filter are not changed regularly, viscosity breakdown, oxidation, acids and sludge can all hurt the oil’s ability to provide adequate lubrication throughout the engine. Any contaminants that end up in the crankcase can also have an adverse effect on lubrication. So if the cam bores show evidence of wiping, scoring or poor lubrication, the vehicle’s owner is probably guilty of maintenance neglect.
What To Look For
When you pull an OHC head off an engine because it has a leaky head gasket, low compression or a camshaft problem, a number of things should always be checked before the head goes back on the engine. The first is camshaft rotation. The camshaft should turn freely in the head once the followers have been removed or the valve springs compressed. If the cam does not turn freely or binds, remove the cam, place it on V-blocks and use a dial gauge to check it for straightness.
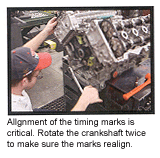 Measured runout at the center cam journal should be 0.001″ or less. If the cam is straight but won’t turn in the head, the head is probably warped and the cam bores are out of alignment. Measured runout at the center cam journal should be 0.001″ or less. If the cam is straight but won’t turn in the head, the head is probably warped and the cam bores are out of alignment.
Cam bore alignment can be checked with a straight edge. Look up the specifications for the engine and check with a feeler gauge. If the bores are off by more than a few thousandths, the head may need to be straightened and/or align bored or honed to correct the condition.
Cam bore wear should also be checked with a dial indicator. If wear exceeds specifications, repairs will be needed. Bore diameters should usually be within 0.001″ of specifications with no more than .001″ out-of-roundness.
Another check that should always be made is head flatness. Place a straight edge both lengthwise and sideways against the face of the head and use a feeler gauge to measure any gaps between the two. As a rule, out-of-flat should not exceed more than .002″ in any direction on aluminum OHC heads.
A visual inspection should also be made for hairline cracks in the combustion chambers, ports, face, sides and top of the head. Many cracks can be very difficult to see, and may not be visible at all unless you use penetrating dye.
Don’t put all your faith in penetrating dye and your eyeballs for finding cracks because some leaks are invisible and will not show up unless the head is pressure tested. Pressure testing requires sealing up all the water openings in the head and applying regulated air (15 to 30 psi) to the cooling jackets. Leaks are revealed by submerging the head in a tank of water or spraying it with soapy water. Bubbles means the head is leaking and needs to be fixed.
Replacement Recommendations
In situations where the original head is not repairable or would be too expensive to fix, replacing it is the only alternative. Used heads are always an option, but they should be an option of last resort. Why? Because a used head may not be in much better condition than the one you just pulled off your customer’s engine. Hidden cracks, porosity leaks, warpage, cam bore misalignment, worn valve guides and seats, weak valve springs, etc., can lead to problems and expensive comebacks. A “good” head may turn out to be not-so-good – and you’ll be the one who eats the labor on the job. So why take chances? It’s safer to buy a new head.
Brand new OEM cylinder heads can be very expensive, so be sure to check the availability of new aftermarket heads before you buy anything. Aftermarket heads are available from a variety of sources, and typically cost a lot less than new OEM heads. In some instances, an aftermarket head may also be better than an OEM head if it has a thicker casting or other design improvements that make it less vulnerable to cracking or other problems.
Aftermarket heads are available bare (usually with new seats and guides installed), or fully assembled with valves and springs ready to install.
Crack Repair
Many cracks and porosity leaks can be repaired by TIG welding or pinning the head. TIG welding is best done by a machine shop that has the proper equipment and expertise because if not done correctly it can lead to further cracking and more problems. All cracks must be identified and completely ground out prior to welding. Care must be used not to contaminate the damaged area while it is being welded, and the head should be preheated and slow cooled to minimize stresses that could cause additional cracking.
Some cracks, though, may not be accessible (such as those deep inside a port), or the head may have too many cracks to be worth fixing. Welding is a time-consuming job that adds up quickly. So for common heads, it’s often cheaper to replace the head than to attempt to repair it.
Small porosity leaks in aluminum heads can be easily drilled and pinned like cast iron heads (using aluminum pins, of course).
Bad Bores
In cases where the cam bores are chewed up, worn, out of round or out of alignment, the head will have to be align bored or honed to restore the bores – or machined to accept cam bearing inserts if the head does not have cam bearings (most do not).
Most heads can be machined in 25 minutes or less. With bearing shells, each half of the bearing has a locating tang so notches have to be cut in the head and cap. These can be cut with a file, die cutter or special tool. On heads that do not have removable caps, the cam bores can usually be machined to accept full round bearing inserts that are pressed into place.
Bearing shells and full circle inserts are available for a wide variety of OHC engines and usually cost less than machining the head to accept a new camshaft with oversized journals and replacing the cam.
On OHC heads that have removable cam journal caps, worn bores can usually be restored by grinding down the faces of the caps and machining the bores back to standard size.
In cases where the cam bores are too badly worn or damaged to be align bored or honed, and bearing inserts are not available, welding may be used to build up the metal so the bores can be machined back to size to accept the original cam. The other option is to replace the head.
 What about align boring the head yourself? Portable drill-powered OHC align boring bars are available for under $1,000, and are fairly simple to use. If you do enough engine repair work, such an investment might make sense. But OHC heads also need valve and seat work, and refacing, too. So unless you want to do everything yourself , you’re probably better off working with a machine shop or local rebuilder who already has the equipment and expertise. What about align boring the head yourself? Portable drill-powered OHC align boring bars are available for under $1,000, and are fairly simple to use. If you do enough engine repair work, such an investment might make sense. But OHC heads also need valve and seat work, and refacing, too. So unless you want to do everything yourself , you’re probably better off working with a machine shop or local rebuilder who already has the equipment and expertise.
 Warped Heads & Resurfacing Warped Heads & Resurfacing
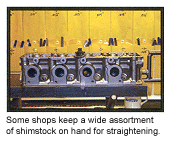
If a head is warped (out-of-flat), it should be straightened before any machine work is done. Some machine shops will just mill a head to make it flat again. But, for several reasons, milling OHC heads isn’t like milling pushrod heads. Many OHC heads are so thin the casting doesn’t have enough metal to allow much machining. Milling also reduces the height of the camshaft, which in turn retards cam timing. It also reduces the volume of the combustion chambers, which raises compression and increases the risk of detonation and preignition. Straightening will usually reduce and sometimes even eliminate the need to mill the head. It may also restore cam bore alignment to the point where align boring or honing is no longer necessary. Straightening is done by shimming and bolting the head to a heavy iron plate, then placing the head and plate in an oven at 450 to 500 for three to six hours. The head is then slow cooled to relax and eliminate residual stresses.
When an aluminum OHC head is resurfaced, it is very important that the surface finish be within specifications for the type of head gasket that will be used on the engine. Multi-Layer Steel (MLS) head gaskets require a very smooth, almost polished finish to seal properly. This, in turn, requires careful milling of the head so the surface is smooth enough and flat enough to seal the MLS head gasket.
Valve, Guide & Seat Repairs
One thing all aluminum OHC heads have in common are replaceable valve guides and seats. Seats may be loose, cracked or too badly worn to be refaced. Guides may also be loose or worn. A heavy buildup of carbon deposits on the back of a valve is a good indication that the guide and/or valve seal have been passing too much oil.
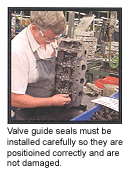 Many late-model OHC heads have powder metal or cast iron valve guides. Others have bronze guides. Guide wear can be checked after the head has been disassembled by inserting a valve stem into each guide and feeling how much the valve wiggles. If a guide feels worn, valve side play can be measured with a dial indicator or you can insert a split-ball gauge micrometer into the guide to measure the inside diameter of the hole. Guides typically show the most wear at the ends and the least wear in the middle. Many late-model OHC heads have powder metal or cast iron valve guides. Others have bronze guides. Guide wear can be checked after the head has been disassembled by inserting a valve stem into each guide and feeling how much the valve wiggles. If a guide feels worn, valve side play can be measured with a dial indicator or you can insert a split-ball gauge micrometer into the guide to measure the inside diameter of the hole. Guides typically show the most wear at the ends and the least wear in the middle.
If the guides are worn, the most common repair is to drive out the old guides and install new guides. But guides can also be reamed to oversize to accept new valves with oversized stems, or reamed and sleeved with guide liners to restore clearances. Some guide wear is normal in high-mileage engines, but if you find severe wear it may indicate inadequate lubrication, improper valve geometry or wrong valve stem-to-guide clearance (too much or too little).
Inadequate lubrication may be caused by oil starvation in the upper valve train due to low oil pressure, obstructed oil passages, push rods, etc. Inadequate guide lubrication can also be caused by using the wrong type of valve seal. Insufficient lubrication results in stem scuffing, rapid stem and guide wear, possible valve sticking and, ultimately, valve failure due to poor seating and overheating.
Geometry problems include the wrong installed valve height (valve seat sunk too far into the head), off-square springs, or worn or misaligned cam followers that push the valves sideways every time they open. This type of wear is often seen in OHC engines where the cam lobes sit directly atop the valves and push down on the valve stems.
Following the suggestions in this article and the “Head Installation Tips” on page 46 should keep you “ahead” in the OHC head repair business and reduce comebacks that are often blamed on “installer error.” | 