You should strive to be perfect in what we do, no matter how long we’ve been doing it. And repaneling a door and ending up with plastic filler around the edge of the panel is more of a symptom of something gone wrong than a solution to a problem. I always strive to replace a part without creating a repaired area. Doing this more closely returns the vehicle to its pre-accident condition and generally reduces exposure for failure – while speeding up the repair process.
You may be saying to yourself, Hey, that sounds like a better repair in less time. That’s right! Better and faster!
Of course, those two concepts don’t usually go together, but in this case they do. Still don’t believe me? (I’m even talking to the instructors here, too). Well, let me take you through the step-by-step process.
First Stop, the Tool Cage
Here are the tools I use. These tools, used with care and skill, allow you to skin a door without damaging the new skin, negating the use of filler. Can other tools be used? Probably, but I started doing collision repair work in 1963, so I’ve tried most other methods and tools and have arrived at this selection – having achieved my greatest level of success with these tools.
The 9-inch disc sander is a powerful tool that makes it easy to remove the panel. The torque of this sander is tremendous. The heat generated as you grind away the hem softens the factory-applied sealers and glues, so you can easily remove the hem strip by simply pulling on the strip by hand (no chiseling, which would damage the door flange). Use a 24-grit disc with a full backing plate. Little air sanders don’t have the torque necessary to generate the heat that makes removal quick and easy.
The spot welder with the moveable skin-side contact anvil works excellently when spot welding the hem flange. The spot welder provides assurance without damaging the outer skin or inner hem flange. It also provides a factory-like appearance.
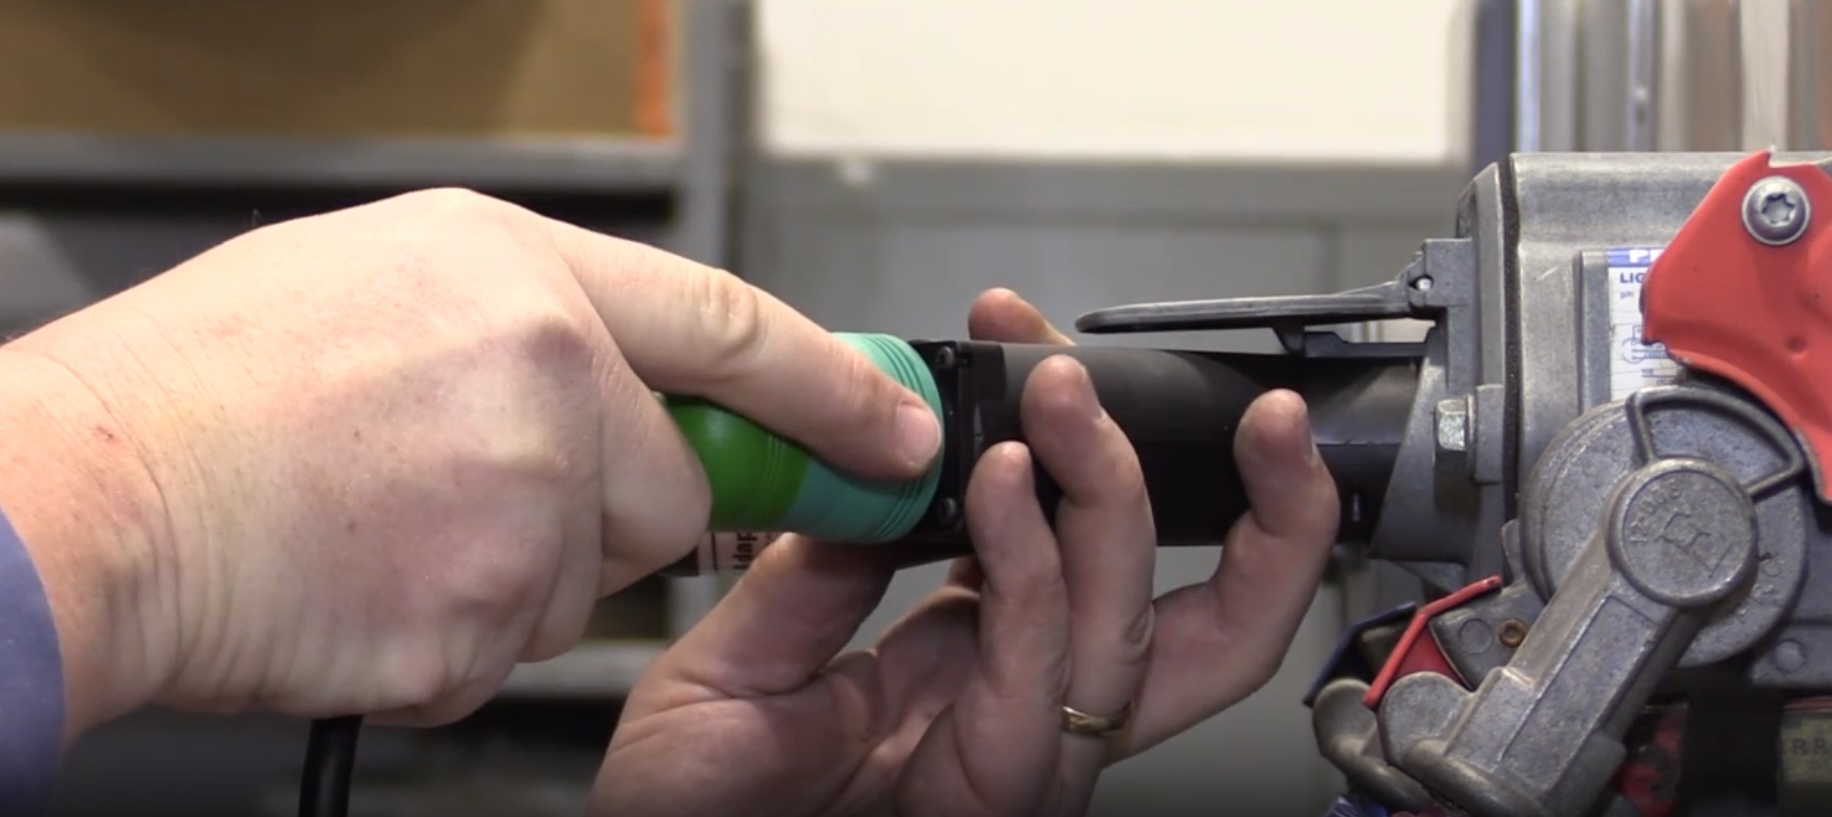
Hem flanging pliers are great for areas that are too tight for a hammer and backup dolly. They provide a tight hem without damaging door skins.
The shot loaded dolly bag, in my mind, is a necessity. I’ve used wooden dollies also, but wood is light and springs back onto the door skin. Steel dollies are too rigid and will cause some damage, even in skilled hands. If you don’t want to end up repairing hem flange damage, don’t damage the flange edge. Use a shot loaded dolly bag – a leather bag filled with lead shot. This dolly is heavy, but conforms to the shape of the outer door skin, whatever that shape is. It works beautifully.
The door paneling hammer is a specialty hammer, one made specifically for paneling doors. This hammer has an elongated head on each end. One end of the hammer head is straight, and the other is angled. The hammer faces are only about 5/8-inches wide and 1-1/4 inches long. I’ve used round face paneling hammers, and they don’t work as well. In addition, I’ve tried any number of power paneling tools, without the level of precision and success I want to achieve. This particular door skin took me 11 minutes to hem with the hammer. I did the uppermost hem with the hemming pliers, but did the two vertical hems and the bottom horizontal flange with the paneling hammer and shot loaded dolly in 11 minutes, without any damage to the skin.
The 6-inch air sander is actually a DA locked-on grind. I use an 80-grit disc. And because it’s a DA that uses a weight to make it oscillate in the free mode, when you lock it into the grind mode, the weight provides additional torque that’s good for metal finishing the skin side.
The Process
Step 1: Always rough out the door to achieve proper edge alignment prior to its removal. In this case, we had a four-door Toyota Prius that needed extensive repair to the front door and quarter panel. We repaired and primed the adjacent panels prior to removal of the door. We removed the glass, molding trim and wiring harness and marked the locations of the wiring harness clips on the inner door frame.
The marking shown above – i-o [inside-out] Harn clip white – helps me greatly when I reassemble. I’m very careful to properly release the harness clips to avoid breaking them. You may have to cut a hole in the outer skin to properly release the harness clips, which aren’t easily accessible.
I can’t overemphasize proper routing of the wiring harness. This speeds up reassembly and assures proper operation of the window regulators, door latches, power door lock actuators and any other hardware. Taking a little time here on the front end of the job will give you peace of mind and speed up the back end of the job.
Step 2: Mark door hinges to door frame location for reassembly, and then remove the door and place it on a blanket covered rack to prevent damage to door frame paint or new panel primer. Remember the physician’s oath: First, Do No Harm.
Step 3: Grind the hem edge with the 9-inch sander, with a 24-grit disc to remove the skin, as shown here.
Let the sander build up some heat by moving slowly. The heat will help to release any sealer or adhesive holding the skin to the frame. Use pressure and attempt to do this in a single pass.
Carefully cut the skin weld to the upper door glass frame as shown here. This part is painted black. The weld joint is covered by the upper reveal molding. If you cut and weld this joint carefully, you can avoid having to paint this door glass upper frame black.
Step 4: After cutting the frame free, use a torch on the outer skin to release the anti-flutter foam on the door beam.
Next, use a hammer and chisel blade putty knife to break the seal between door skin and door frame, as shown below.
Now remove the door skin.
Inspect the inner door panel for sound deadener and anti-vibration material and fit the new door skin.
Step 5: Remove the residual hem metal strip, using care not to damage the paint on the door frame. You can minimize your painting work by being careful. Now remove the old sealer around the inside of the door frame as shown below.
Use a chisel blade putty knife and scrape off the seam sealer. Don’t sand this edge; preserve existing primers and galvanized coating to prevent future corrosion.
Step 6: Apply flexible foam, as shown here, to the door beams.
Don’t use bonding adhesive. This can cause dents when the door flexes.
Now apply a coat of seam sealer to outer edge of door frame.
NOTE: This is a Toyota-recommended procedure. If the recommended procedure was adhesive bonding, this is when you’d apply adhesive bonding material.
Now fit the door skin.
The photo below demonstrates the use of the shot-loaded dolly bag and the door paneling hammer.
Different power tools have been invented to do this operation, and most of them fit one shape or another very well but not more than one shape. Once they get into reverse curves or door bottom panels that don’t hem over at a full 180 degrees to the door frame, they can damage the skin.
I paneled this door on three sides in 11 minutes and had no damage that required any filling thus, giving the customer a new, un-repaired part.
Use hemming flange pliers to access the top reveal molding reinforcement flange. Very tight access requires the use of this tool. The flange must be tight for the proper fit of the reveal molding, which attaches to this area.
Step 7: I always test fit every door skin, as pictured here.
This will require reinstalling the door and adjusting the flange height and door to the adjacent panel gap width. Once the gaps are adjusted and fit to final approval, you can then weld the door skin to the upper window frame. Use protective tape on the black painted upper window frame to protect the finish. Now remove the door and replace it on a blanket-covered table.
Step 8: Spot weld the upper reinforcement and finish all welding operations now. On this job, I used both MIG welding and squeeze-type resistance welding.
Now grind the exposed outer skin hem flange area with a 6-inch sander with an 80-grit disc, as shown below. This will remove any minor imperfections that occurred during the hemming process.
Sand off any loose primer caused by the hemming operation.
Step 9: Prepare the hem flange for seam sealing. Mask door frame for painting; this can be reduced to just inward of the seam sealer and not the entire door frame.
After masking for paint, overlap your paint mask with an additional strip of masking tape, an 1/8 inch outside of your paint mask. Apply epoxy primer to this area. Do not use acid-etch primer under the seam sealer.
After the epoxy has cured, you can apply the seam sealer and tool to match the existing seams on the vehicle. A custom-made seam sealer finishing tool is shown below.
Toyota has quite heavy seams on their doors. You can duplicate this appearance by notching a hard plastic squeegee with your bench grinder and tooling the squeegee over the seam sealer until you achieve the appropriate appearance as shown.
Remove the bordering masking tape, and you’ll find crisp, sharp seams, which match the factory seams. Now you’re masked and ready to paint the jambs.
This photo shows the final door skin ready for primer.
After painting and prior to assembly, apply corrosion protective coating around the hemmed areas.
Well, this completes the process of skinning a door without using plastic filler. By following this step-by-step process, you’ll produce a very high quality, long-lasting product – one that you can rightly take great pride in.